
In the digital age, speed, security, and scalability are paramount for any web application, including static websites. Whether you’re hosting a personal blog, a portfolio, or an enterprise-level site, hosting static content on Amazon Web Services (AWS) offers a powerful, cost-effective solution.
In this blog, we’ll walk through how to host a secure and scalable static website using Amazon S3 and CloudFront, leveraging AWS’s global network to deliver content faster and securely.
Why Use Amazon S3 and CloudFront for Hosting a Static Website?
Amazon S3:
- Scalable Storage: S3 is designed to store and serve static assets like HTML, CSS, JavaScript, images, videos, and more. S3 automatically scales to meet your website’s traffic needs without requiring manual intervention.
- High Durability: With 99.999999999% durability, your files are safe on S3.
- Easy to Use: Upload, manage, and access your files using an easy-to-navigate web interface or command-line tools.
CloudFront:
- Content Delivery Network (CDN): CloudFront caches your content at edge locations around the world, ensuring faster loading times for users regardless of their geographic location.
- Improved Performance: CloudFront reduces latency and speeds up the delivery of your static content.
- SSL Security: With CloudFront, you can secure your static website with HTTPS to ensure your users’ data is protected during transit.
Steps to Host a Secure and Scalable Static Website on S3 with CloudFront
Step 1: Create an S3 Bucket
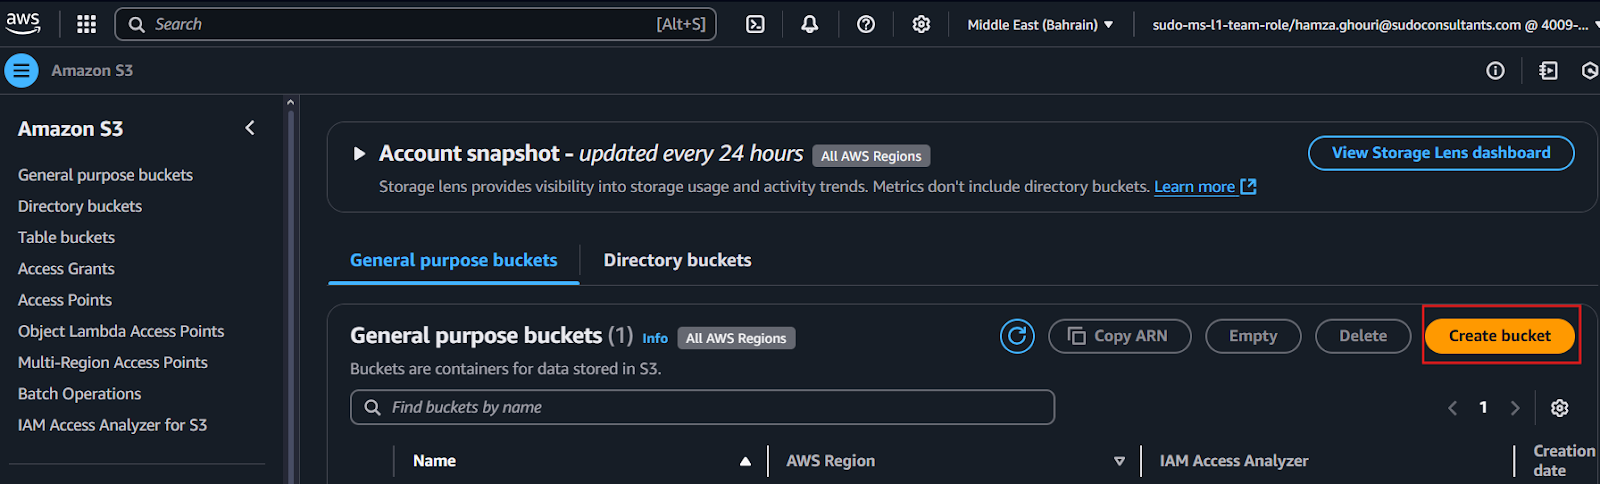
- Log in to the AWS Management Console and go to S3.
- Click Create bucket.
- Enter a unique name for your bucket. This name must be globally unique across all of AWS.
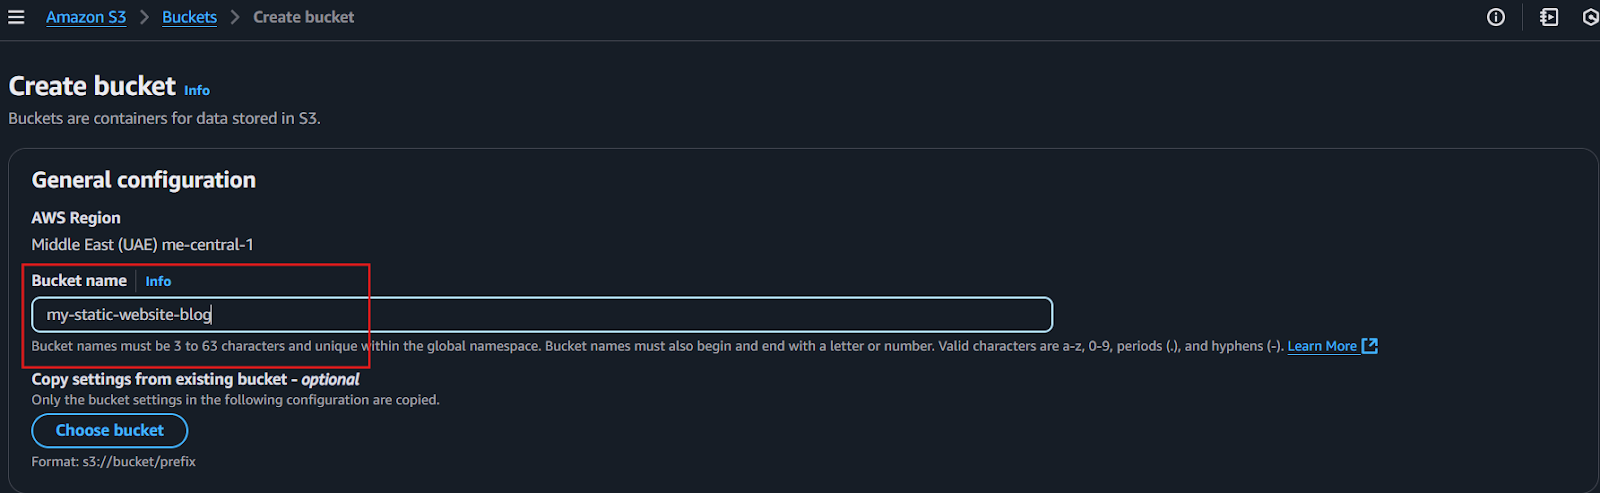
- Choose the region closest to your target audience for best performance.
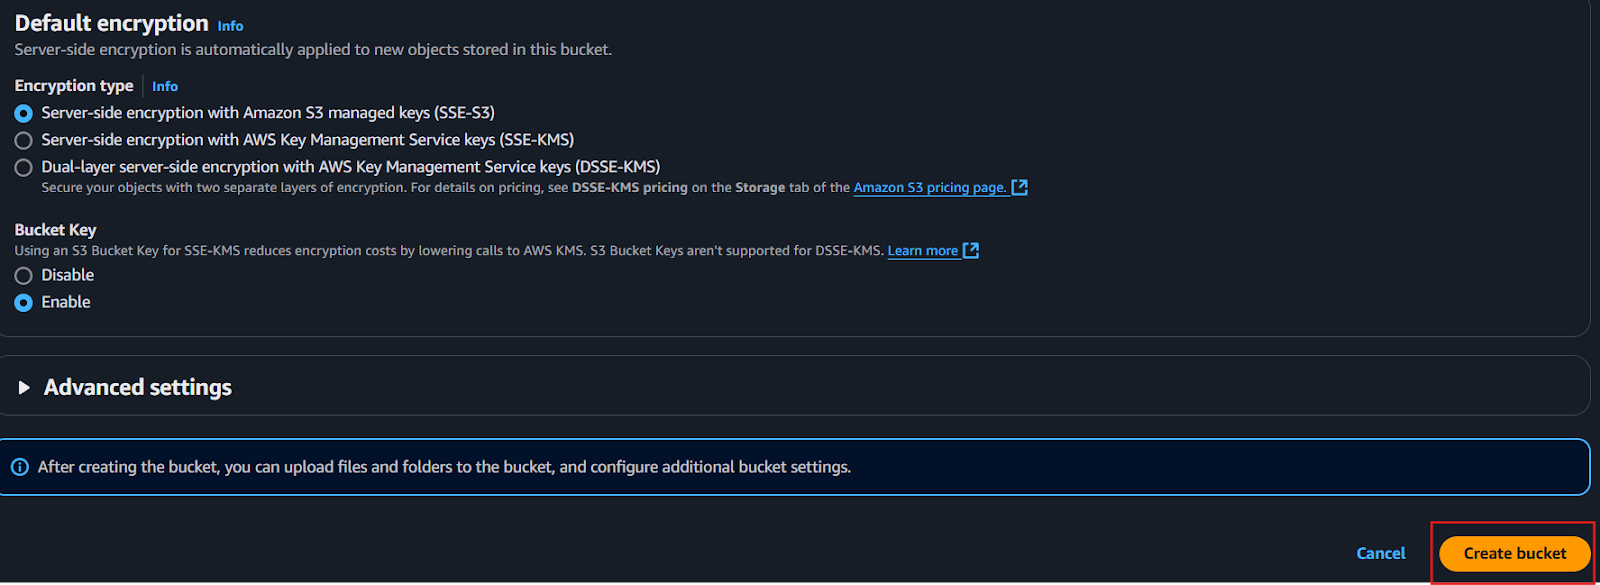
- Leave the other options as default and click Create bucket.
Step 2: Upload Your Website Files to S3
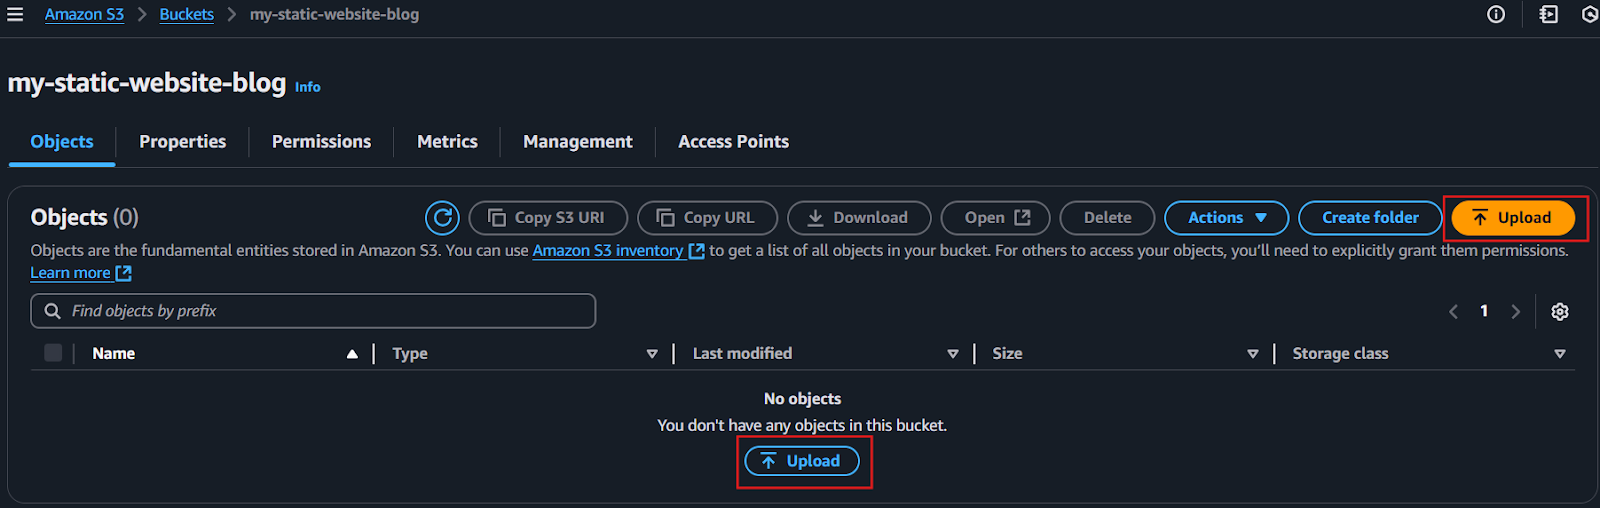
- After creating the bucket, click on it to open the Bucket Dashboard.
- Click Upload and select your static website files (HTML, CSS, JS, images, etc.).
- Ensure your main HTML file is named index.html and, if necessary, provide a custom 404 error page (404.html).
- Click Upload to start uploading your files to S3.
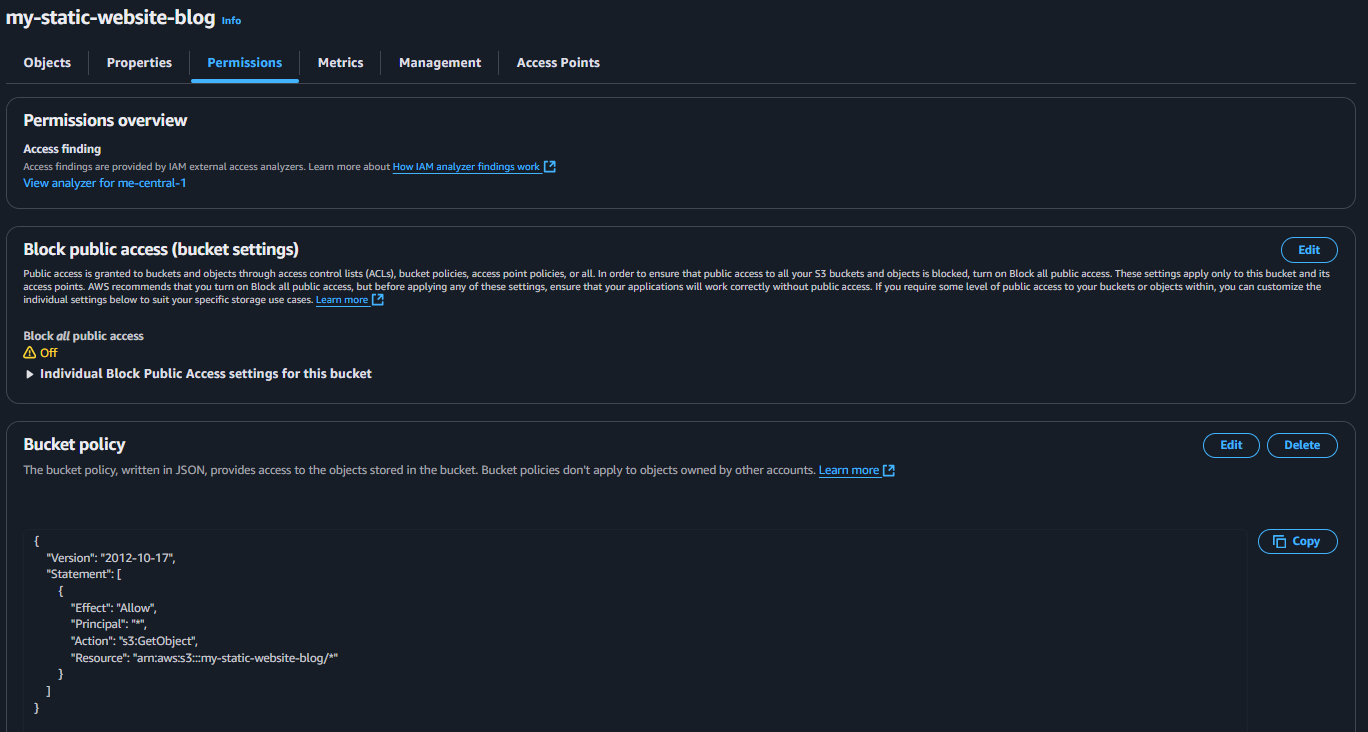
Step 3: Make Your S3 Bucket Public
To serve your website to the public, you need to configure the permissions on your S3 bucket.
- Open your S3 bucket and go to the Permissions tab.
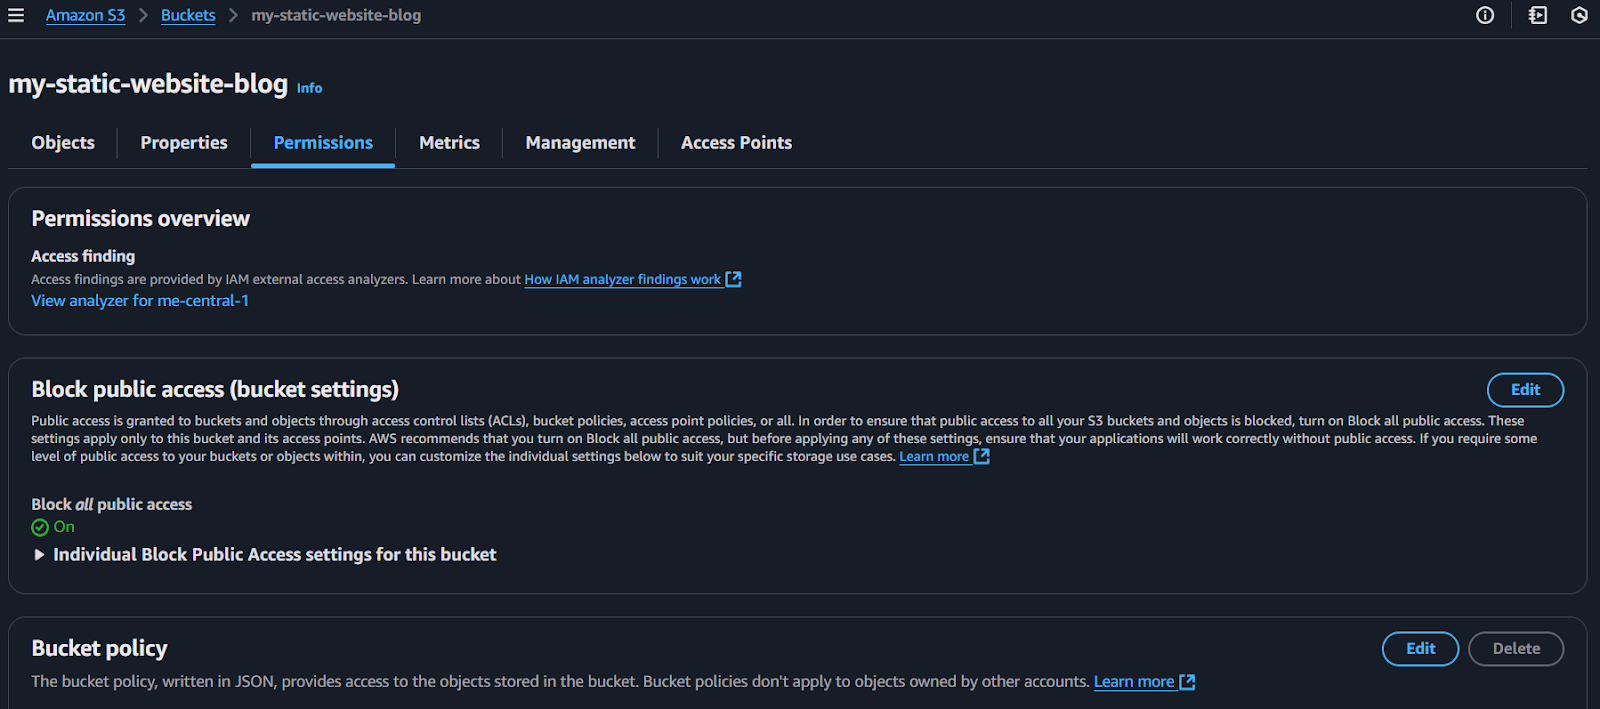
- Click Bucket Policy and add a policy that allows public access to the files. You can use this template:
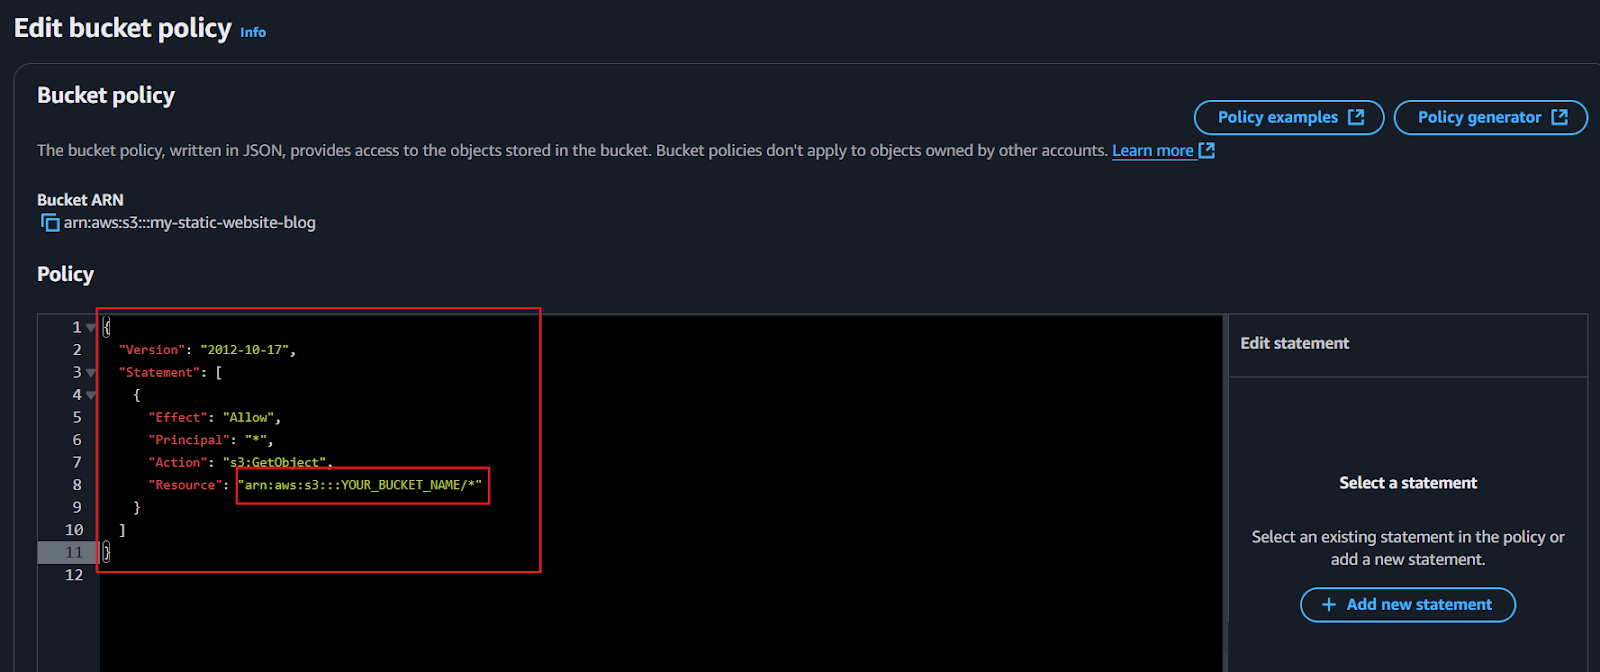
Replace YOUR_BUCKET_NAME with your actual bucket name.
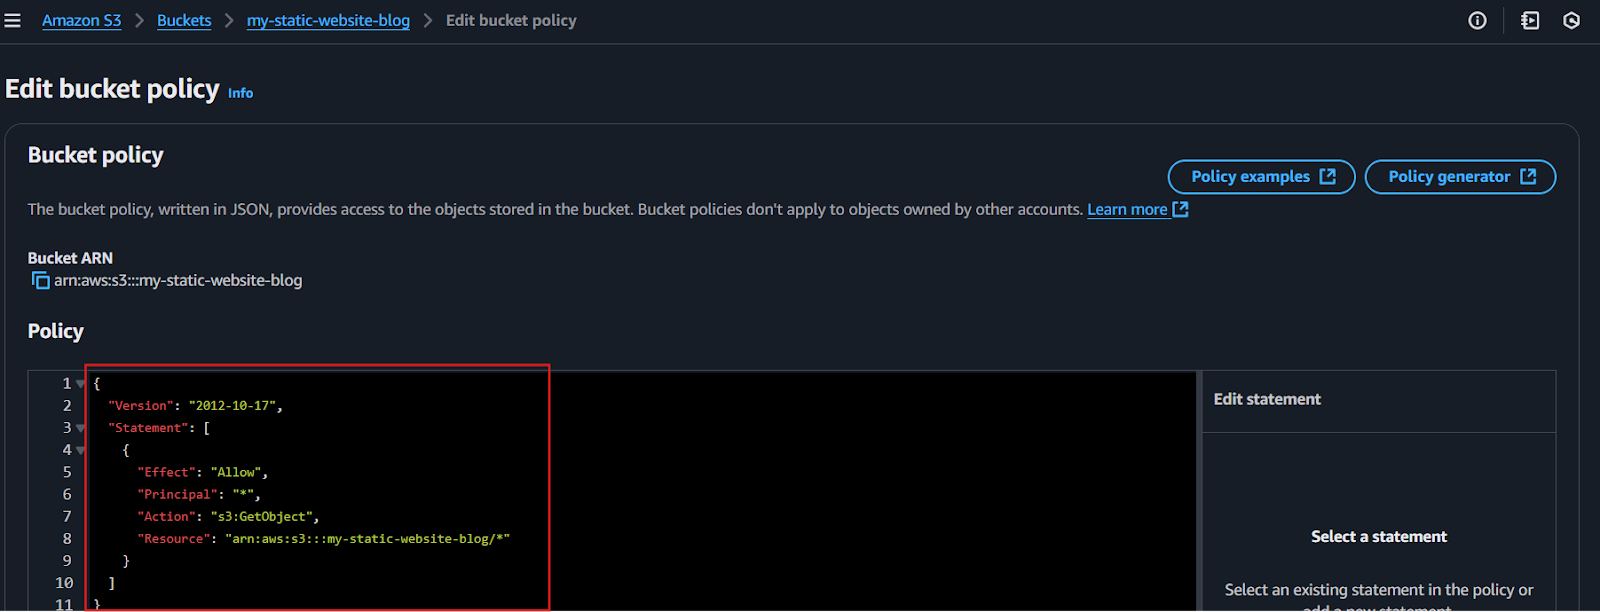
- Click Save to apply the policy.
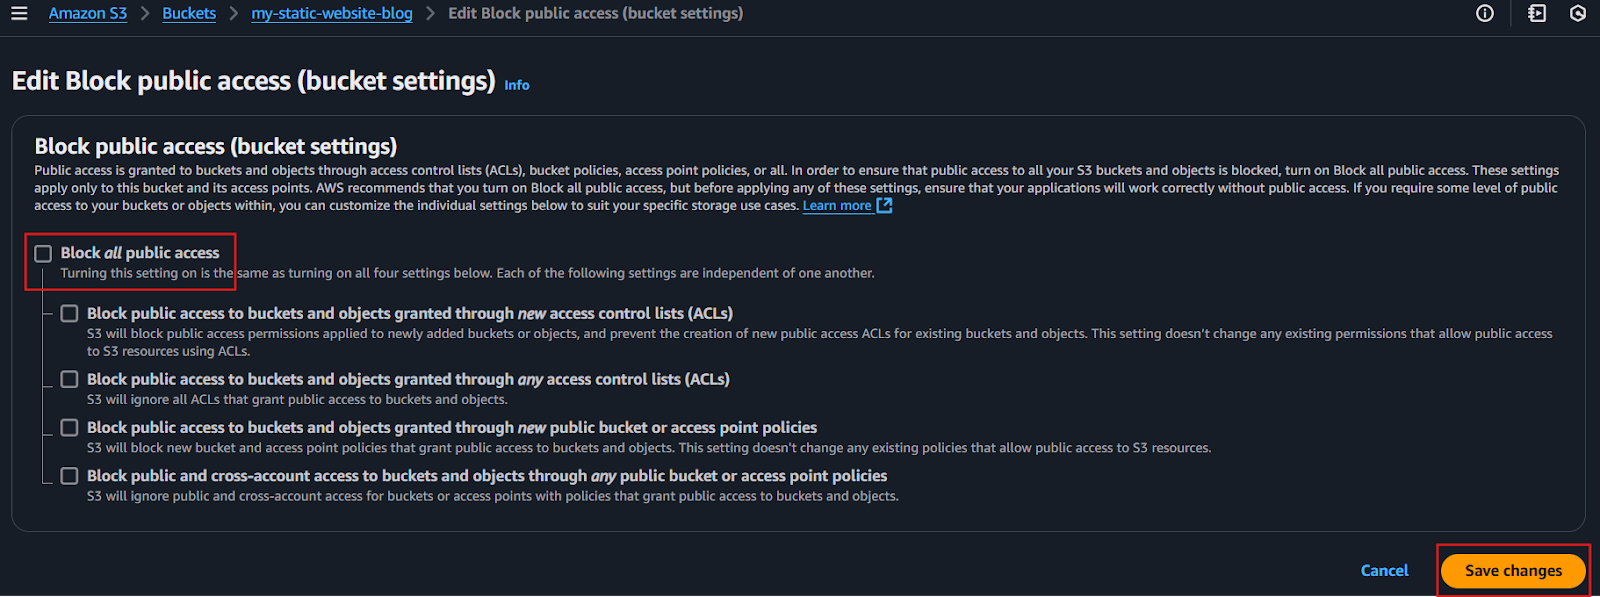
- On the Public Access Settings tab, click Edit and ensure that “Block all public access” is disabled. This allows your content to be publicly accessible.
- After setting up your s3 permissions should look like this.
Step 4: Enable Static Website Hosting in S3
- Go to the Properties tab of your S3 bucket.
- Under the Static website hosting section, click Enable.

- Set the Index document to index.html and the Error document to 404.html (if you have one).
- Click Save changes.

At this point, your website will be live at the S3 bucket endpoint, e.g., http://YOUR_BUCKET_NAME.s3-website-us-east-1.amazonaws.com.
Step 5: Set Up CloudFront for CDN
To deliver your static website with faster speeds and security, use CloudFront.
- Go to CloudFront in the AWS Console and click Create Distribution.

- Under Web, click Get Started.

- In the Origin Settings:
- Origin Domain Name: Select your S3 bucket from the dropdown list (e.g., YOUR_BUCKET_NAME.s3.amazonaws.com).

- Origin Path: Leave blank unless you want to serve content from a specific folder in your S3 bucket.
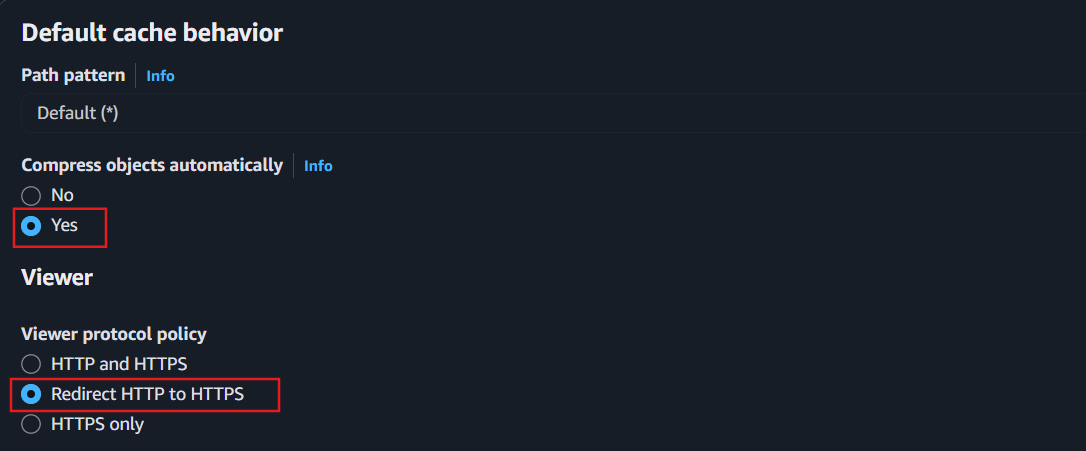
- Viewer Protocol Policy: Select Redirect HTTP to HTTPS to ensure your website is served securely.
- Configure Cache Settings:
- Keep the defaults for cache settings, unless you have a specific use case (e.g., caching rules for images or assets).
- Default Cache Behavior Settings:
- Set Viewer Protocol Policy to Redirect HTTP to HTTPS.
- Enable Compress Objects Automatically to reduce content size and improve load times.
- Under Distribution Settings, set your Alternate Domain Names (CNAMEs) if you want to use a custom domain (e.g., www.yourdomain.com). You will need to configure DNS for your custom domain later.
- Finally, click Create Distribution.
CloudFront will now begin propagating the content across its edge locations worldwide, which may take a few minutes.
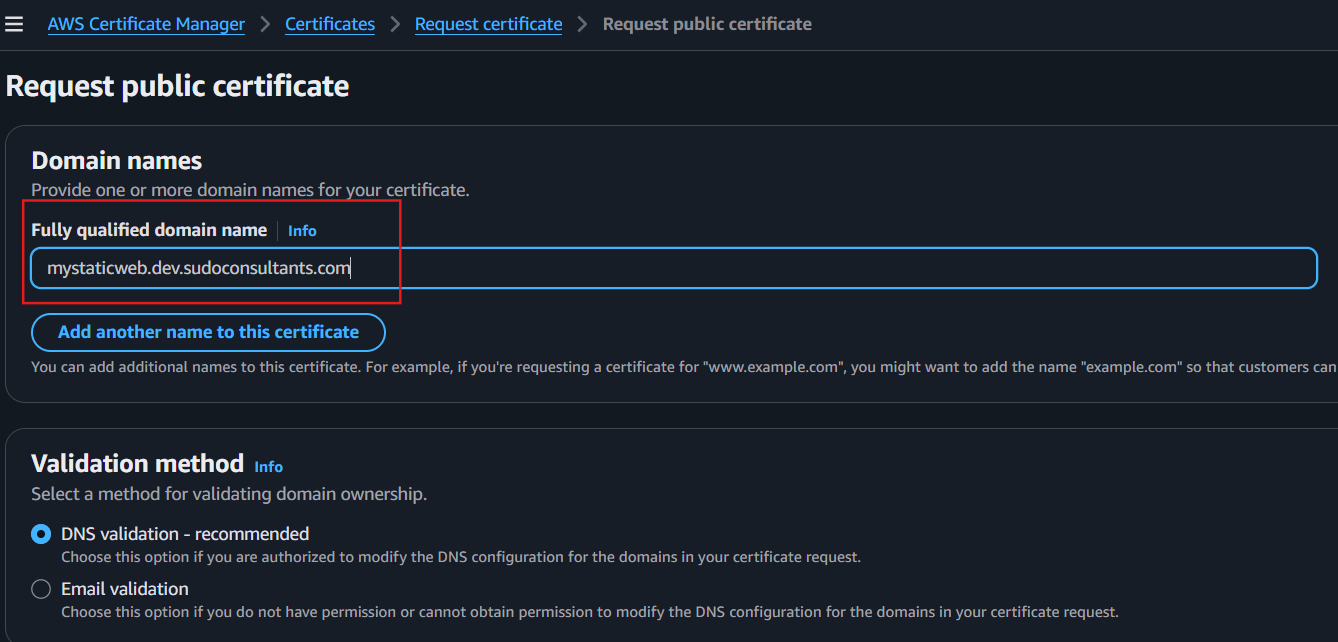
Step 6: Set Up SSL for HTTPS (Optional but Recommended)
To secure your website with HTTPS:
- Go to AWS Certificate Manager (ACM).
- Request a new SSL certificate for your domain (e.g., www.yourdomain.com).
- After a certificate is created, create records on route53 of your certificate. Use the CNAME name and CNAME value which you can find under Domain in ACM.
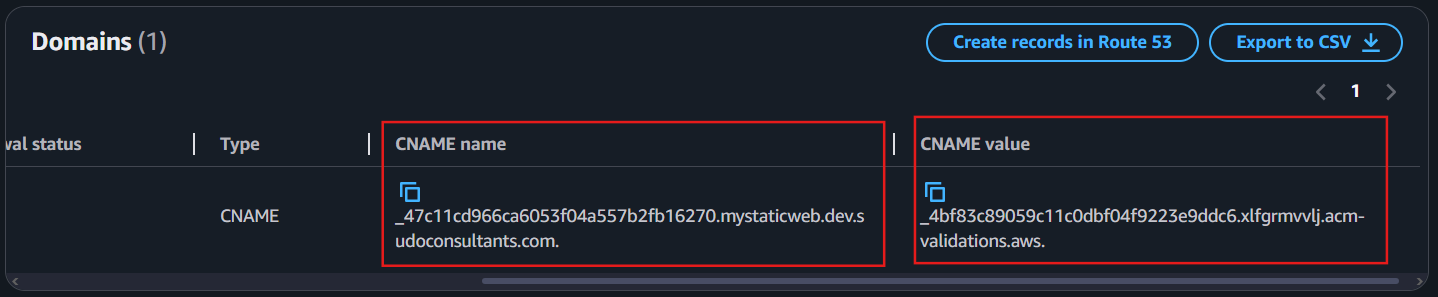
- Create route53 records Enter CNAME name in Record name and CNAME value in value, then click save.

- Once the certificate is issued, return to CloudFront and edit your distribution.

- Under SSL Certificate, select Custom SSL Certificate and choose the certificate you created.

- Save the changes, and CloudFront will now serve your site securely over HTTPS.
Step 7: Configure Your Domain (Optional)
If you want to use your own domain (e.g., www.yourdomain.com), follow these steps:
- Go to Route 53 (or your DNS provider) and create a CNAME record.
- Point the CNAME record to the CloudFront distribution domain name (e.g., d1f2e3g4h5i6j7.cloudfront.net).
- Wait for DNS propagation (this can take up to 24 hours).
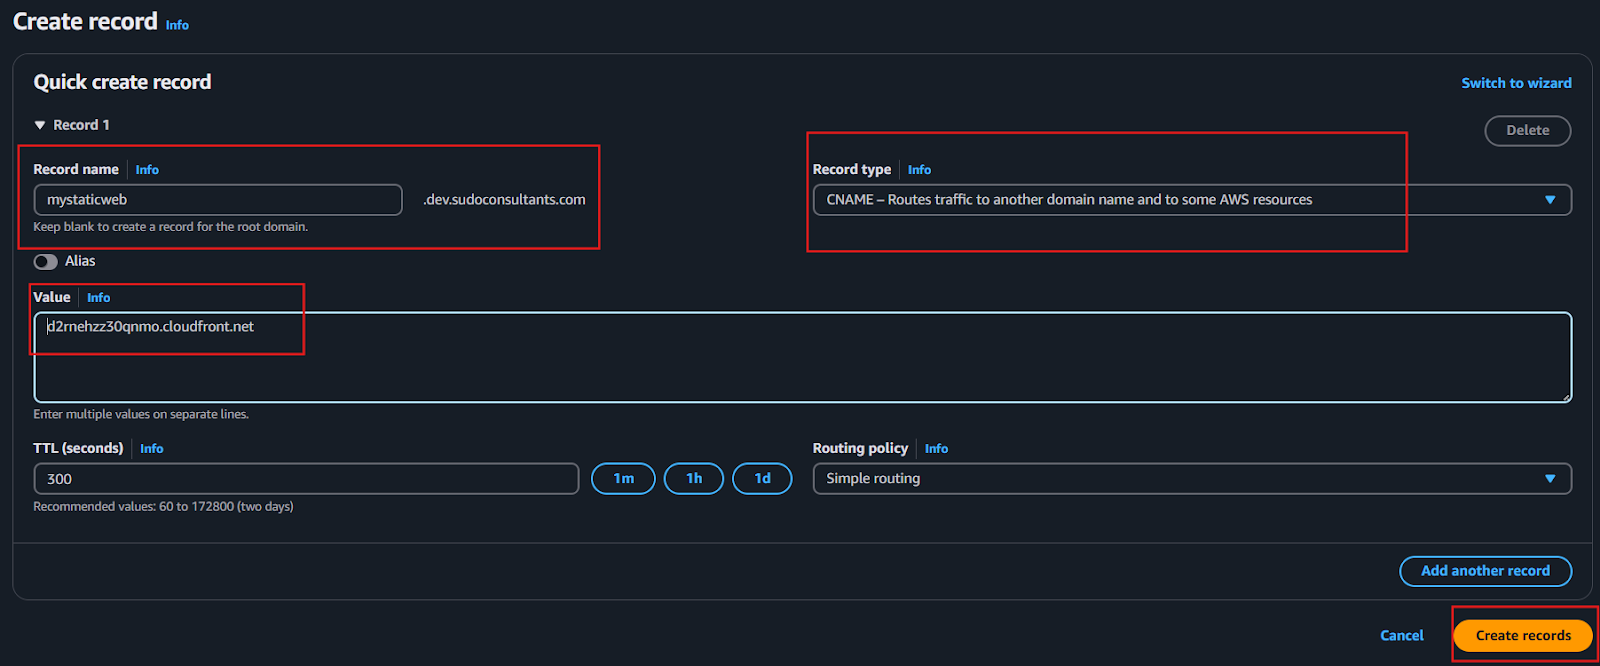
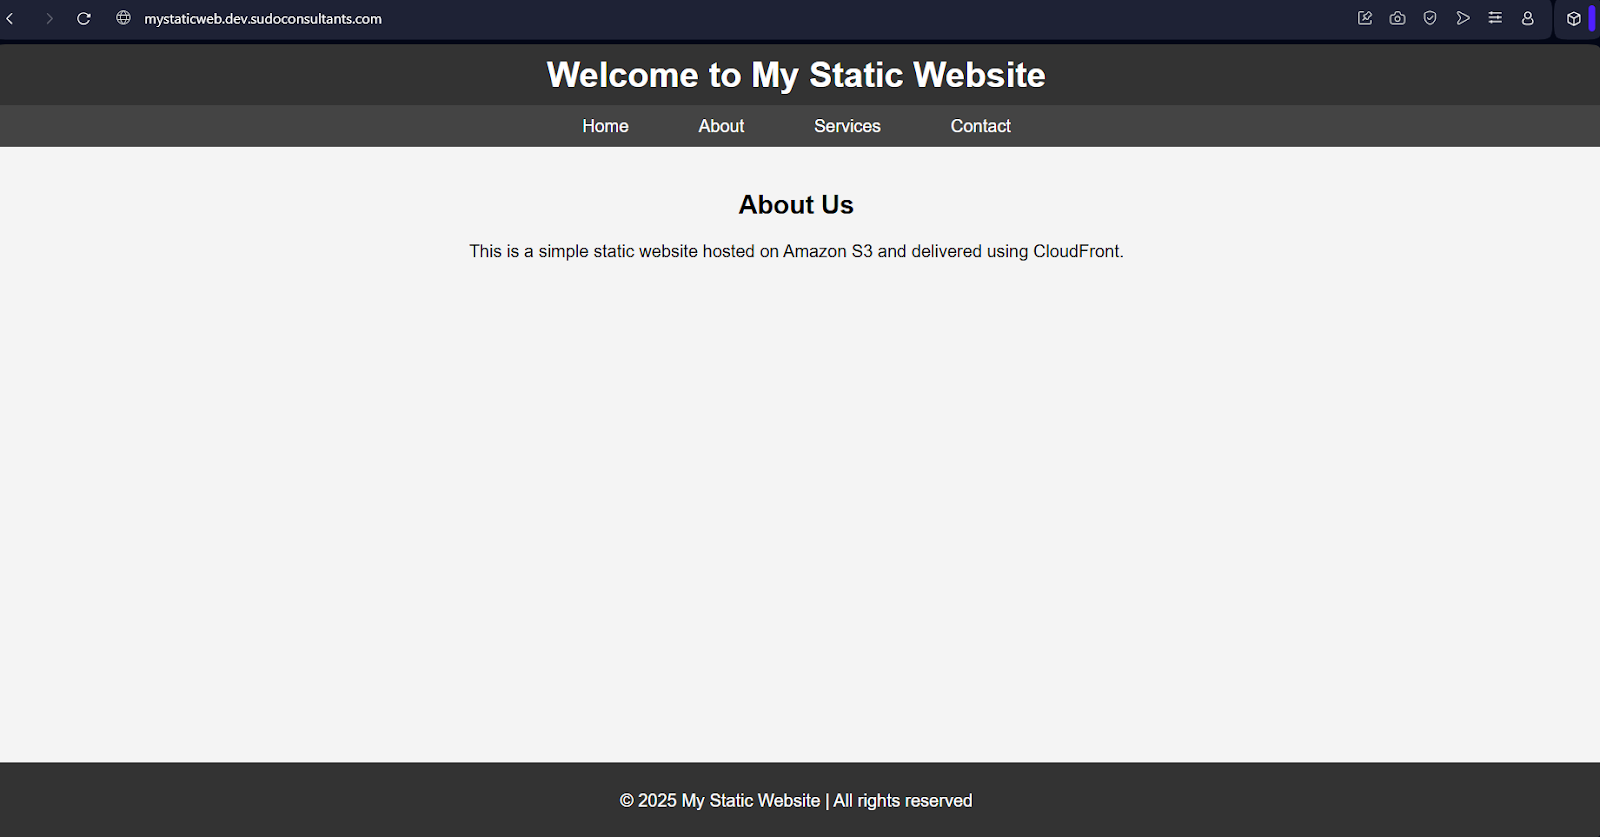
- Now browse your domain which is set in route53. Your website will be visible.
Conclusion
By combining Amazon S3 and CloudFront, you can host a scalable, secure, and fast static website with minimal effort. S3 provides scalable and durable storage for your assets, while CloudFront ensures fast delivery by caching content across AWS’s global edge locations. Additionally, CloudFront’s SSL support ensures your site is served securely via HTTPS.
Key Benefits:
- Scalability: No matter how much traffic your website gets, S3 and CloudFront scale automatically.
- Speed: CloudFront’s global CDN reduces latency by serving content from edge locations close to your users.
- Security: HTTPS ensures data protection during transit, and CloudFront’s support for custom SSL certificates secures your website.
- Cost-Effectiveness: Both S3 and CloudFront are low-cost services, with pricing based on usage and traffic.