
Introduction
Amazon SageMaker is a fully managed machine learning service that enables data scientists and developers to easily build, train, and deploy ML models. It provides a user-friendly interface for running machine learning workflows across different integrated development environments. SageMaker enables data storage and sharing without server management and provides managed ML algorithms for the efficient processing of large datasets. Additionally, SageMaker supports bringing your algorithms and frameworks and allows for easy deployment of models into a secure and scalable environment from the SageMaker console
AI Short Overview

AI has significantly impacted the market, with machine learning projects such as Deep Learning, Tabular Data Models, Time Series Forecasting, Reinforcement Learning, and NLP leading the way. In this guide, I will demonstrate how to set up the SageMaker environment, which enables data storage and sharing without the need to manage servers. SageMaker provides managed machine learning algorithms for efficient processing of large datasets, supports custom algorithms and frameworks, and allows for easy model deployment into a secure, scalable environment from the SageMaker console.
AWS SageMaker Pricing

Amazon SageMaker offers flexible pricing based on the instance type, usage duration, and features used. You only pay for the time your instances run for notebooks, training, or hosting models. Costs vary depending on computing power, storage, and additional services such as SageMaker Studio or Autopilot. AWS also provides a free tier for limited use, allowing you to start experimenting with SageMaker at no cost.
AWS ML Model Pipeline
We will provide guidance on Amazon SageMaker in this blog, and you can also explore the AWS machine-learning model pipeline from the table below.
| Stage | AWS Service | Description |
| 1. Data Collection | S3, Glue | Store and manage raw data. |
| 2. Data Preparation | Glue, SageMaker | Clean, transform, and prepare data. |
| 3. Model Training | SageMaker Training | Train the machine learning model. |
| 4. Model Validation | SageMaker Processing | Evaluate model performance. |
| 5. Model Tuning | Hyperparameter Tuning | Fine-tune the model for better accuracy. |
| 6. Deployment | SageMaker Endpoint | Deploy for real-time or batch inference. |
| 7. Inference | SageMaker Endpoint | Run predictions using the deployed model. |
| 8. Monitoring | Model Monitor, CloudWatch | Track model performance and detect data drift. |
| 9. Automation | Step Functions, Lambda | Automate the entire ML pipeline. |
SageMaker Notebook Instance vs SageMaker Studio
- Purpose
Notebook Instance: A basic managed Jupyter notebook on EC2 for individual tasks.
SageMaker Studio: A full-featured IDE for end-to-end machine learning projects. - Management
Notebook Instance: Manual instance management (start/stop).
SageMaker Studio: Serverless, automatically scales resources as needed. - Features
Notebook Instance: Simple environment for training and development.
SageMaker Studio: Advanced tools for tracking experiments, debugging, and collaboration. - UI & Collaboration
Notebook Instance: Standard Jupyter interface.
SageMaker Studio: Rich interface with built-in collaboration and model monitoring tools. - Pricing
Notebook Instance: Pay for the EC2 instance size and duration used.
SageMaker Studio: Pay per user for the resources consumed (compute, storage) within Studio. - Use Case
Notebook Instance: Ideal for small projects or individual work.
SageMaker Studio: Perfect for teams needing a scalable, collaborative environment with integrated tools.
Here are the steps you must follow to set up the Notebook instance successfully
Step 1
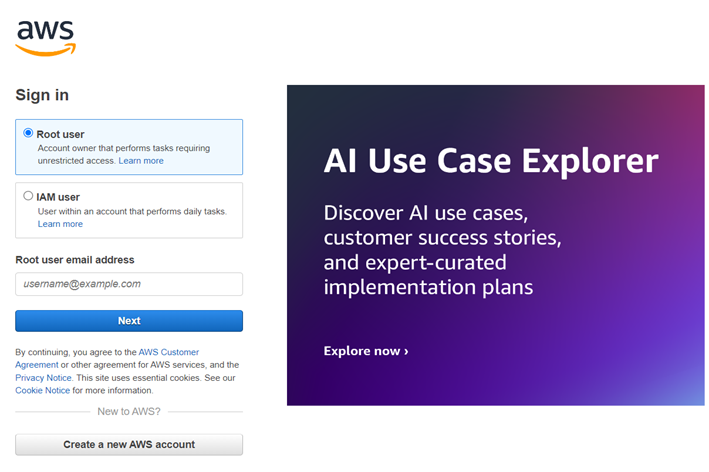
- Go to the AWS Management Console.
Step 2
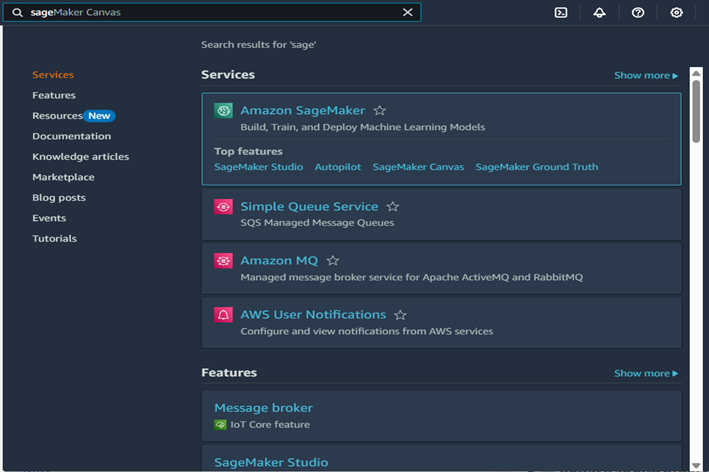
- Go to the search bar, type “SageMaker,” and then click on the SageMaker option.
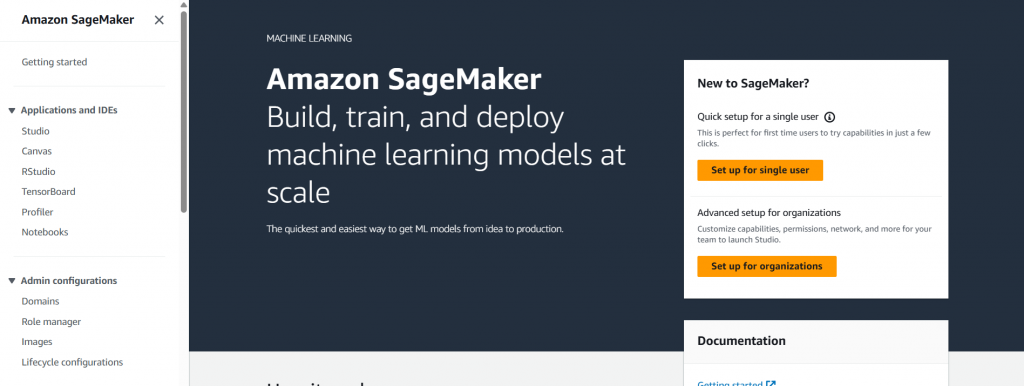
- After clicking on the SageMaker the below page will appear.
Step 3
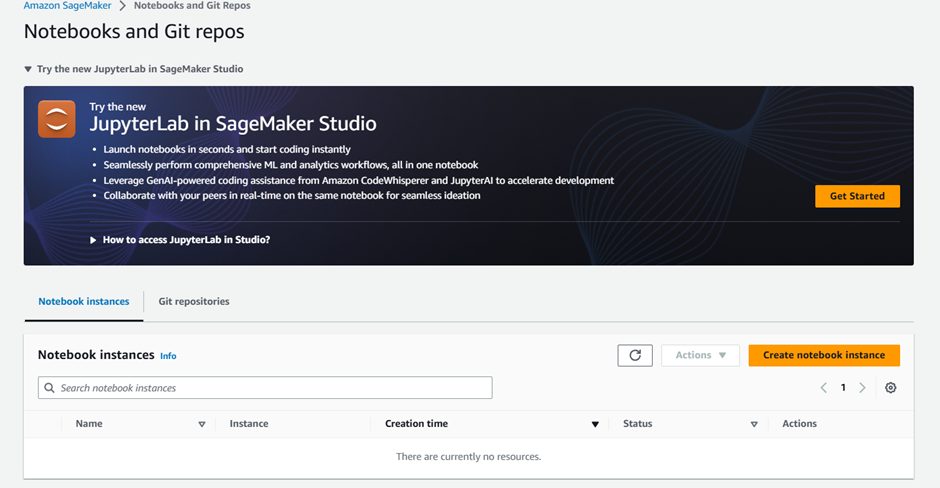
- Then click on the Notebooks that is present on the left sidebar.
Step 4
- Then click on the Create Notebook Instance.
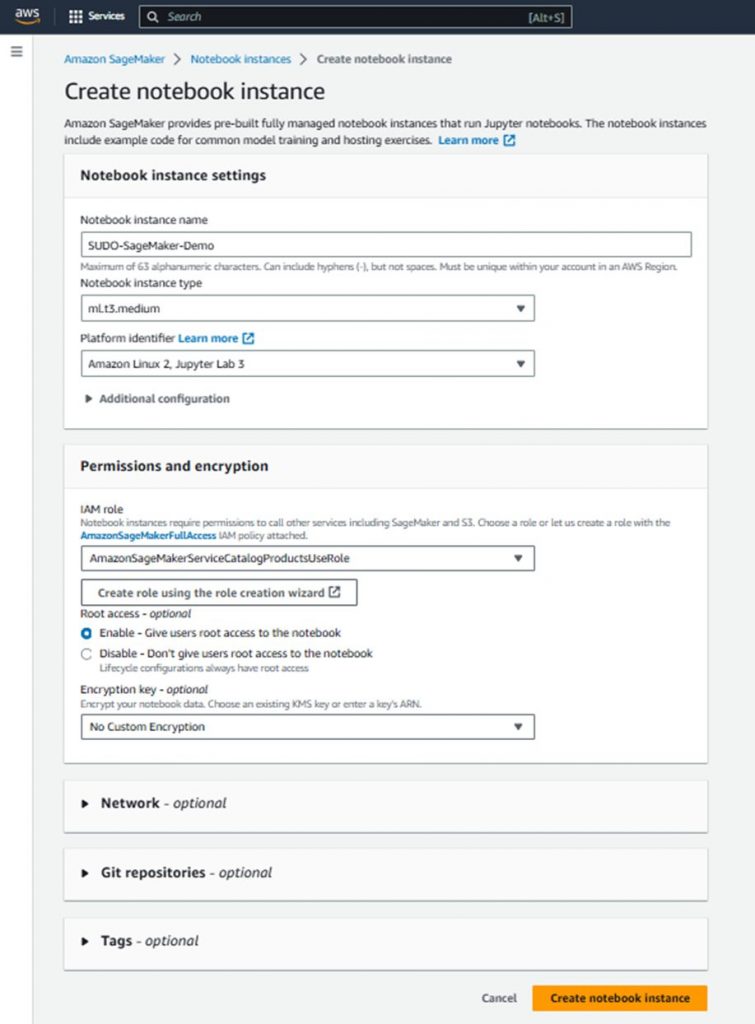
- Then we have to provide the configuration according to our use case, as shown in the above image.
- After reviewing your configuration click on the Create Notebook instance.
- Then wait for 3 to 5 minutes until the instance is created.

- Once the instance is fully created the status is changed to InService.
- You can access the notebook instance using either Jupyter Notebooks or Jupyter Lab.
- In this blog, we will access the Jupyter Notebook.
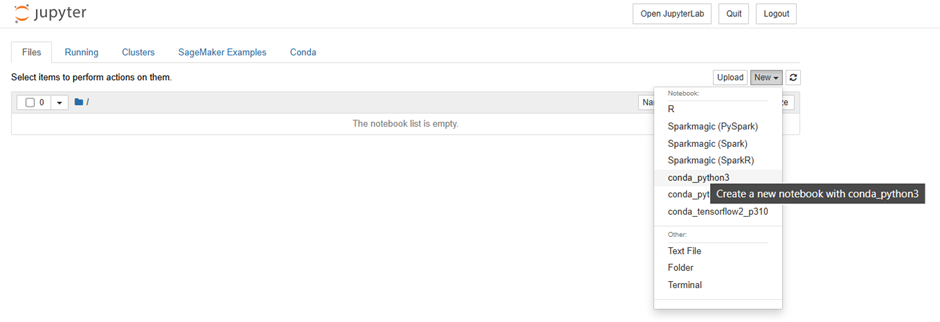
- Click on the Open Jupyter, then you will see the same page as below.

Step 5
- Then to create the new file on the instance you must choose the desired environment. We go with the conda_python3.
- Click on the New option then click on the conda_python3 from the list.
Step 6
- Then you can change the name by clicking on the Untitled.
- Then click on the Rename.

Step 7
1. We can utilize Jupyter Notebook.
2. Jupyter Notebook is an interactive tool that is ideal for coding, data visualization, and machine learning. It provides a platform to write and execute code, visualize data, and perform data analysis.
2.1 Compose code using Python, R, and other programming languages.
2.2 Utilize visual representations such as charts and graphs to effectively present and analyse data.
2.3 Document workflows with text, images, and code.
2.4 Ensure the seamless execution of machine learning models.
2.5 Share your work easily for collaboration.
3. The Jupyter Notebook is well-suited for conducting data analysis, and research, and generating easily understandable and shareable insights.
Conclusion
Amazon SageMaker provides a seamless environment for building, training, and deploying machine learning models. It offers flexible pricing options and a rich suite of tools, catering to various project needs. With integrated AWS services and automation features, SageMaker enhances productivity and scales effortlessly. Start exploring SageMaker today to build powerful AI solutions!


