
SSL, or Secure Sockets Layer, is a protocol that provides communication security over the internet. SSL uses encryption to protect data transmitted between devices, making it ideal for protecting sensitive information like credit card numbers and login credentials.
Two-way SSL, also known as mutual SSL, adds an extra layer of security by requiring both the client and server to authenticate each other’s identity before any data is exchanged. In this article, we’ll show you how to set up two-way SSL on an NGINX server.
In this tutorial, we will cover:
- Configure Nginx to start
- Generate Certificate Authority (CA) files
- Generating Client/User Certificates
- Generating Server Certificates
How Two-Way SSL Works
Two-way SSL uses digital certificates to authenticate both the client and server. The server presents its certificate to the client, and the client verifies that the certificate is valid and trusted. The client then presents its own certificate to the server, and the server verifies that the certificate is valid and trusted. Once both sides have been authenticated, a secure connection is established and data can be exchanged.
REQUIRED
- Nginx
- sudo privileges on your system
On your Linux system, use the apt command to install nginx.
sudo apt update
sudo apt install nginx
This will install Nginx on the /opt/nginx path. This directory contains all of the configuration files for two-way SSL that we will be editing.
Configure Nginx to start
Before we can use Nginx, we must enable some firewall ports so that Nginx can listen for incoming connections.
sudo ufw app list
Output:
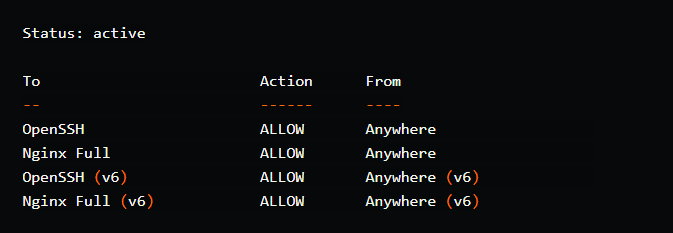
Available applications: Nginx Full Nginx HTTP Nginx HTTPS OpenSSH
The utility responds with four profiles, as shown in the output above. When we installed Nginx, it registered three profiles with the ufw utility.
Nginx HTTP | Enables Nginx to listen on port 80 for standard HTTP traffic.
Nginx HTTPS | Allows Nginx to listen for HTTPS traffic on port 443.
Nginx Full | A combination of the two, enabling both ports 80 and 443.
We’ll enable Nginx Full because we need to use our server for SSL, but using regular HTTP connections is also not uncommon. To enable it, execute:
sudo ufw allow 'Nginx Full'
If you run the following command, you should see the activated profile.
sudo ufw status
Output:
The Nginx service should be up and running right now. You can test it by running:
systemctl status nginx
Create a directory called certs under the root of the file-system which will hold all the certificates and related files.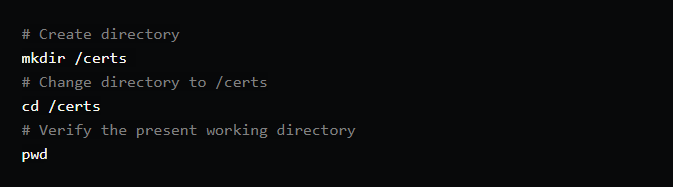
Output:
/certs
Generate Certificate Authority (CA) files
We would first generate a CA key, which would serve as the foundation for all subsequent certificate generation.
openssl genrsa -des3 -out ca.key 4096
Output:
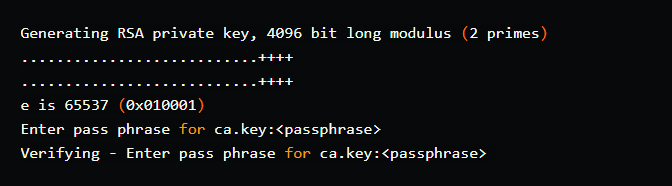
Command options:
genrsa: create an RSA private key
-des3: uses des3 encryption to encrypt the output key.
-out: specifying the output key file
4096: size of the private key in bits.
This creates a file in the current directory called ca.key. For the key, you would need to provide a password/passphrase. For the purposes of this tutorial, I’ll use the same passphrase as before.
<passphrase> = root
The next step is to generate ca.crt.
openssl req -new -x509 -days 3650 -key ca.key -out ca.crt
Output:
Enter pass phrase for ca.key:<passphrase>
Command options:
req: used to generate certificate requests.
-new: makes a new certificate request.
-x509: outputs a new self-signed certificate instead of a certificate request.
-days 3650: validity of certificate (in this case, 10 years/3650 days)
-key: The RSA key that will be used to generate the certificate.
-out: output file for the certificate.
Once you enter the passphrase (entered in the previous step), it will prompt you to provide additional information for the self-signed certificate.
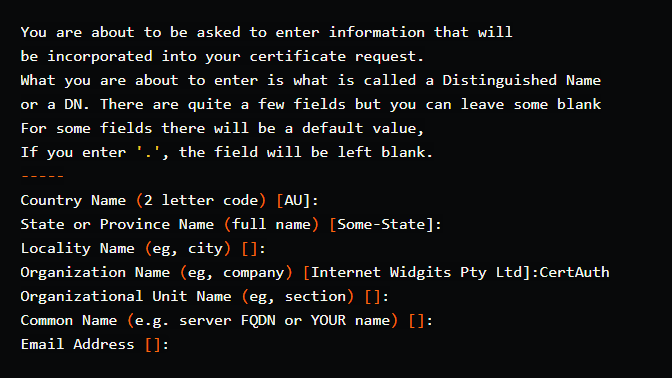
In this example, the Organization Name parameter is called CertAuth. This is due to the fact that we are a CA, and CAs should ideally be independent in order for other parties to trust other parties and establish a chain of trust.
A PEM file certificate is also required. This file is used to encode certificates. Simply do the following to generate a PEM file:
cat ca.key > ca.pem
cat ca.crt >> ca.pem
Generating Client/User Certificates
We now have three files in the certs directory.
- ca.key
- ca.crt
- ca.pem
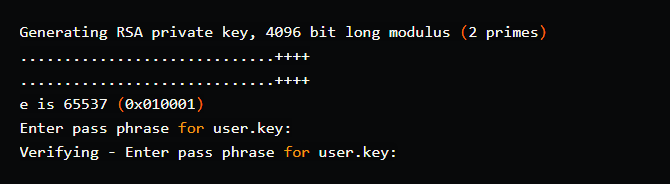
We would now create client/user certificates. The command for generating the user.key is similar to the one for generating the ca.key.
openssl genrsa -des3 -out user.key 4096
Output:
The client/user certificate isn’t supposed to be self-signed, so we’d have to generate a CSR. It means that the signing will be performed by a CA (even though we own the CA in this case!). This can be accomplished in the following manner:
openssl req -new -key user.key -out user.csr
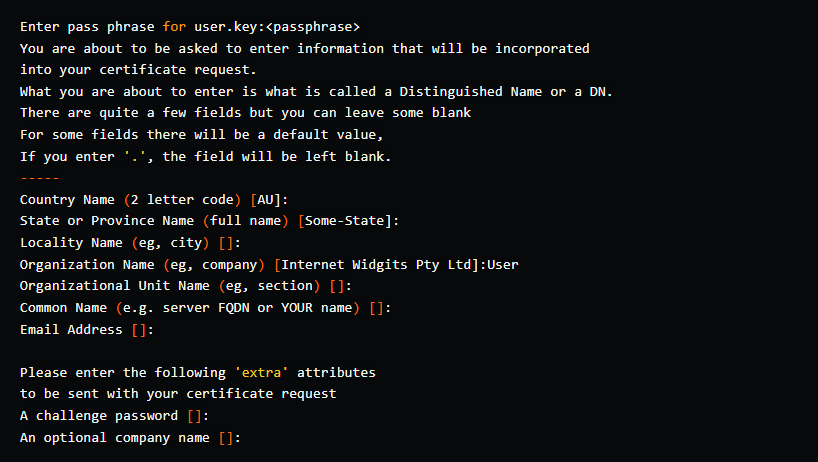
Because this certificate is for a Client/User, the Organization Name would be User. Do not use the same one as for CA.
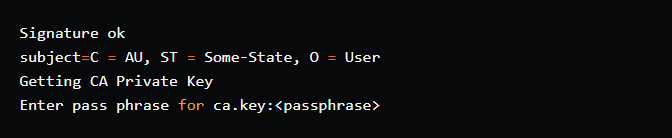
The User CSR would then be used to generate a User Certificate:
openssl x509 -req -days 365 -in user.csr -CA ca.crt -CAkey ca.key -set_serial 01 -out user.crt
Output:
Command options:
x509: public key certificate standard format
-CA: the CA certificate
-CAkey: the key used to generate the certificate.
-set_serial 01: the serial version of the generated certificate. The user certificate can be regenerated by incrementing the serial number from the same user.csr. It will expire after 365 days.
As you can see, it displays data from the CSR before using the CA key to generate user.crt.
To be able to use the certificate from a web browser, we must first create it in the PFX file format:
openssl pkcs12 -export -out user.pfx -inkey user.key -in user.crt -certfile ca.crt
Output:

The following command can be used to see if the generated certificate can be decrypted using the CA certificate:
openssl verify -verbose -CAfile ca.crt user.crt
We currently have the following files in the directory:
- ca.key
- ca.crt
- ca.pem
- user.key
- user.csr
- user.crt
- user.pfx
Generating Server Certificates
This is comparable to generating User certificates with the commands listed below.
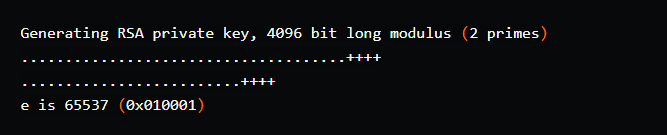
Generate the Server key. The common naming practice for server certificates appears to be <website-domain-name>.<key>
openssl genrsa -out nginx.mssl.com.key 4096
Output:
To generate a CSR, use the key generated above.
openssl req -new -key nginx.mssl.com.key -out nginx.mssl.com.csr
Output:
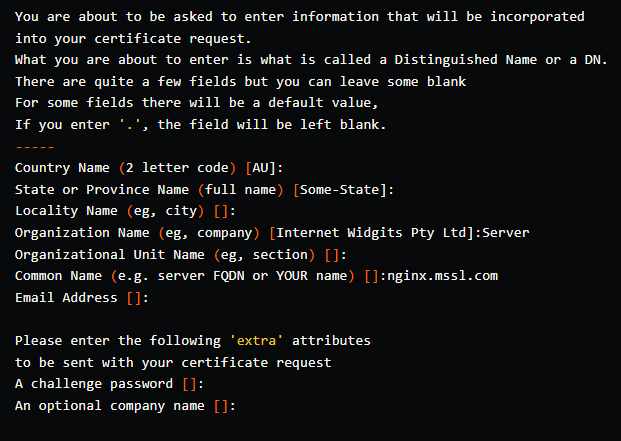
Make sure the Organization Name is Server and the Common Name (the website name) is nginx.mssl.com.
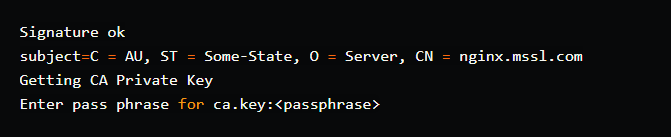
We can now generate the CRT for our server using the CSR and the CA files.
openssl x509 -req -days 365 -sha256 -in nginx.mssl.com.csr -CA ca.crt -CAkey ca.key -set_serial 1 -out nginx.mssl.com.crt
Output:
All of the certificates are now available for use.
- ca.key
- ca.crt
- ca.pem
- user.key
- user.csr
- user.crt
- user.pfx
- nginx.mssl.com.key
- nginx.mssl.com.csr
- nginx.mssl.com.crt