Introduction:
Start by introducing what GitLab and AWS CodeCommit are, and why someone might want to migrate from AWS CodeCommit to GitLab. Highlight the advantages of GitLab, such as its integrated CI/CD capabilities and community support.
Installing GitLab using Docker:
Update the Package Index
First, update the package index on your system:
Command: sudo apt update. Install Docker
Install Docker on your system:
Command: sudo apt install docker.io Verify Docker Installation
Check the Docker version to verify the installation:
Command: docker --version Manage Docker as a Non-root User
By default, Docker requires root privileges. To avoid using sudo with every Docker command, add your user to the Docker group:
Command: sudo usermod -aG docker $USER Reboot your system to apply the changes:
Command: sudo reboot Verify Docker Group Changes
After the reboot, check if Docker is accessible without sudo:
Command: docker ps 
Output:

Run GitLab Container :
Run the GitLab container with the following command:
Command: docker run --detach
  --publish 1443:443 --publish 8080:80 --publish 1001:22
  --name gitlab
  --restart always
  --volume gitlab_config:/etc/gitlab
  --volume gitlab_logs:/var/log/gitlab
  --volume gitlab_data:/var/opt/gitlab
  --shm-size 2gb
  gitlab/gitlab-ce:latest
Retrieve Initial Root Password
To retrieve the initial root password for GitLab, use the following command:
Command: docker exec -it gitlab grep 'Password:' /etc/gitlab/initial_root_password 
Access GitLab Container
To access the GitLab container’s bash shell, use:
Command: docker exec -it gitlab /bin/bash 
Performing Initial Configuration on the Web Interface:
With GitLab running, you can perform an initial configuration of the application through the web interface.
Logging In for the First Time
Visit the domain name of your GitLab server in your web browser:
plaintext:
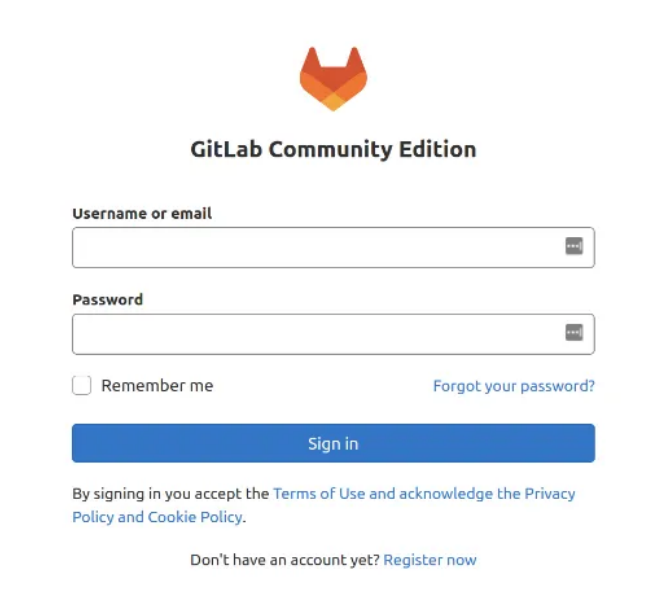
https://your_domainOn your first visit, you’ll be greeted with a login page:
Enter the username root.
Use the initial password retrieved from the Docker container.
Adding a New User
After Log in to GitLab with the root account.
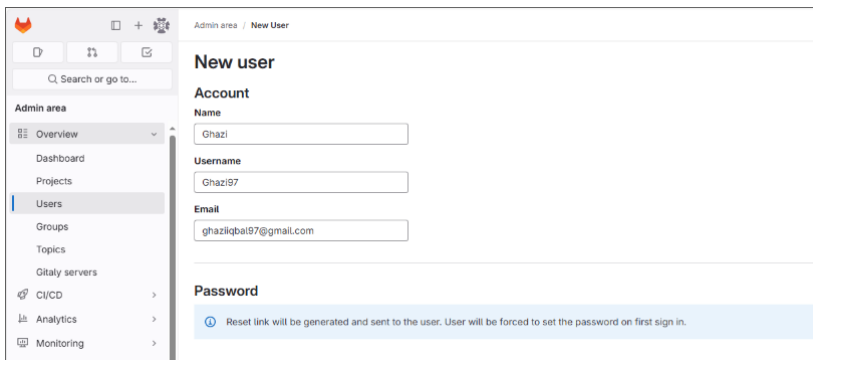
Navigate to the Admin Area by clicking on the wrench icon in the top-right corner.
click on Users:

Enter the name, username and email.
Create a blank project
To create a blank project:
-
- On the left sidebar, at the top, select Create new (+) and New project/repository.

-
- Select Create blank project.

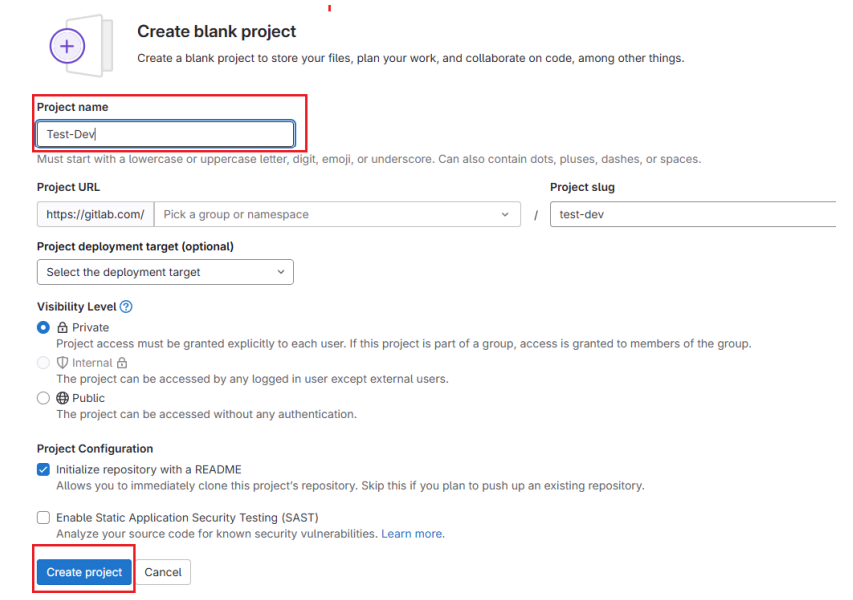
3.Enter the project details:
-
- In the Project name field, enter the name of your project. See the limitations on project names.
-
- In the Project deployment target (optional) field, select your project’s deployment target. This information helps GitLab better understand its users and their deployment requirements.
-
- To modify the project’s viewing and access rights for users, change the Visibility Level.
-
- To create README file so that the Git repository is initialized, has a default branch, and can be cloned, select Initialize repository with a README.
-
- To analyze the source code in the project for known security vulnerabilities, select Enable Static Application Security Testing (SAST).
4.Select Create project.
Preparing for Migration:
Ensure you have access to all repositories in AWS CodeCommit.
Install Git on your local machine if not already installed.
Cloning Repositories from AWS CodeCommit:
Migrating your AWS CodeCommit repository to a GitLab repository
Using the CodeCommit clone URL in combination with the HTTPS Git repository credentials, follow the guidance in GitLab’s documentation for importing source code from a repository by URL.
Clone the AWS CodeCommit Repository :
Start by cloning your AWS CodeCommit repository to your local machine using Git. For HTTPS access, execute the following command:
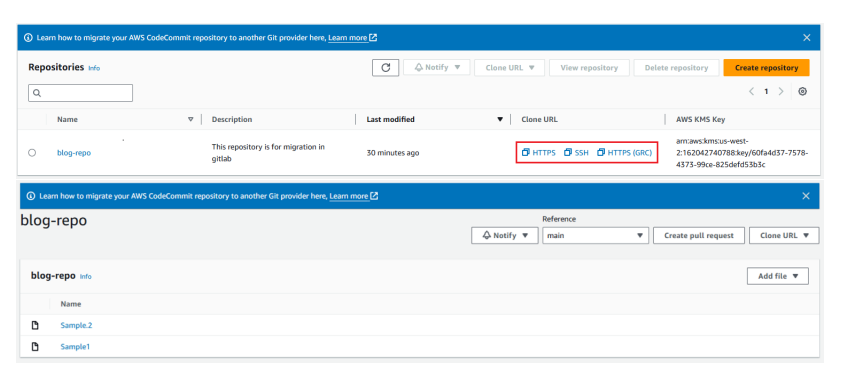
Command: git clone --mirror https://your-aws-repository-url your-aws-repository 
Replace your-aws-repository-url with the URL of your AWS CodeCommit repository and your-aws-repository with a suitable name for this repository. For example:
Command: git clone --mirror https://git-codecommit.us-east-2.amazonaws.com/v1/repos/MyDemoRepo Configure the New Remote Repository
Navigate to the directory of your cloned AWS CodeCommit repository. Add the URL of the new repository provider as a remote:
Command: git remote add <provider-name> <provider-repository-url> 
Replace <provider-name> with the name of your new provider (e.g., gitlab) and <provider-repository-url> with the URL of the new repository.
Push the Repository to the New Remote
Push all branches and tags to the new repository. Ensure that the <provider-name> matches the name you used in the previous step:
Command: git push <provider-name> --mirror 
Verify the Migration
After the push is complete, confirm that all files, branches, and tags have been successfully migrated to the new repository. Check this by browsing the repository online or by cloning it to a different location and verifying the contents locally.
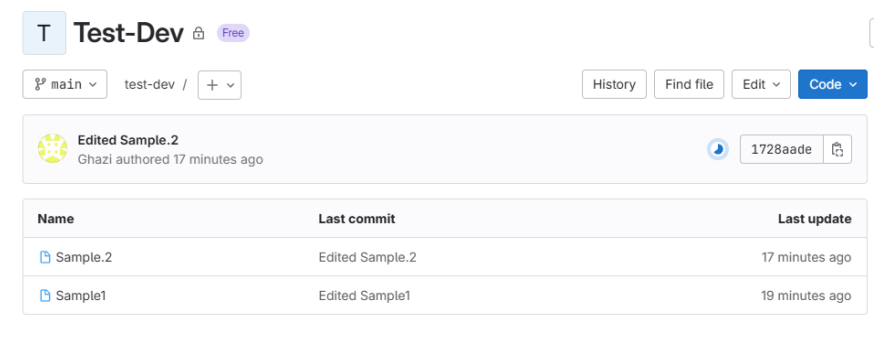

Update Remote URLs
To continue working with the migrated repository locally, update the remote URL to point to the new provider’s repository instead of AWS CodeCommit:
Command: git remote set-url origin <provider-repository-url> 
Replace <provider-repository-url> with the URL of your new repository provider.
Update CI/CD Pipelines and Reapply Branch Protections:
If you have CI/CD pipelines configured (e.g., GitLab, GitHub, AWS CodePipeline), update their configurations to reflect the new repository URL. If you had disabled branch protections in Step 3, consider reapplying these protections to your main branch as needed.
Conclusion:
Summarize the steps taken to migrate from AWS CodeCommit to GitLab. Highlight the benefits of GitLab and encourage readers to try it out. Invite readers to share their experiences and any challenges they faced during the migration process.


