What is MongoDB?
MongoDB is a NoSQL, document-oriented database that stores data in JSON-like BSON format. It is designed for scalability, flexibility, and high performance, making it ideal for modern applications.
How MongoDB Helps:
- Flexible Schema: No need for predefined tables — you can store data in any structure.
- High Scalability: Supports horizontal scaling with sharding.
- Fast Performance: Optimized for high read/write throughput.
Step 1: Launch an EC2 instance
Log in to AWS Console → Go to EC2 service.
Launch Instance → Click Launch Instances.

Configure Basics:
- Name: Give a meaningful name to your instance.

- AMI: Choose Ubuntu (Latest LTS).
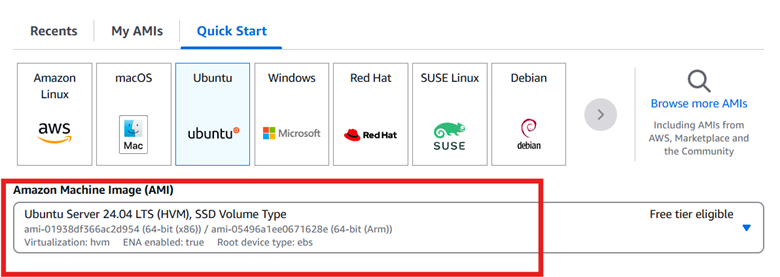
- Instance Type: Select as per your need (e.g., t2.micro for free tier).

Key Pair:
- Create or choose an existing Key Pair for SSH access to the EC2 instance.

Network Settings:
- Select VPC and Subnet.
- Enable Auto-assign Public IP (if needed).
- Configure Security Group for SSH (port 22).
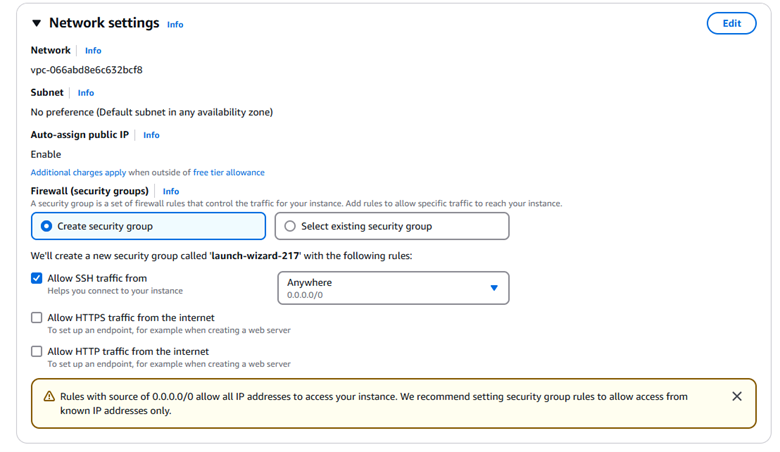
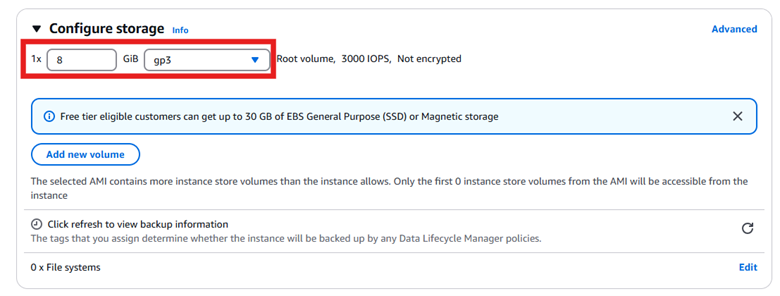
Storage:
- Set root volume size (default 8 GiB or more).
Review and Launch:
- Verify settings and click Launch.

Step 2: Connect to the EC2 instance
- Locate Key Pair:
- Ensure you have the .pem key file downloaded.

- Set Permissions:
- Run:
cp /mnt/c/Users/hp/Downloads/hamzatestkey.pem ~/.ssh/
If ~/.ssh directory does not exist then run the below command:
mkdir -p ~/.ssh
After the ~/.ssh directory is created run the above command again and run the below commands to set the file permissions:
chmod 400 ~/.ssh/hamzatestkey.pem
- Find SSH Command To The Instance:
- Go to the EC2 Console → Select your instance → Click on Connect.

- Connect via SSH:
- Copy the following command:

- Go To Your Local Ubuntu Terminal:
- Here paste the above command.
- After pasting the command (ssh -i “hamzatestkey.pem” ubuntu@ec2-54-254-228-40.ap-southeast-1.compute.amazonaws.com)
Change the keypair location in the command to something like this (ssh -i ~/.ssh/hamzatestkey.pem ubuntu@ec2-54-254-228-40.ap-southeast-1.compute.amazonaws.com)
You are now connected to your EC2 instance.

Step 3: For MongoDB Run the following commands as per your Operating system requirement
# Switch to Root User:
sudo su

# Update & Upgrade Package List:
sudo apt update && sudo apt upgrade -y

#From a terminal, install gnupg and curl if they are not already available:
sudo apt-get install gnupg curl

#To import the MongoDB public GPG key, run the following command:
curl -fsSL https://www.mongodb.org/static/pgp/server-8.0.asc | \sudo gpg -o /usr/share/keyrings/mongodb-server-8.0.gpg \   –dearmor

#Create the list file /etc/apt/sources.list.d/mongodb-org-8.0.list for your version of Ubuntu:
echo "deb [ arch=amd64,arm64 signed-by=/usr/share/keyrings/mongodb-server-8.0.gpg ] https://repo.mongodb.org/apt/ubuntu noble/mongodb-org/8.0 multiverse" | sudo tee /etc/apt/sources.list.d/mongodb-org-8.0.list

#Update and Install MongoDB:
sudo apt update
sudo apt install -y mongodb-org

#Start and Enable Service:
sudo systemctl start mongod
sudo systemctl enable mongod

#Verify Installation:
mongod –version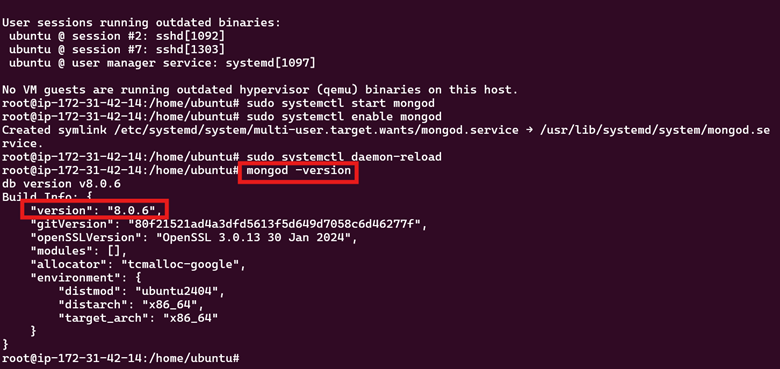
Step 4: Start Using MongoDB
Start a mongosh session on the same host machine as the mongod. You can run mongosh without any command-line options to connect to a mongod that is running on your localhost with default port 27017.
mongosh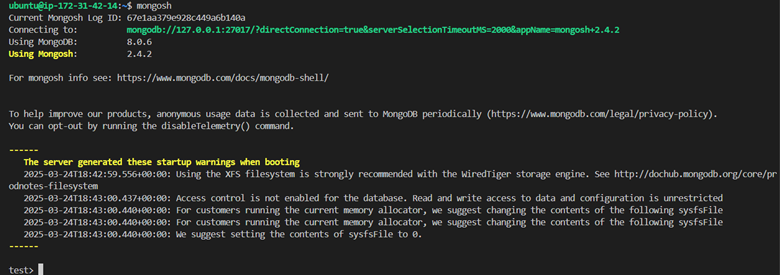
Step 5: Create a database in MongoDB
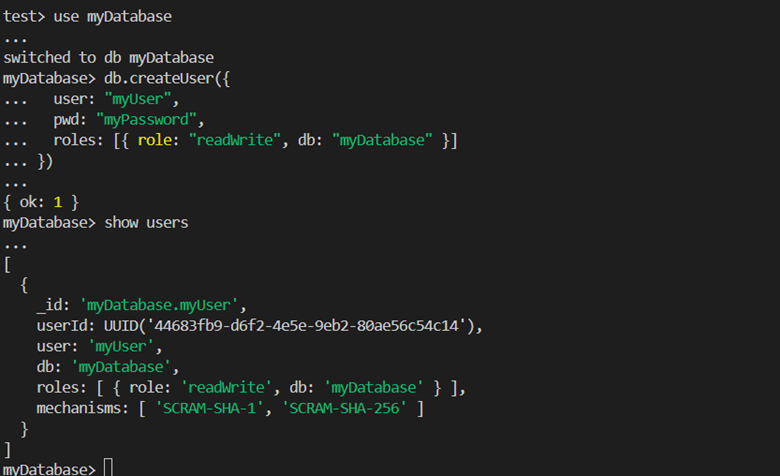
use myDatabase (replace myDatabase with name of database you like)Step 6: Create a user in MongoDB
db.createUser({

  user: "myUser",

  pwd: "myPassword",

  roles: [{ role: "readWrite", db: "myDatabase" }]

})

Hi there! I’m a passionate tech enthusiast with a curious mind, currently working with SUDO Consultants. I’m on a journey of continuous learning, tackling challenges, and troubleshooting errors in my daily tasks. I love sharing my experiences and insights to help others navigate the tech world a bit more smoothly. Let’s learn together!

