Introduction
Welcome to the ultimate guide on deploying a secure OpenVPN Access Server on AWS! In today’s cloud-driven era, having a reliable VPN is crucial for safeguarding your remote connections and accessing private resources with confidence. Whether you’re an IT pro looking to boost your network security or a cloud enthusiast ready to dive into AWS, this guide will walk you through every step—from launching your EC2 instance using the official OpenVPN Access Server image to fine-tuning your VPN settings and connecting with your client. Let’s build a secure, scalable VPN gateway together!
Getting Started with AWS Free Tier
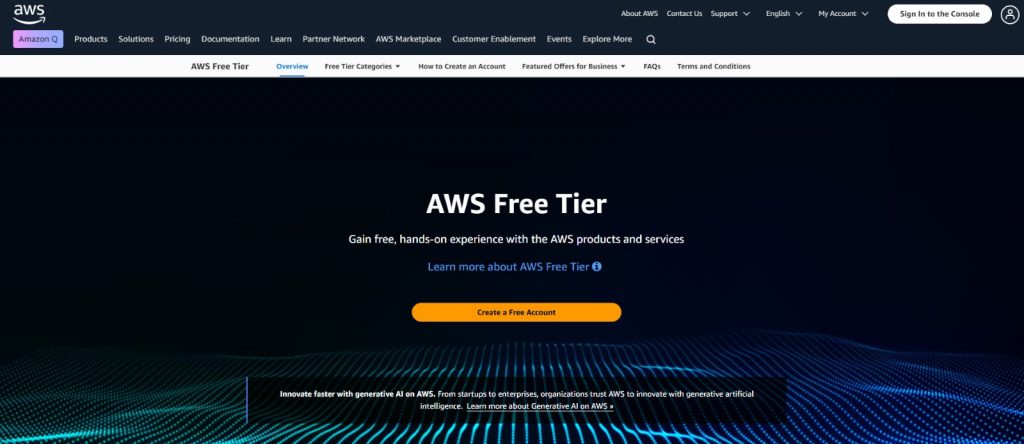
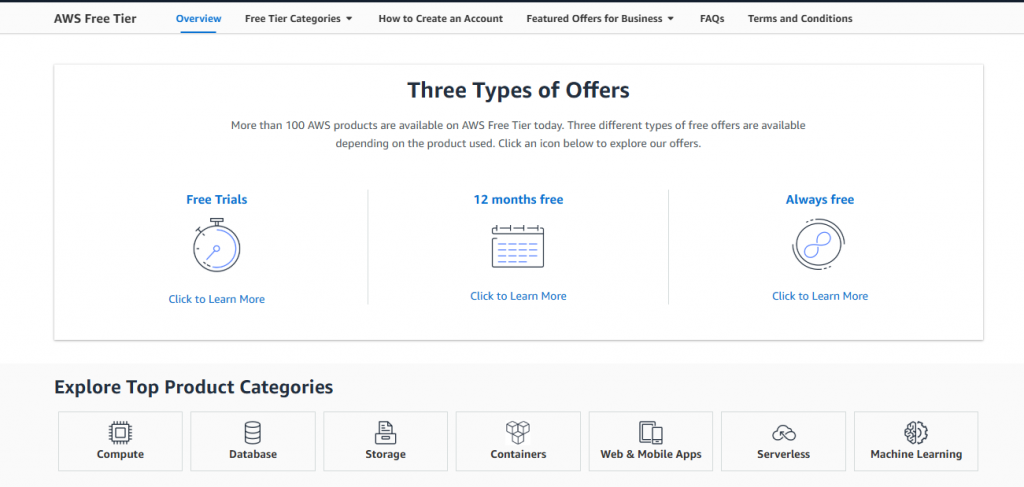
Before you dive in, make sure you’re signed up for an AWS Free Tier account. This account gives you access to a range of AWS services (including EC2) free for 12 months with limited usage – perfect for testing out your VPN setup!
Prerequisites
Before you begin, ensure you have the following:
- An AWS account (Free Tier): Sign up at aws.amazon.com and confirm that you’re using the Free Tier.
- Basic familiarity with AWS services: Especially EC2 and VPC.
- A terminal with SSH support
Note: The SSH key pair required for accessing your instance will be generated during the instance setup process.

Step 1 – Launch an EC2 Instance and Select the OpenVPN Marketplace AMI
Log in to AWS Console & Navigate to EC2:
Sign in to your AWS Management Console and click on “EC2” from the Services menu.
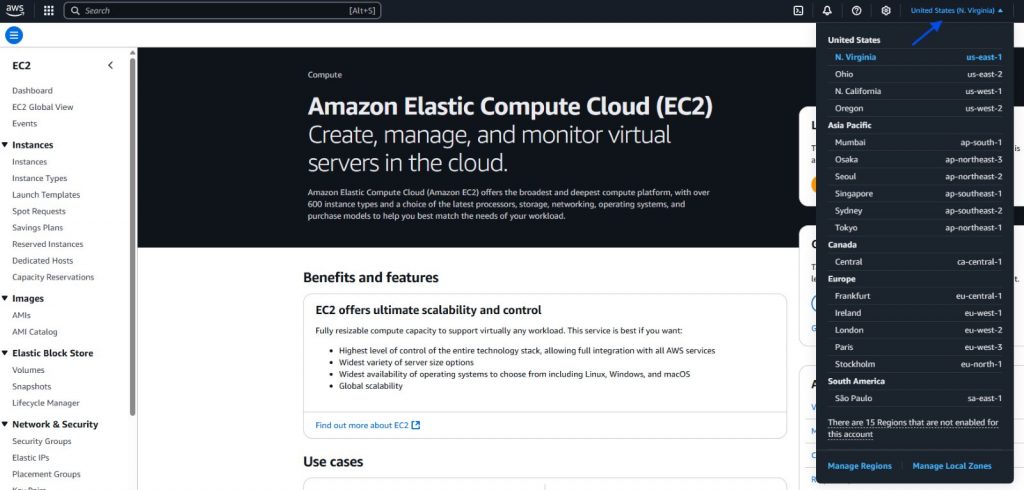
Select the Region for Your VPN Server:
At the top right corner of the console, choose the region where you want your VPN server to launch.
- Launch a New Instance:
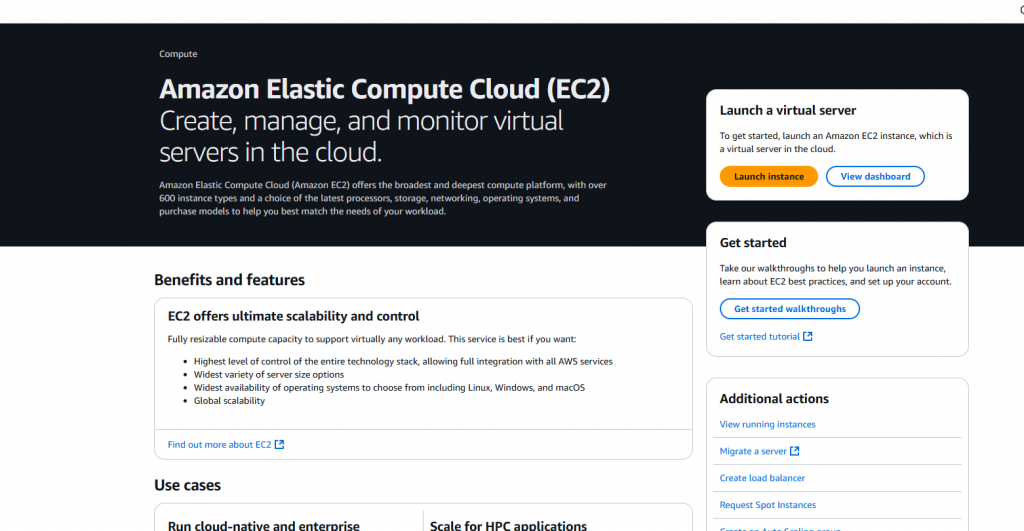
Click the “Launch Instance” button to start the instance creation process.
Select an AMI from AWS Marketplace:
- On the “Choose an Amazon Machine Image (AMI)” page, select the “AWS Marketplace” tab.
- In the search bar, type “OpenVPN Access Server” and press Enter.
- Review the available offerings. Remember, the free tier option supports only 2 concurrent users at no cost.
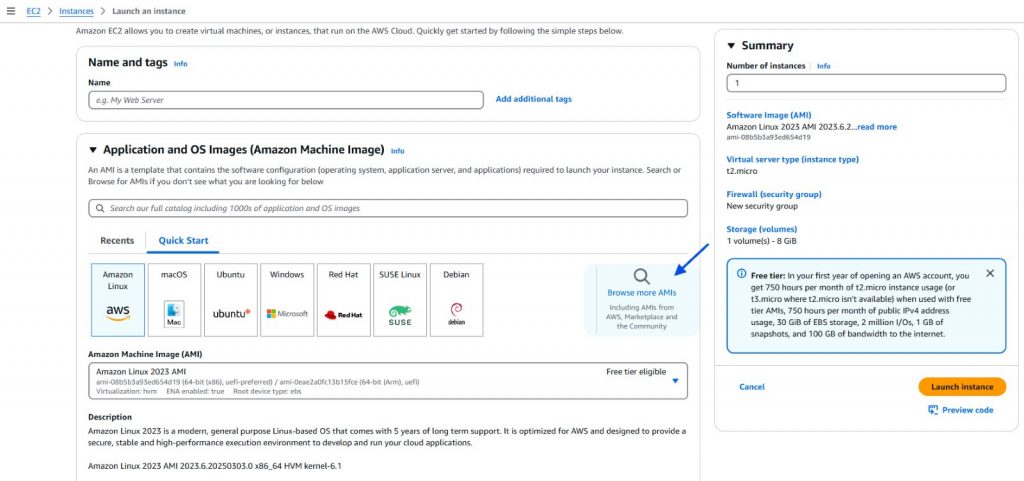

Subscribe & Continue:
Click “Select” on your chosen AMI, then click “Continue” to subscribe. Review the terms, click “Accept Terms”, and proceed to configure your instance.

Step 2 – Configure & Launch Your EC2 Instance
Select Instance Type:
Make sure to select free tier instance t2.micro.

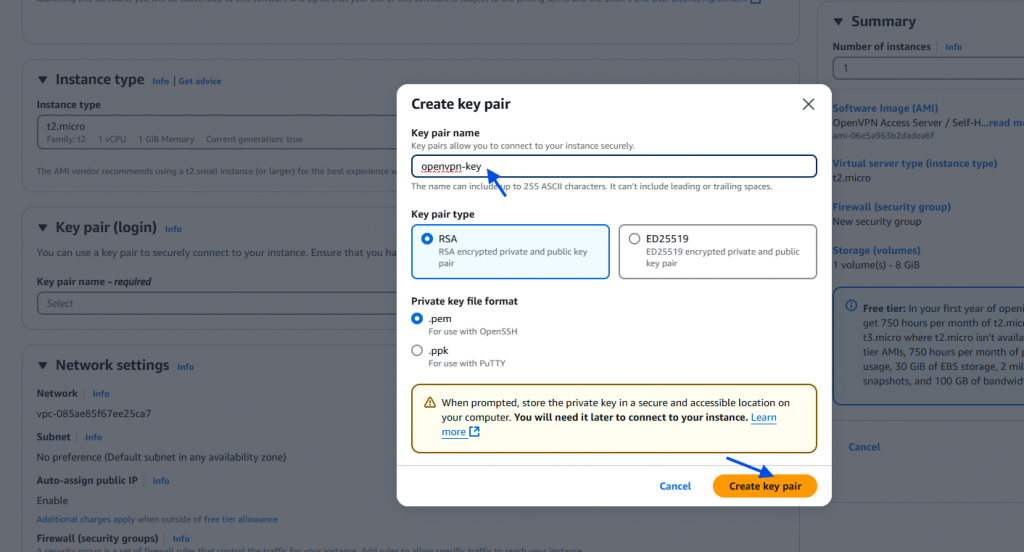
Create a Key Pair (PEM File):
- Key Pair Setup: During the configuration process, you’ll be prompted to select a key pair for SSH access.
- Create New Key Pair: If you don’t have one, choose “Create a new key pair”.
- Download & Save the PEM File: Save the generated PEM file securely on your computer. This file is essential for securely connecting to your instance via SSH.
Configure Network Settings:
AWS automatically populates the recommended network settings for your instance.
Note: You don’t need to manually adjust network settings as OpenVPN Access Server will auto-configure its required network parameters.
Launch the Instance:
Review your settings and click “Launch Instance.”
Step 3 – Associate an Elastic IP
To ensure your server’s public IP remains constant even after reboots:
Navigate to Elastic IPs:
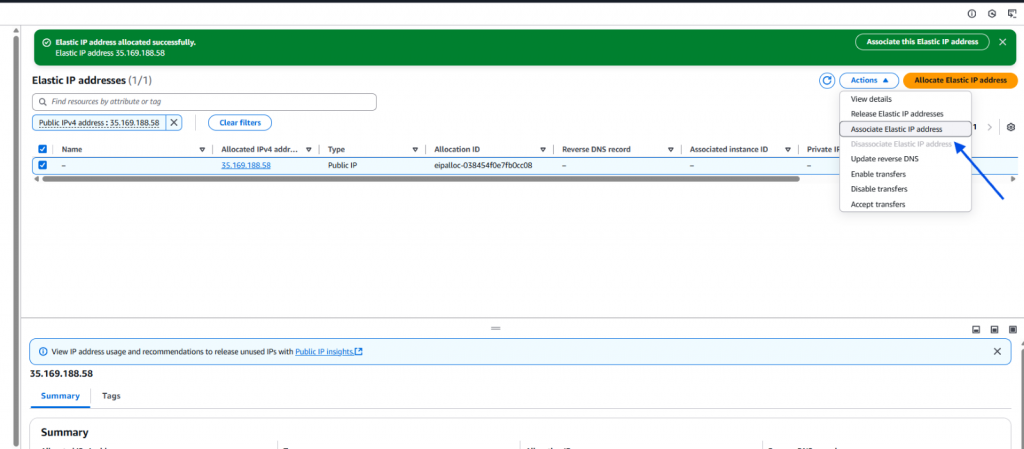
In the EC2 console sidebar, click on “Elastic IPs.”
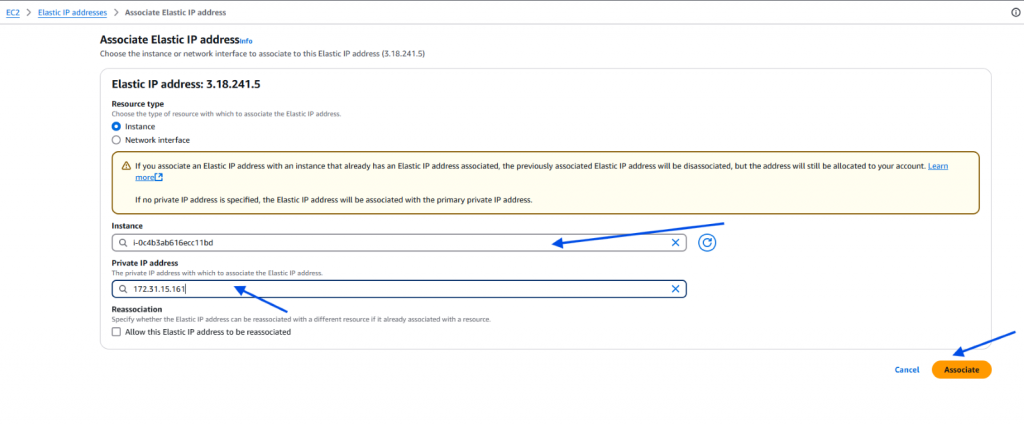
Allocate and Associate:
Allocate a new Elastic IP and then associate it with your OpenVPN EC2 instance. This fixed IP will be used to access your VPN’s web interface.
Step 4 – Connect to Your Instance via SSH
- SSH into Your Instance:
Open your terminal or SSH client and run:
ssh -i /path/to/your-key.pem openvpnas@<Elastic-IP-address>

- Run the Setup Wizard:
The first time you log in, a setup wizard might automatically run. If it doesn’t, follow the on-screen instructions and set a password for the default admin account:
sudo passwd openvpn
Pro Tip: Choose a strong password to secure your VPN admin account.
Step 5 – Complete the Initial Configuration
Follow the Wizard Prompts:
The wizard will prompt you to:
- Confirm if this is the primary node (usually “yes”)
- Choose the network interface (often “all interfaces: 0.0.0.0”)
- Set the Admin UI port (default is 943) and the OpenVPN daemon port (default is 443)
- Decide whether to route all client traffic and DNS through the VPN (commonly “yes”)
Finalize Configuration:
Once completed, the wizard will generate the default configuration files and prepare the server for VPN connections.

Step 6 – Access the OpenVPN Admin Web UI
- Open Your Browser:
Navigate to:
https://<Elastic-IP>:943/admin
Make sure to write https in address bar
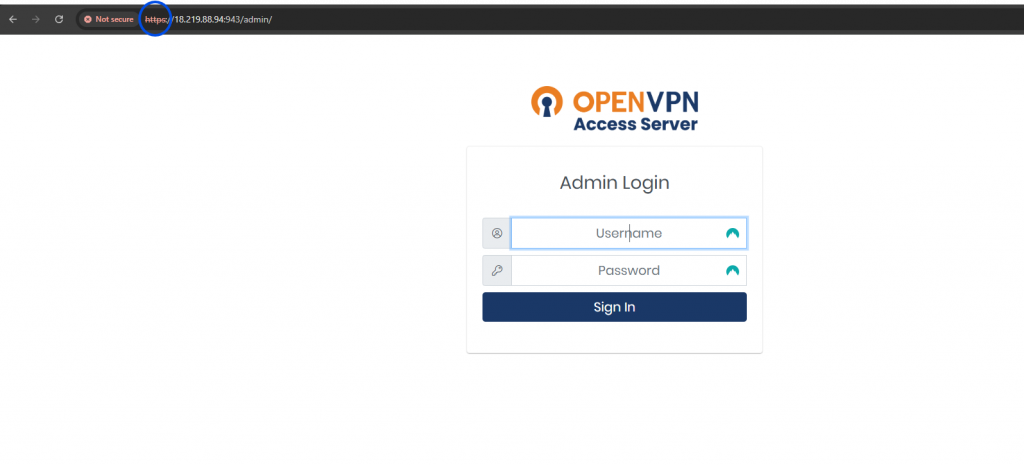
Log In:
Sign in using the admin credentials (default username “openvpn” and the password you set earlier).
Check VPN Routing Settings:
Once logged in, go to the Settings section and ensure the option “Route client internet traffic through VPN” (or similar wording) is enabled. This setting ensures all client traffic is routed securely through your VPN server.
Enter Custom DNS Address:
In the same settings area, you can also specify custom DNS servers (e.g., Google DNS: 8.8.8.8 and 8.8.4.4 or Cloudflare DNS: 1.1.1.1) that the VPN clients should use. This helps improve name resolution and can offer additional security or performance benefits.
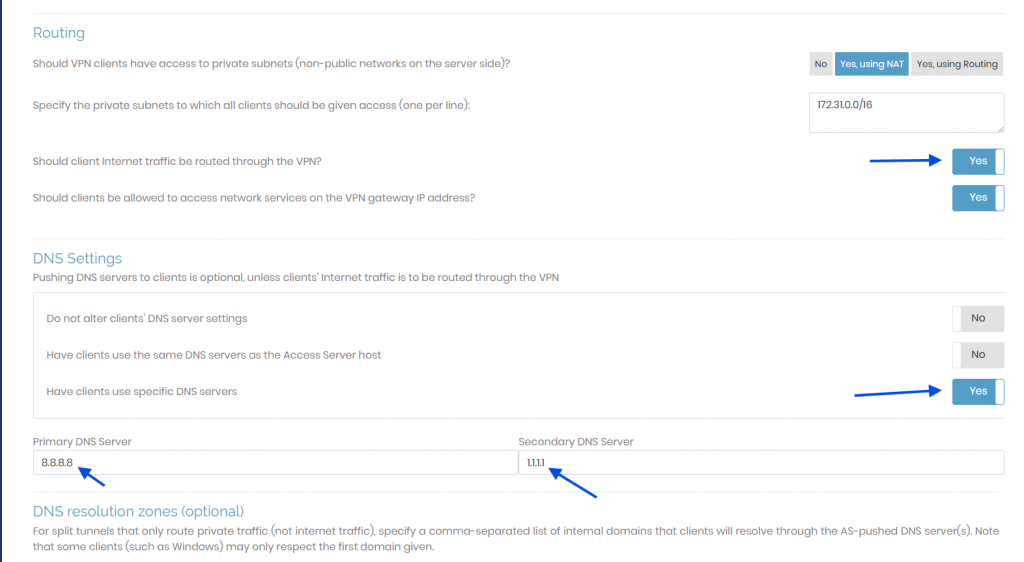
All done, don’t forget to SAVE settings.

Step 7 – Creating User & Test the Connection
Download the Client Profile:
Download the .ovpn configuration file for the new user.
Open your web browser and navigate to:
Log In Using VPN Credentials:
Enter the credentials for your VPN admin user.
Download the OpenVPN Client:
After logging in, you’ll see an option to download the OpenVPN client application. Click the download link, then install the client on your device.
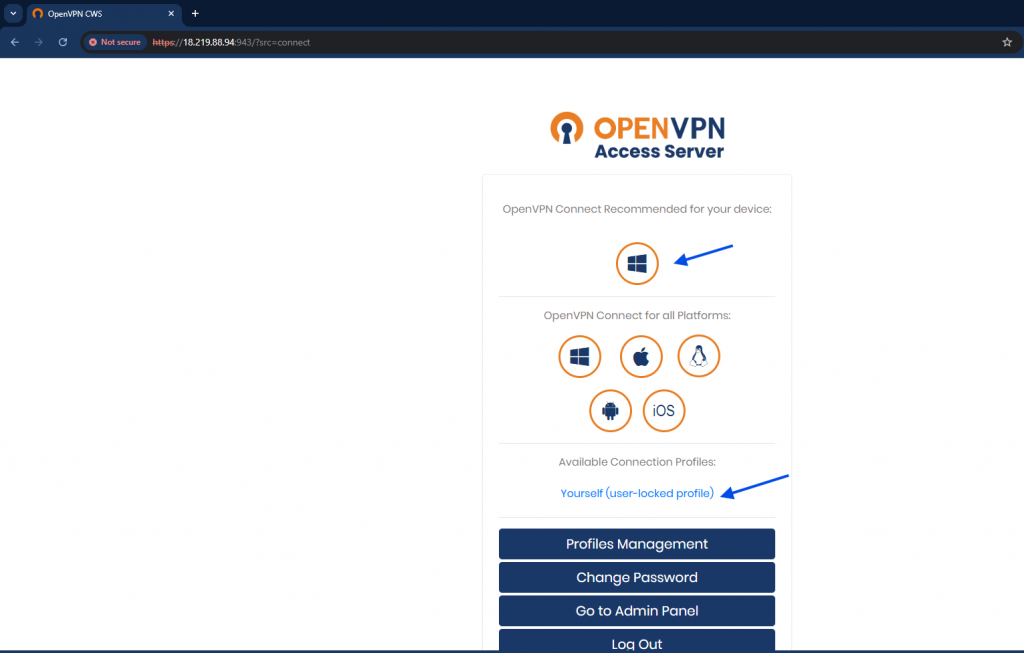
Download & Import the VPN Profile:
Once the OpenVPN client is installed, go back to the client portal and click this to download the .ovpn configuration file.
Import this profile into your OpenVPN client application to complete the setup and connect to your VPN.


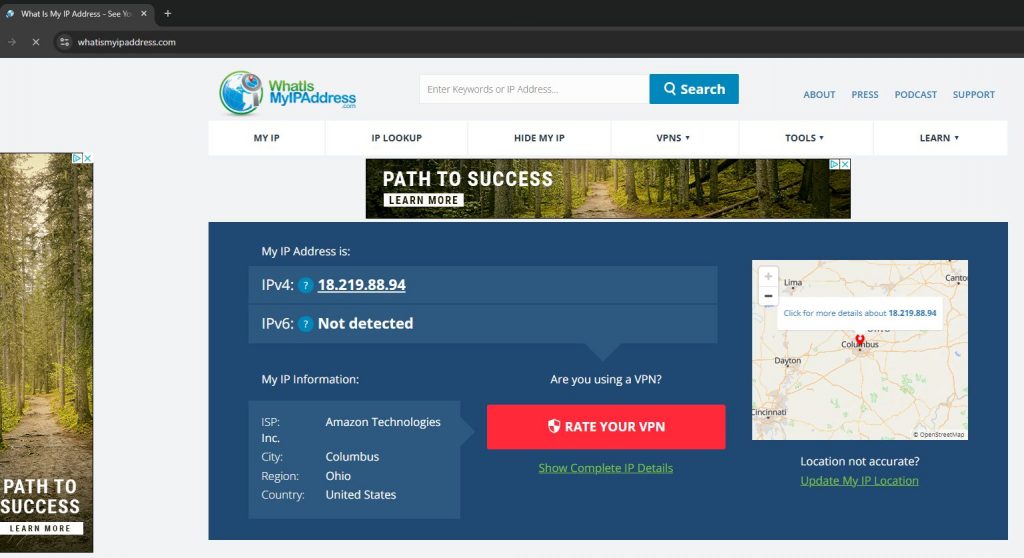
Verifying my WAN IP Address:
Search on google to verify what is my IP to check you WAN IP.

Conclusion
Congratulations! You now have a fully functional OpenVPN Access Server running on AWS, providing secure remote access to your private resources. With the intuitive admin web UI, managing users and tweaking settings is a breeze. Whether you’re securing a corporate network or building a personal VPN, this setup gives you the tools to protect your data and enhance connectivity in today’s digital world. Happy VPNing!

