Ever wished your users could access all your applications with just one login? Single Sign-On (SSO) makes that dream a reality! This blog dives into SSO and guides you through implementing it with AWS Cognito and Azure AD.
This blog will teach you how to use AWS Cognito and AzureAD to establish Single Sign-On on your application.
Understanding Single Sign-On (SSO)
Imagine a world where users don’t juggle multiple logins for different applications. SSO makes this a reality. It eliminates the need to enter credentials repeatedly by providing a central authentication point. Users log in once and seamlessly access all authorized applications. Single Sign-On (SSO) is a system that replaces several login windows for various applications with a single one.
There are benefits and drawbacks to using a single sign-on authentication solution, just like anything else in life. SSO’s ability to help customers remember and manage fewer identities and passwords across several apps is one of its many wonderful features. However, the problem with SSO is that users become locked out of the different
How exactly SSO Works?
SSO relies on an authentication token. This digital token verifies a user’s identity after a successful login. Let’s break down the process:
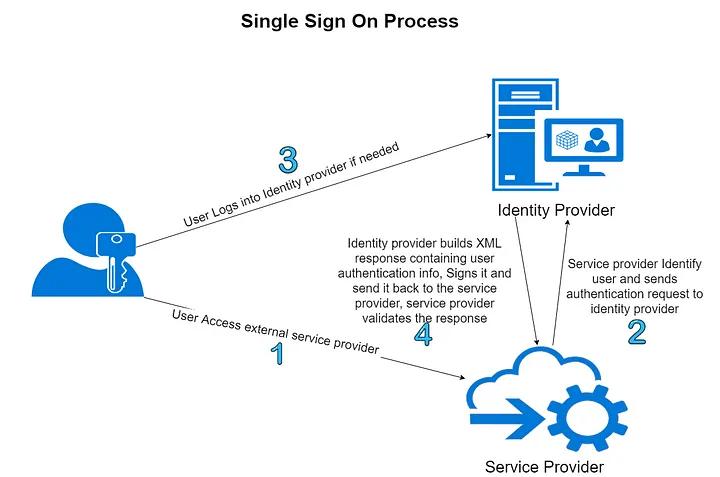
Source: Double Octopus
- User Accesses an Application: The application redirects the user to an SSO service (AWS Cognito in our case).
- Identity Verification: Cognito identifies the application and directs the user to their chosen identity provider (Azure AD) for login.
- Login at Identity Provider: The user logs in to Azure AD using their existing credentials.
- Authentication Response: If successful, Azure AD sends an authentication response containing user information back to Cognito.
- Access Granted: Cognito validates the response and grants access to the application.
Now, let’s explore how to implement SSO using AWS Cognito and Azure AD.
Implementing SSO with AWS Cognito and Azure AD
AWS Cognito is a user management, authorization, and authentication solution for web and mobile apps. With it, users can log in with a third-party service like Azure AD, Amazon, or Google, or with only their username and password. The User pools, a user directory that enables users to log in, and the Identity pools, which grant users access to further AWS services, are the two primary parts of AWS Cognito. You can utilize the Identity and User pools separately or together.
Conversely, Azure Active Directory (Azure AD) is an identity and access management (IAM) service that businesses may use in the cloud. It functions as the foundation of the Office 365 system, syncing with on-premise Active Directory and granting other cloud-based apps OAuth authentication.
Before allowing the user to access AWS services, Azure AD verifies the user’s identity (passwords, emails, etc.) and confirms to AWS Cognito that the user is authorized to access the services and that the user’s identity is authentic. The following procedures form the foundation of Single Sign-On authentication:
- The user opens an application, which directs them to a website hosted by AWS Cognito.
- By using their client ID, application subdomain, and other details, AWS Cognito establishes their origin before directing them to the identity provider for authentication. To the Azure Active Directory login screen, in our instance. This is a SAML authentication request.
- The user gets redirected to an SSO URL in their browser. The user either has an active browser session with the identity provider or starts one by logging in. The identity provider (Azure AD) generates the authentication response in XML document format, which may include the user’s username, email address, and extra attributes (if specified), and then signs it using an X.509 certificate. The result is returned to the service provider (AWS Cognito)—this is the SAML authentication response.
- The service provider retrieves and validates the authentication response using the certificate fingerprint, which he already knows and has. The user’s identity is authenticated by include the access token in the URL, and the user is granted app access.
Now that you understand what AWS Cognito and Azure AD are and how they function together, let’s talk about how to use them to establish SSO. I’ve broken down the following part into separate steps to assist you comprehend the process better.
Step 1: Create a Cognito User Pool on AWS
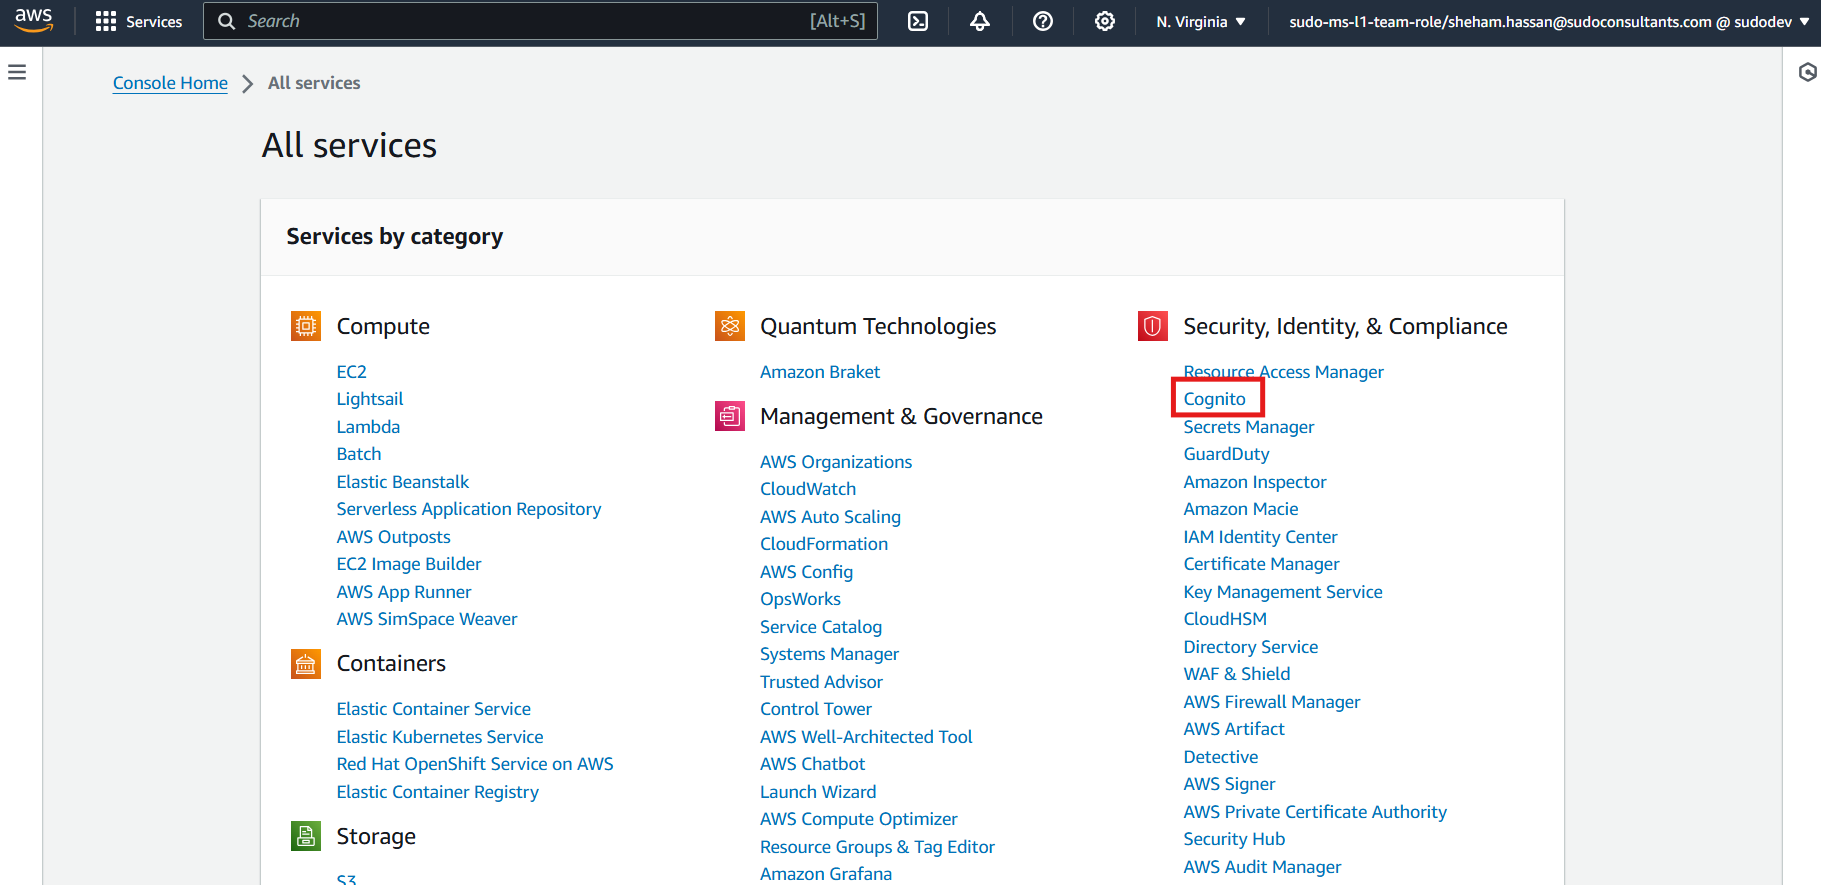
Create an AWS account to start with. Once created go to the AWS Management Console, navigate to the “All Services” section, and click on Cognito in the Security, Identity, and Compliance section.
On the Cognito page, click on “Create a user pool”. Check “username” and “email” checkbox in “configure sign-in experience” page.

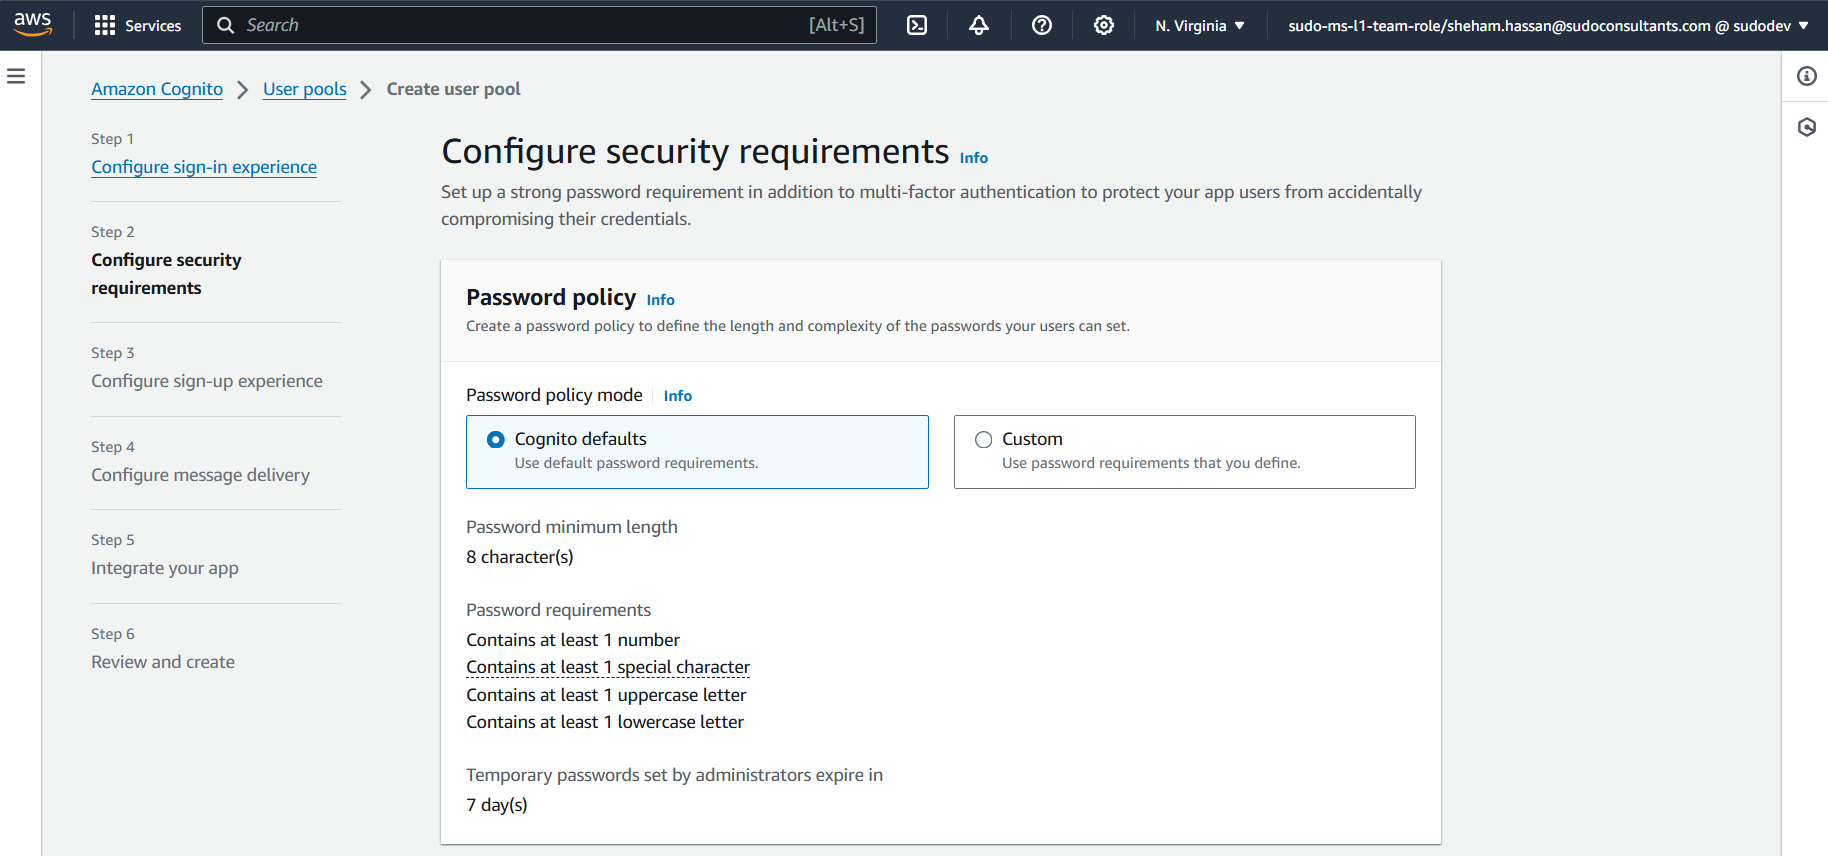
Keep everything as default in “Configure Security Requirement” page. Choose MFA if needed.
Keep everything as default in “Configure sign-up experience” page.
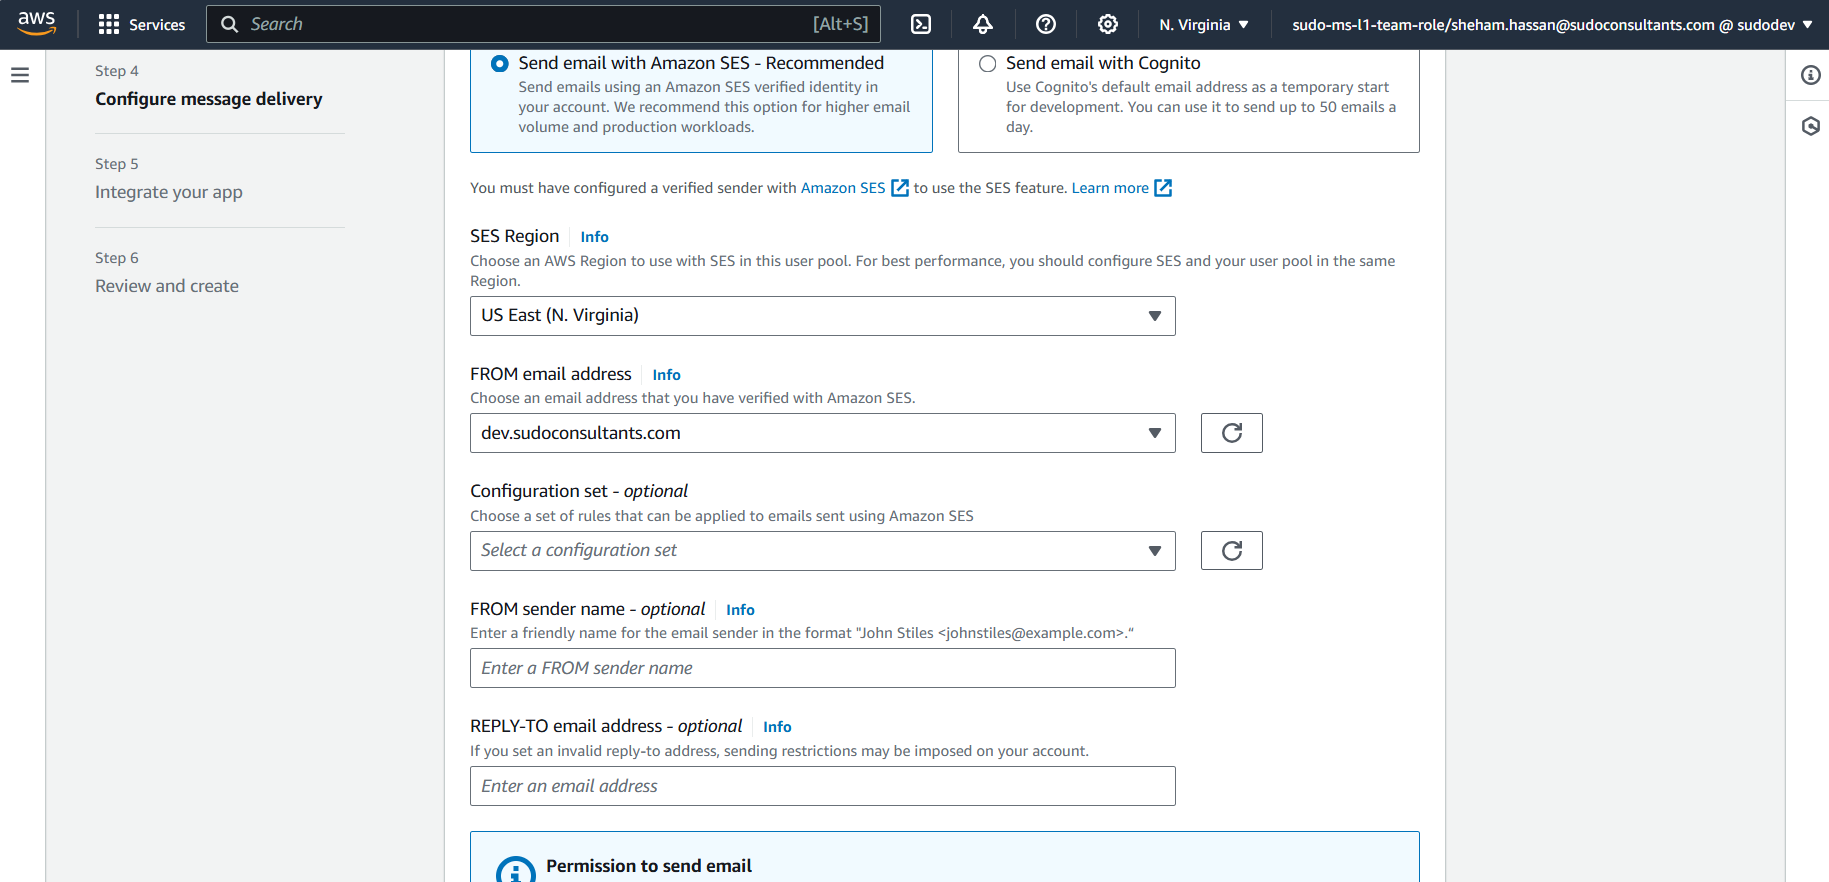
On “Configure Message delivery” page, Select domain/email in “FROM email address” dropdown. (Email/domain identities should be configured in SES first)
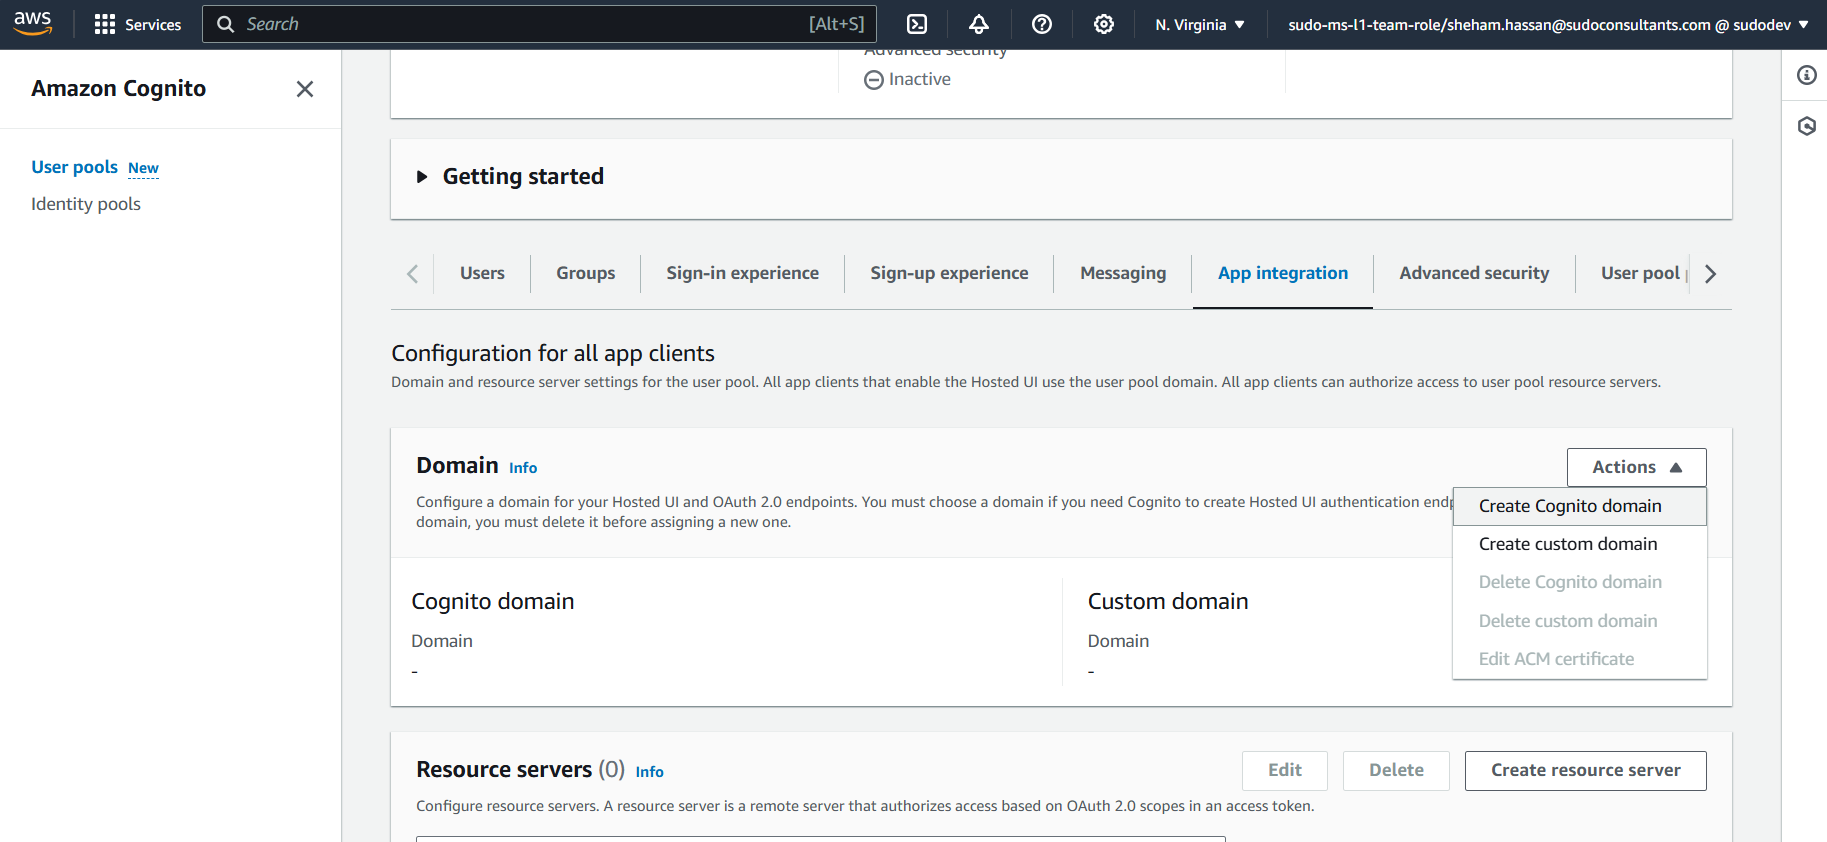
Give “user pool a name” and an “app client name” in “Integrate your app” page .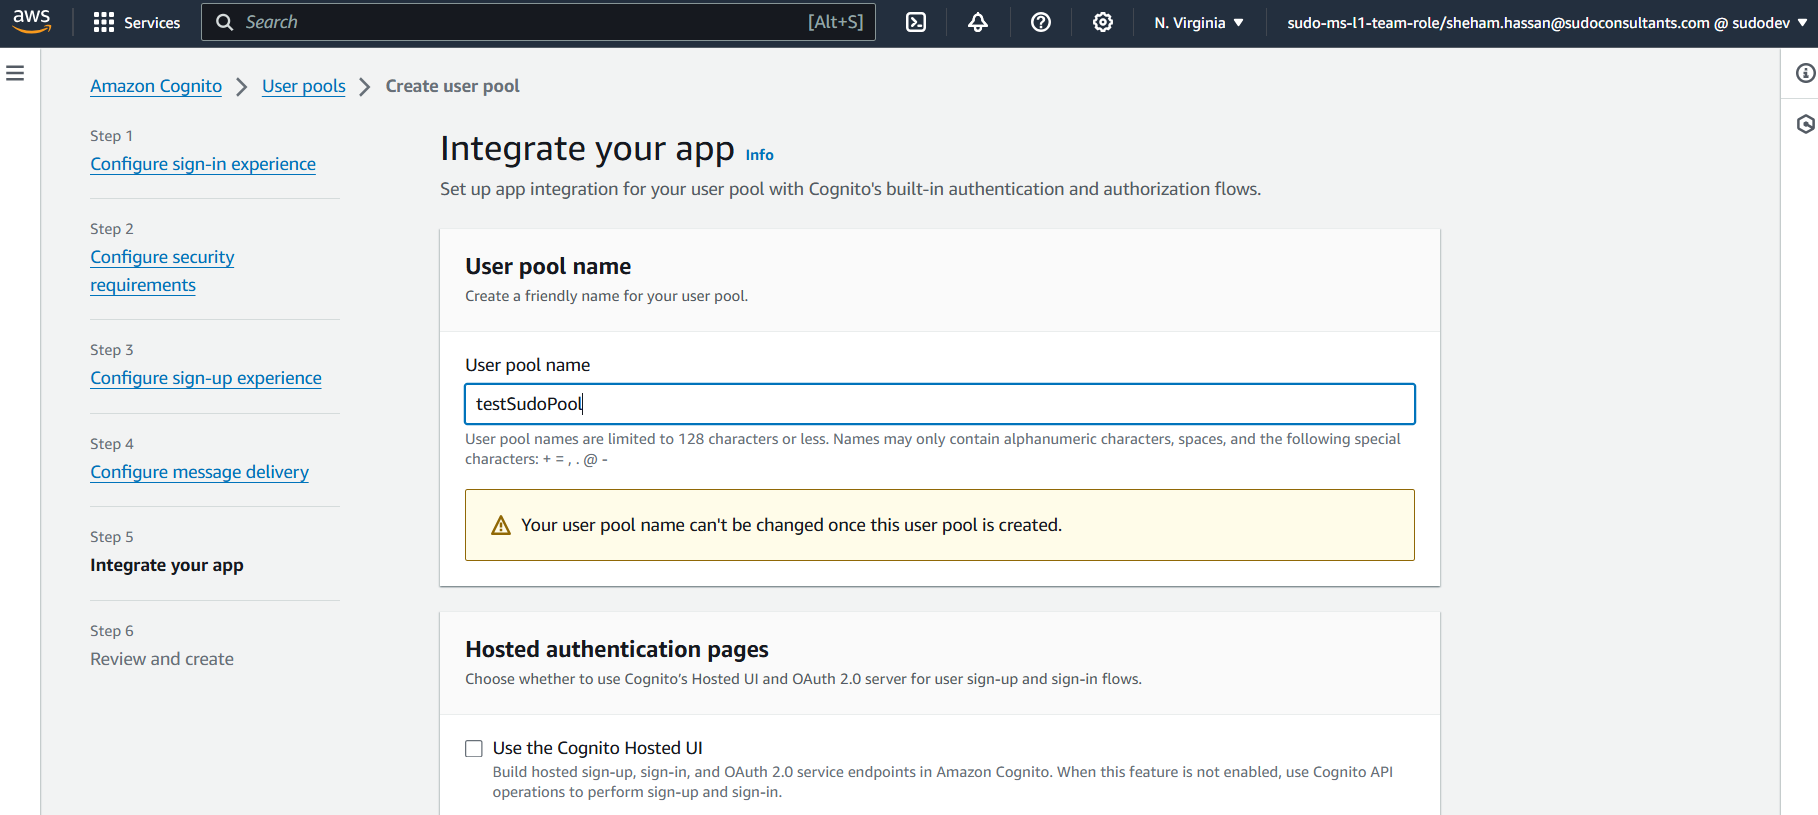 Finally, review all the configurations in “Review and Create” page. Once reviewed, click “Create User Pool” Setting the domain name for our User Pool will be our next step. Click “App integration” -> “Domain name” -> enter the domain prefix -> “Save Changes” to accomplish this.
Once you select “Save Changes,” AWS will create a domain for you. The domain `https://test-sudo-consultants.auth.us-east-1.amazoncognito.com was the one I used, and it will be linked to the user pool that we had previously established. 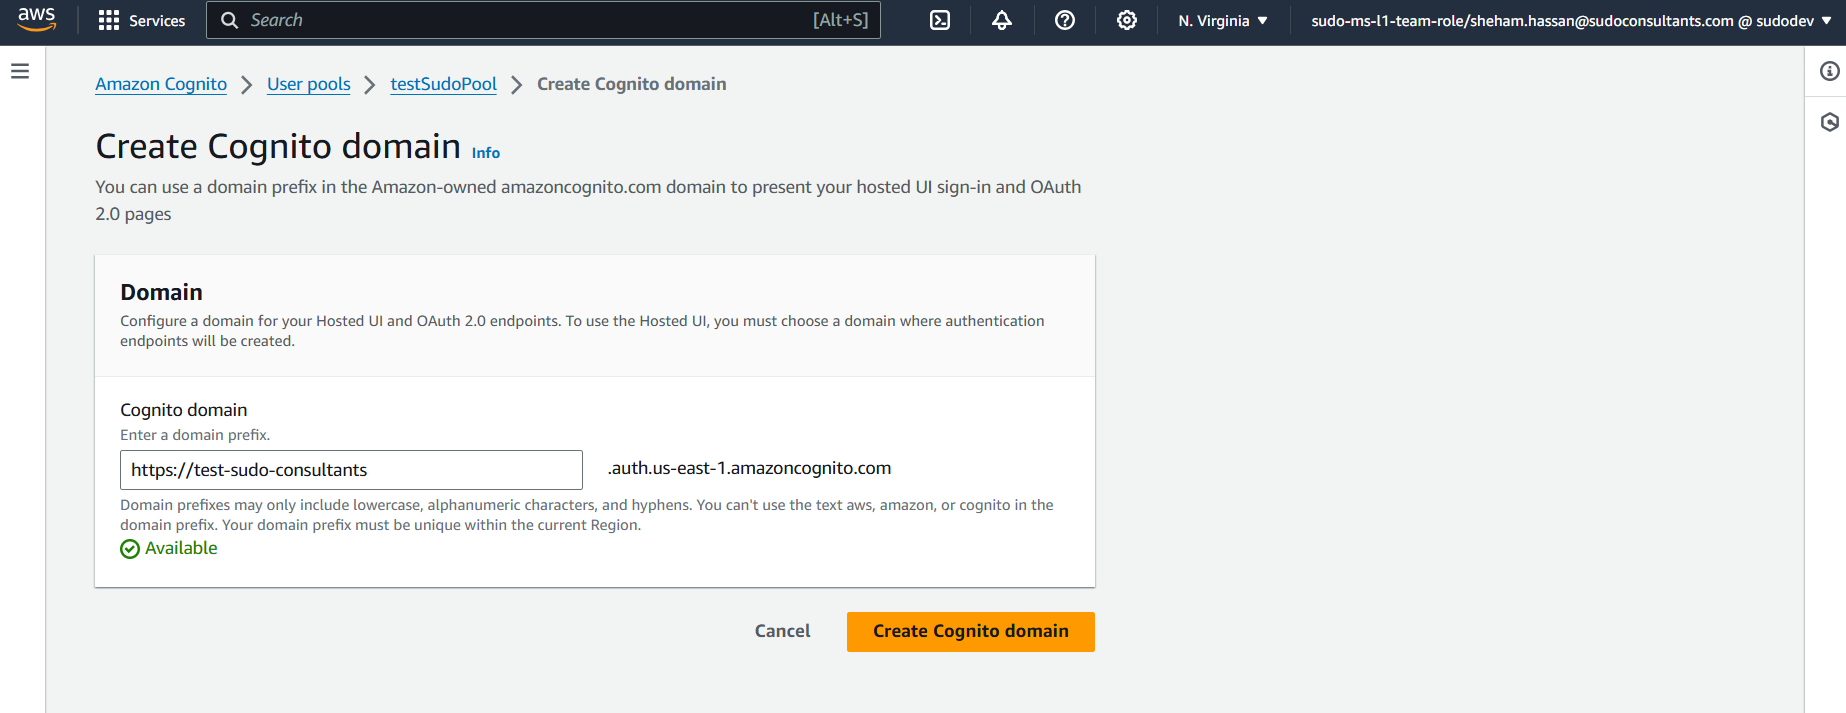
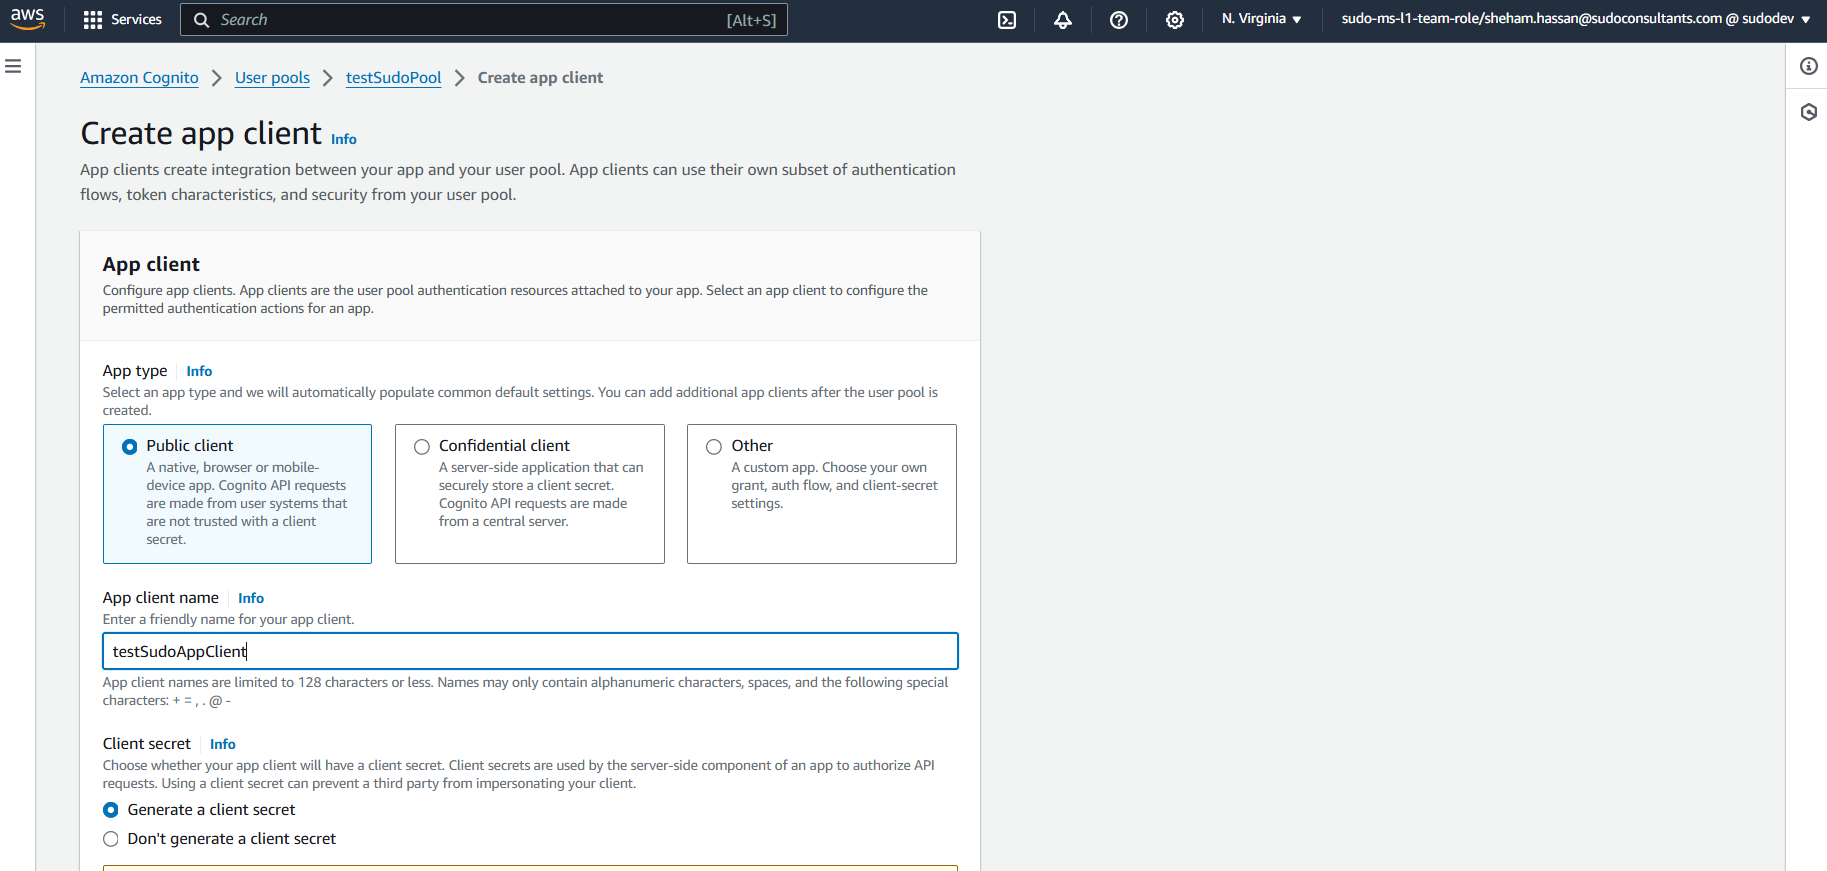
Step 2: Build an AWS application client and add it to the User Pool
The next thing we will do is create an application using Cognito Service. To begin, go to your “User Pool” -> “App Integration” -> Scroll down to the “App Clients list” -> “Create new app client”.
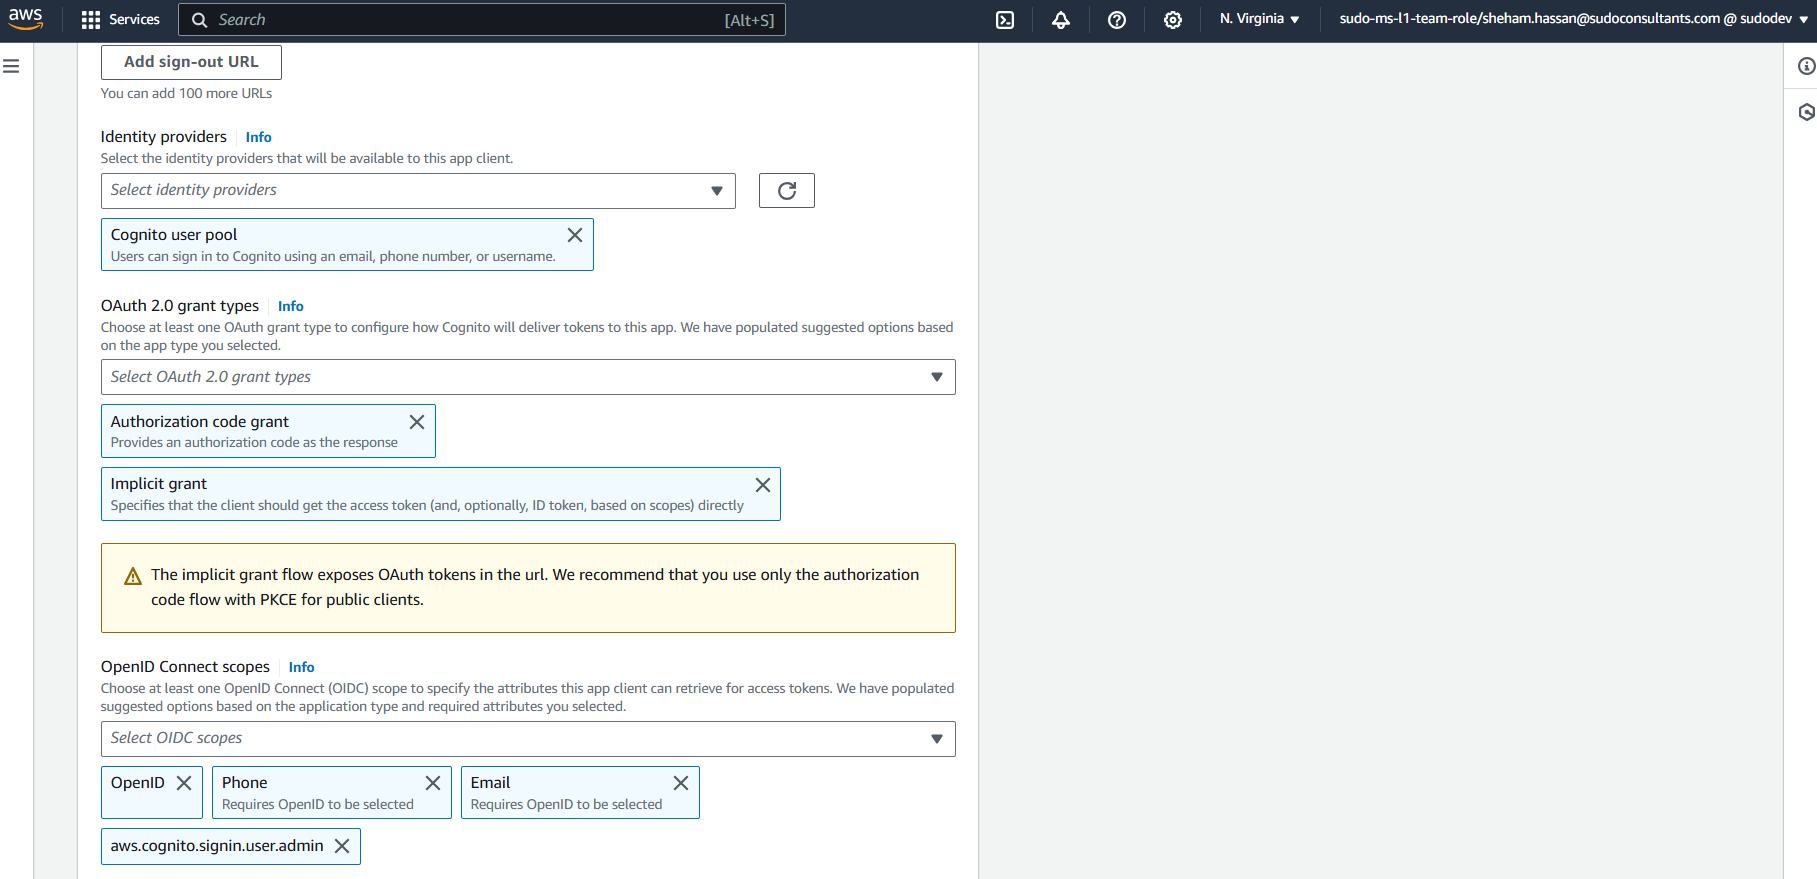
Then add a name for your app client, select “Generate client secret”, provide callback URL of app.
Configure the OAuth2 and OpenID connect scopes as per the screenshot below.
Step 3: Establish a connection between the Cognito User Pool and an Azure AD enterprise application.
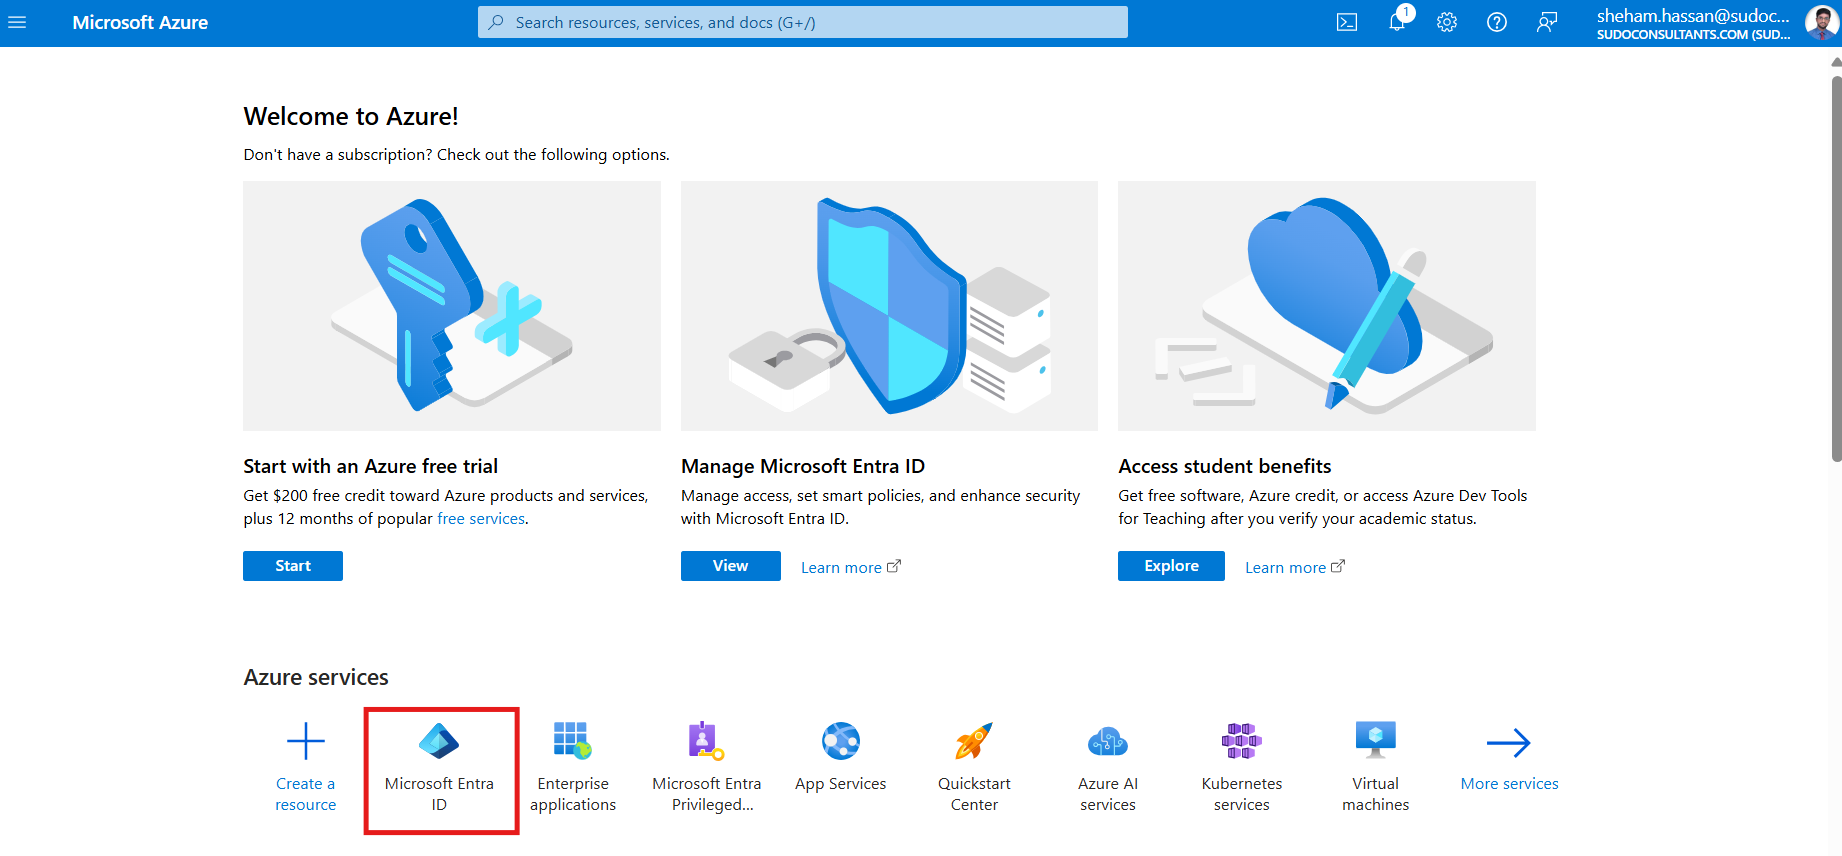
Go to the Azure portal, and navigate to “Microsoft Entra ID”.
Click “Enterprise applications” -> “New Application” -> “Non-gallery application” -> on the Azure AD page. After entering the application’s name, click the Add button.
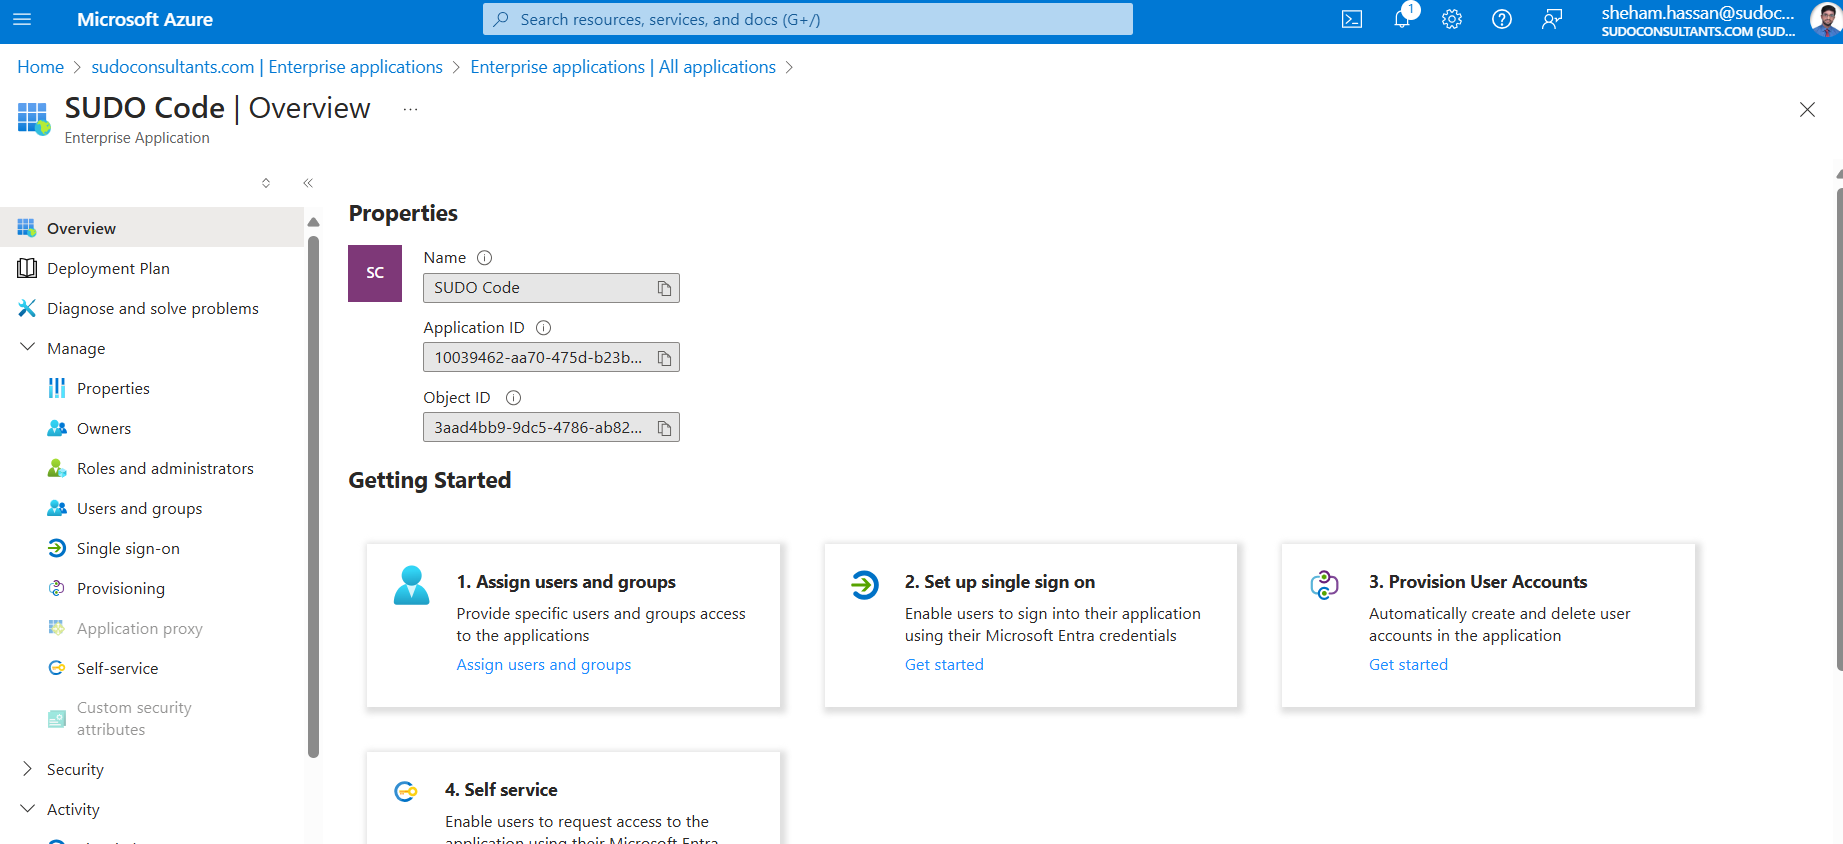
After developing your application, it’s time to connect it to the AWS User Pool. In your Azure AD business application, choose “SAML-based Sign-on” from the dropdown list under “Single sign-on.”
Add the necessary information to the Domain and URLs portion of the SAML page, save it, and download the SAML file. For background:
- The Identifier has your User Pool id (from AWS), which is constructed using the following pattern: urn:amazon:cognito:sp:us-east-1 XX123xxXXX
- The authentication token should be sent through the Reply URL by the application. In SAML, this is also known as the Assertion Consumer Service (ACS). It follows this pattern: https://test-sudo-consultants.auth.us-east-1.amazoncognito.com/saml2/idpresponse
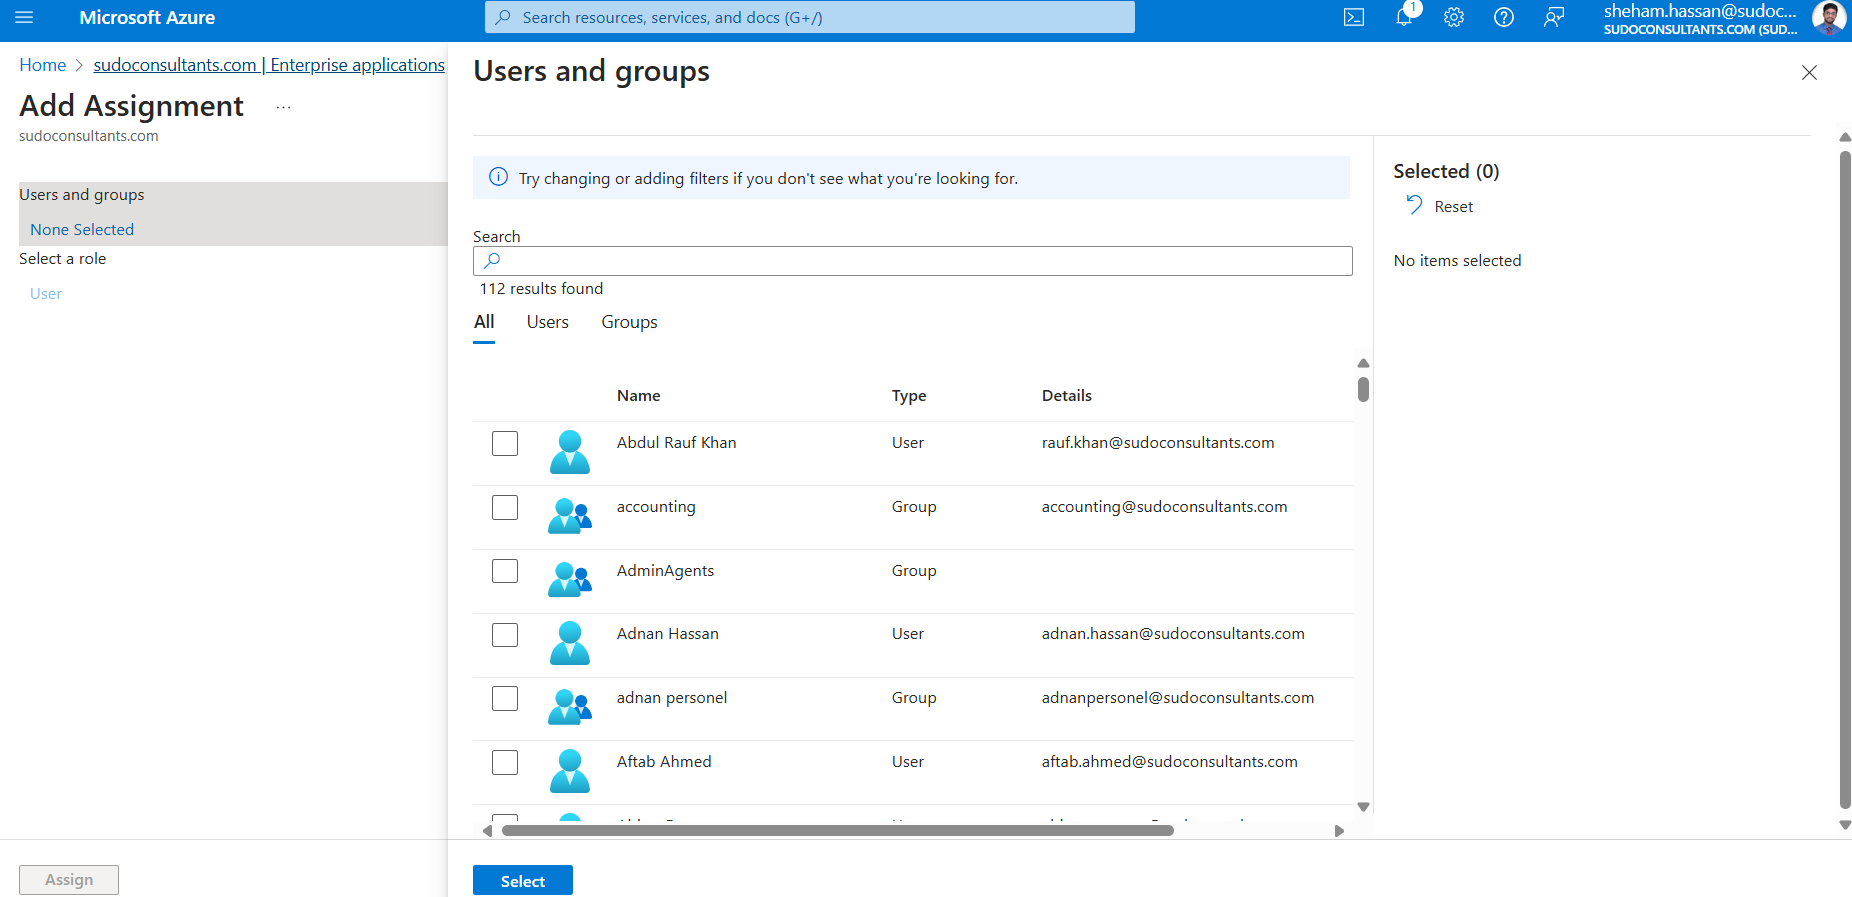
We are going to add “Users” as our next step. You can designate people from a list of current users or invite new ones. The user will be able to utilize this Azure AD account to access your application as a result. Navigate to “Enterprise apps” -> “Users and groups” -> “Add user” to accomplish this.
After adding the user, click “Assign” to save your modifications.
Step 4: Configure an AWS User Pool identity provider.
As of right now, you have an XML-formatted SAML file and the user or users to log in with. Now let’s configure an identity provider within your AWS User Pool.
App users can federate with another identity provider to sign in while utilizing a user pool. To accomplish this, go to our user pool -> Sign-in experience -> Add identity provider.
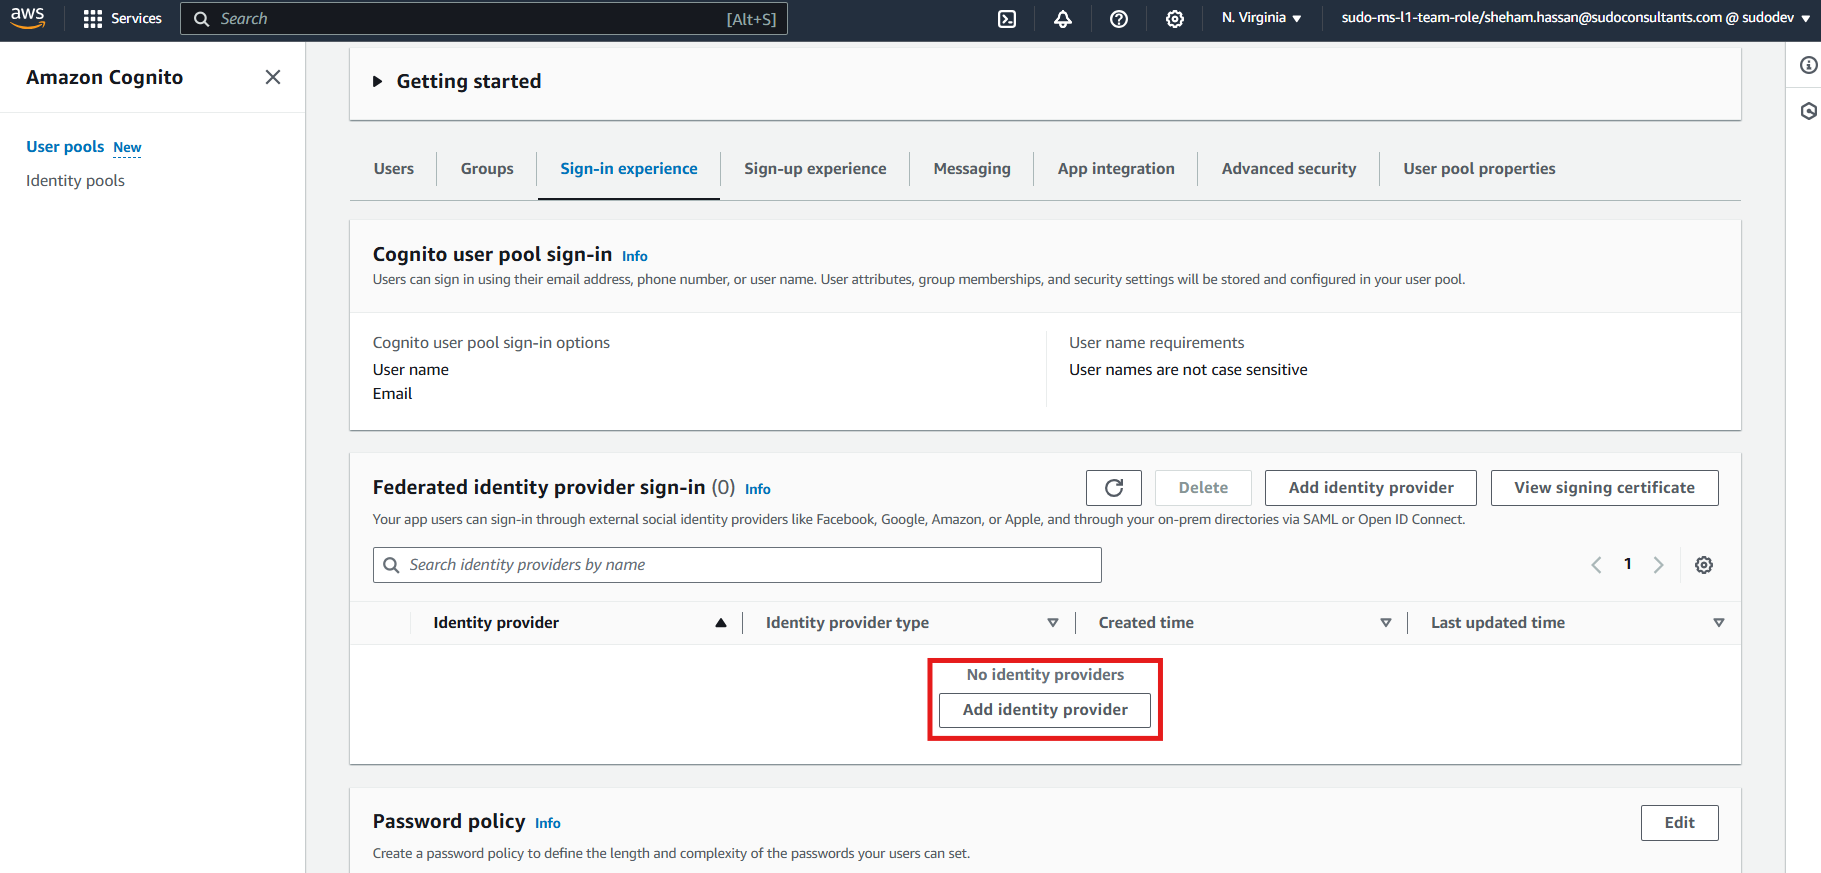
On “Add Identity Provider” page, give your provider a name and upload a SAML file that you downloaded from Azure AD.
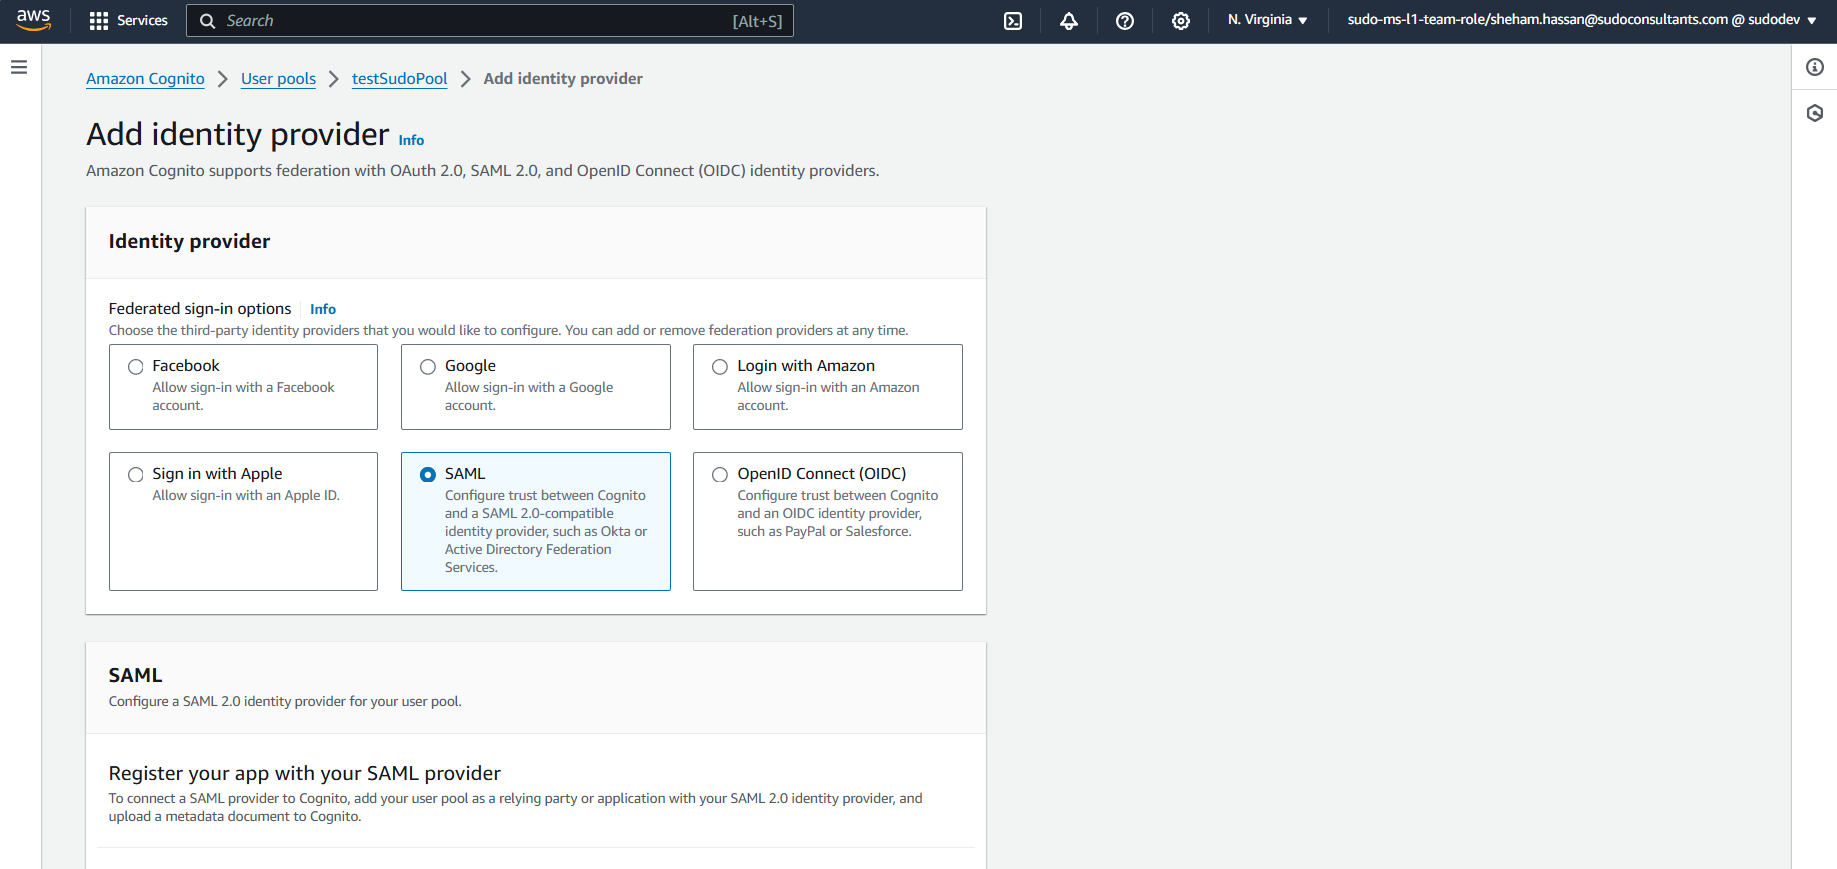
Establish a mapping between the properties of AWS and your supplier by adding relevant SAML attributes. Once done, save the configuration
That’s all that is left to do via the Azure website and AWS management panel. Now is the time to test your setup.
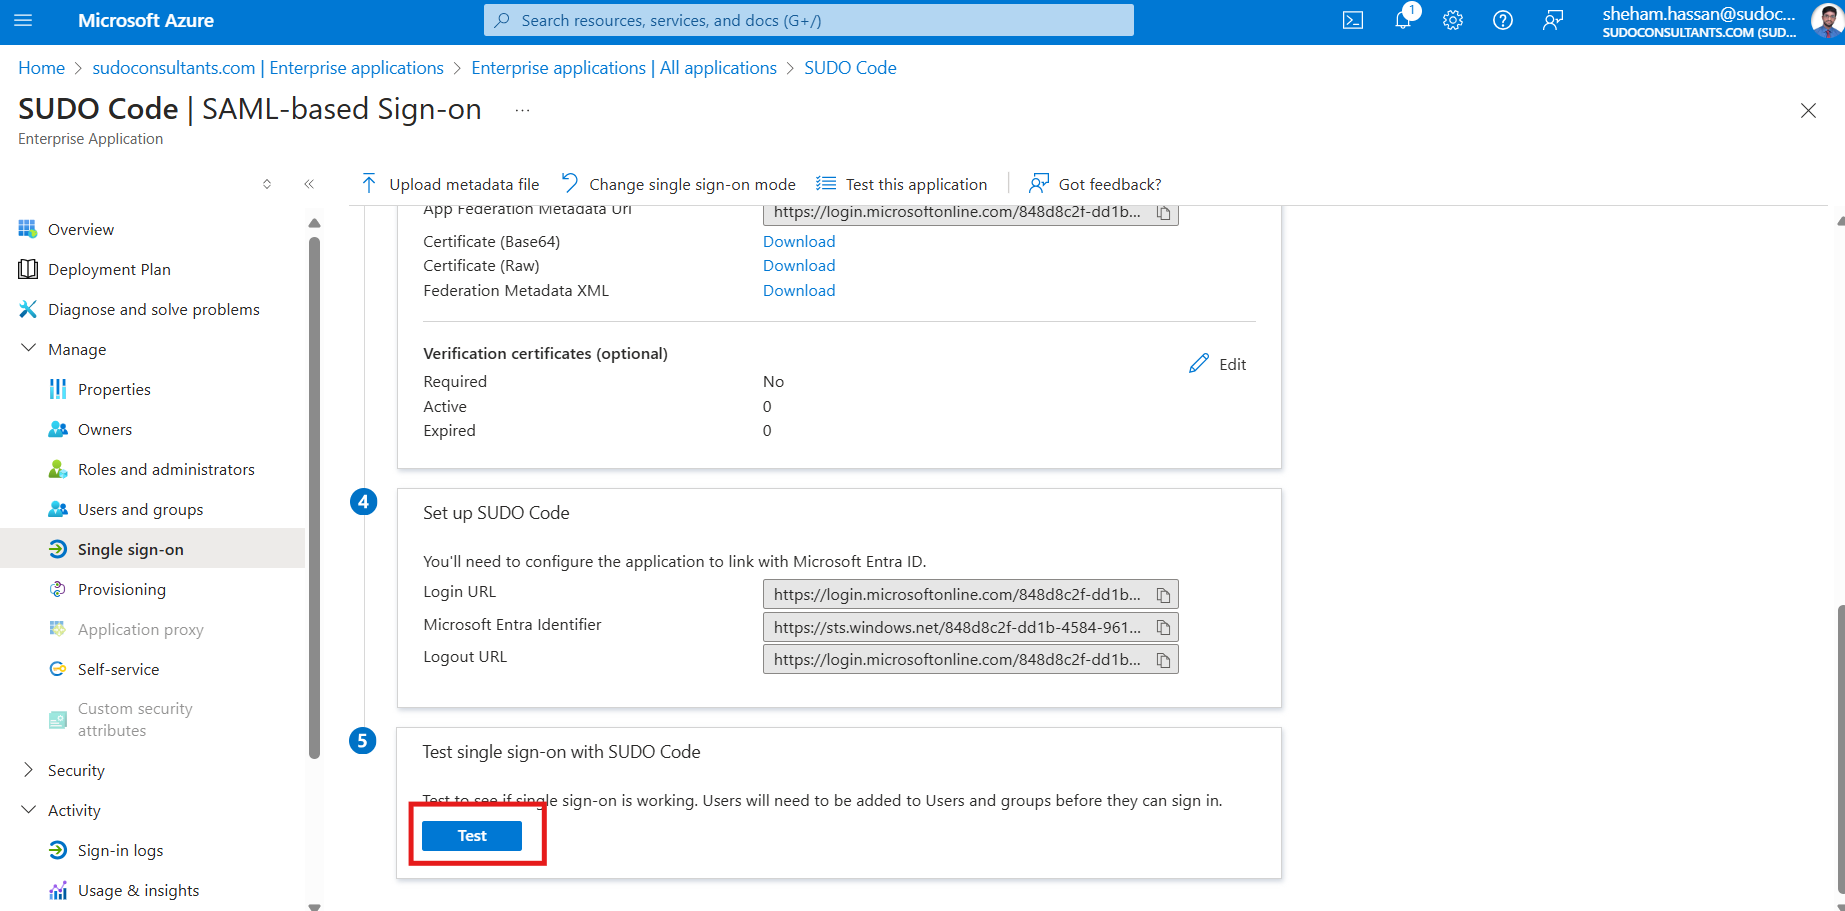
Step 5: Verify your Configuration
Navigate to your application’s Single Sign-On section in the Azure portal, then select the Test SAML Settings option.
The next step is to install the My Apps Secure Sign-in Extension and log in with the account you added in step 3 of this application.
You will be able to see the token and the SAML request and response if the login is successful.
Now that you have all the necessary information, you can begin configuring SSO authentication in your online or mobile application using your Azure AD account.
Conclusion
In summary, this blog post demonstrated how to configure Single Sign-On (SSO) using AWS Cognito and Azure AD. By following these steps, you can enable users to access your web or mobile applications using their existing corporate credentials.