Amazon Web Services is undoubtedly among the most popular cloud computing platforms worldwide. It provides a vast array of virtual servers, cutting-edge artificial intelligence utilities, and an assortment of scalable databases. In addition to these sophisticated solutions, AWS also offers a basic yet effective email service called Amazon Simple Email Service (SES). If your application currently resides on the AWS cloud, integrating SES into your digital infrastructure for email correspondence is certainly a practical choice worthy of consideration. This post will explore how SES differs from its rivals, analyze its benefits and drawbacks, and illustrate the setup and implementation procedures necessary for incorporating this service into an existing AWS environment. We will start by contrasting SES against other email service providers, then delve into its notable strengths for handling large mail volumes. While reasonably priced, its lack of advanced email marketing tools could disadvantage certain organizations. However, for the majority of clients, its scalability, reliability and seamless connection to the AWS platform outweigh such limitations. By following the steps outlined below, even non-technical teams can harness the power of SES within their AWS account to send communications to customers, partners or internal employees.
What is Amazon SES?
Amazon SES is a cloud-based email service offered by Amazon that facilitates both transactional and bulk emails. This service leverages Amazon’s powerful infrastructure in the cloud to provide a veritable suite of integration options including its SMTP interface, AWS SDKs designed to integrate effortlessly with applications, as well as support for email clients and other software.
Why use it?
Amazon SES can boast its reliable infrastructure at a reasonable cost. Amazon prices are very competitive compared to other solutions available on the market. If you check customers’ reviews, you will notice it as the most often mentioned advantage.
Amazon SES cost
Let’s return to pricing. We’ve already noted that if your application is part of the Amazon (EC2 or Elastic Beanstalk) infrastructure, then you qualify for a free tier – and the first sixty-two thousand emails each month are free.
For all other situations, Amazon’s policy of “pay only for what you use” applies.
Emails beyond the sixty-two thousand limit will cost as much as ten cents for every thousand messages sent in addition to twelve cents per gigabyte of attachments.
If your application isn’t hosted on Amazon’s servers, the price is identical: ten cents for every thousand emails sent plus twelve cents for each gigabyte of attachments. The only difference is that you begin paying from the very first message. Hence, ten thousand emails without attachments would cost just one dollar. However, if each of those messages included a one megabyte attachment, you would add another one dollar and eighteen cents to the total.
What you will accomplish
In this tutorial, you will:
- Verify your email address
- Send an email using the Amazon SES console
- Verify your domain
Implementation:
Step 1: Verify your Email Address
In order to send an email using the Amazon Simple Email Service, it is needed to verify an email address denoting the sender. This verification can be done by submitting the email address or the entire email domain to Amazon SES. If you are a new user of the service, you should also verify the address of a recipient’s account, because your account still operates under a test environment of Amazon SES known as sandbox. The recipient address limitation can later be lifted, and you can later apply to be moved out of the sandbox.
In this tutorial, you will send an email to and from the same email address.
- Navigate to the Amazon SES console
- On the Amazon SES home page, choose Get started.

3. Enter your email address, and choose Next.
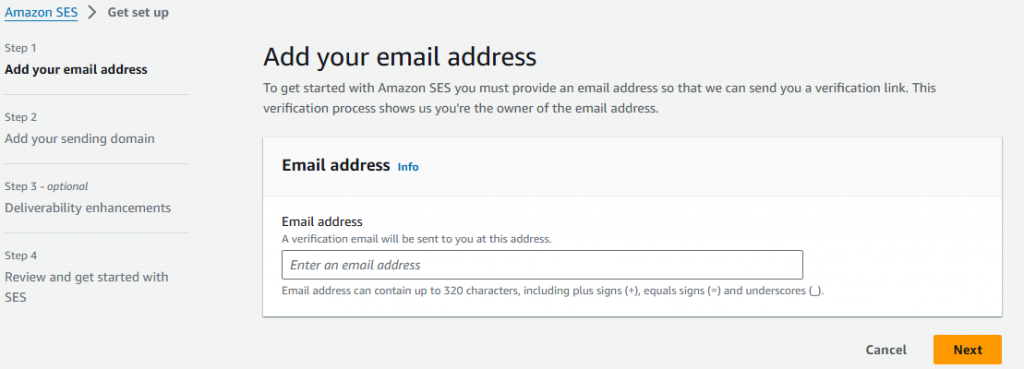
- Enter your sending domain, and choose Next.
- If your domain is www.example.com, enter example.com as your domain. Don’t include the “www.” part, because the domain verification process won’t succeed if you do.
Note: For your initial domain, it is recommended that you verify a valid domain that displays identifiable information about your organization to establish your reputation with AWS as a trusted email sender.
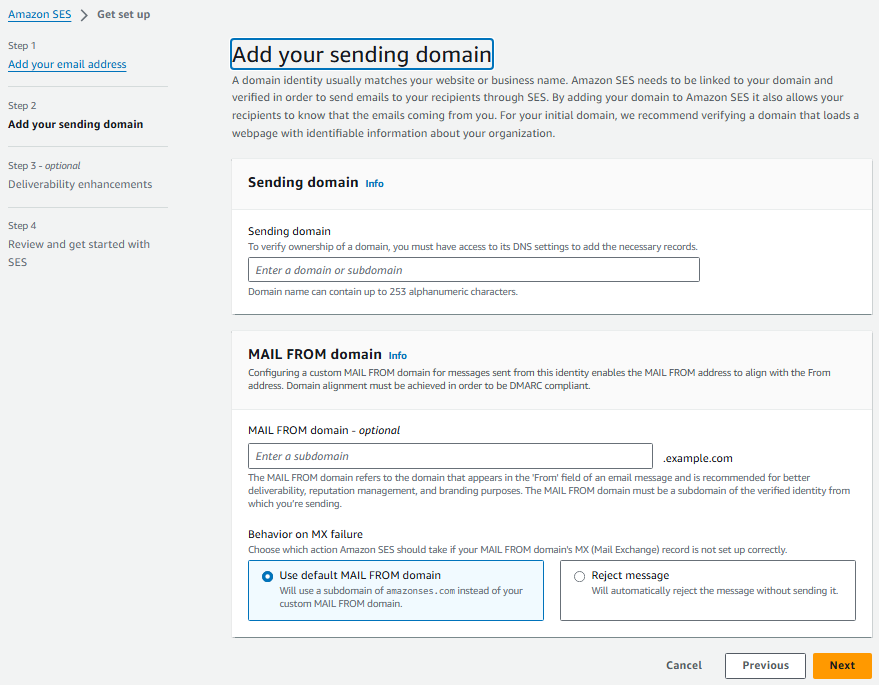
5. Leave default selections for Add MAIL FROM domain – optional, and choose Next.

6. Review your inputs, and choose Get started.
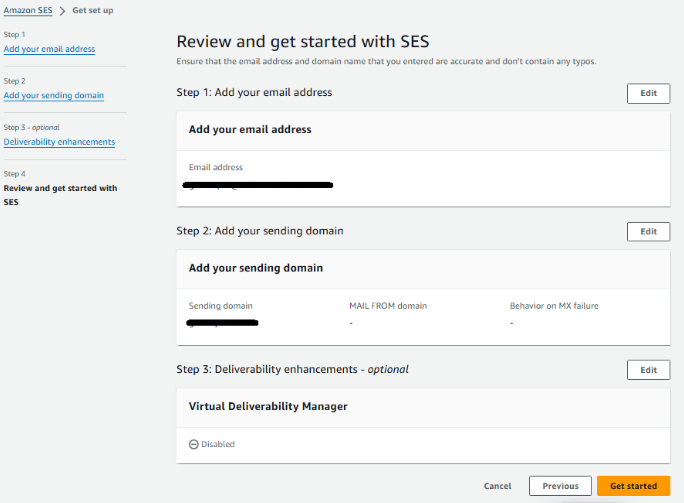
- Sign in to the email client you use to receive email for the email address you entered in the previous step.
- In your email client, open the message from Amazon Web Services asking you to confirm that you own the email address. Select the link in the message.
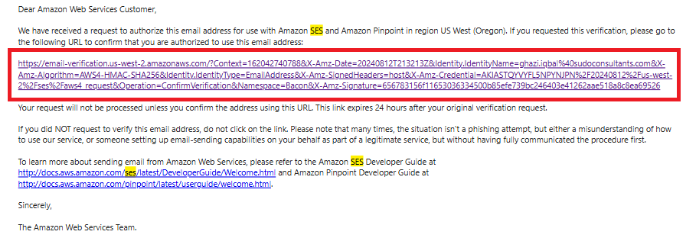
9. Navigate back to the Amazon SES console, and confirm that the status of the email address in the Amazon SES console is verified.

Step 2: Verify your domain
Before applying for production access, you must first verify your domain.
- On the Get set up page, in the Verify sending domain section, choose Get DNS records.

- From the Publish DNS records table, copy records that appear in this section to be published (added) to your DNS provider.
- Alternatively, you can choose Download .csv record set to save a copy of the records to your computer.
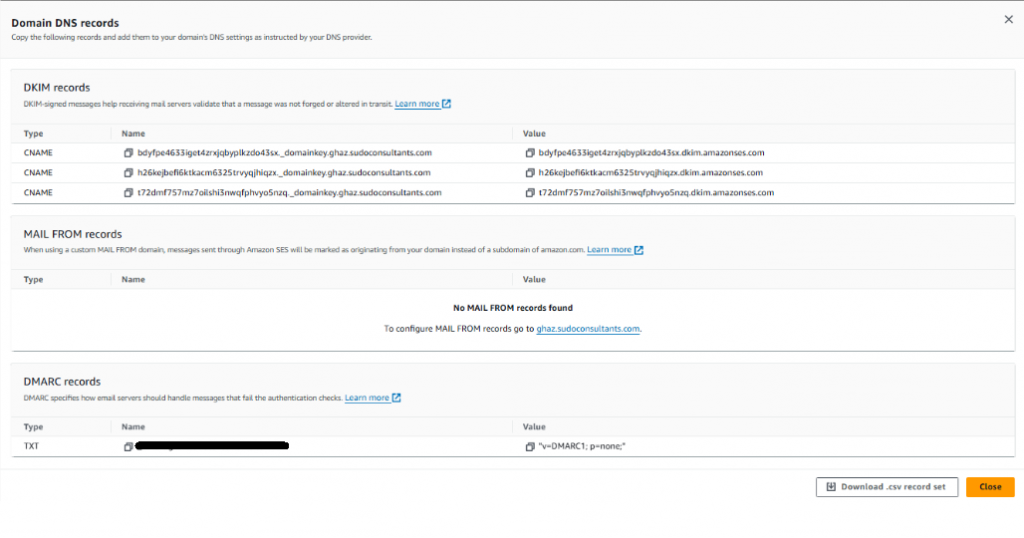
- Log into your domain’s DNS or web hosting provider, and then add the records containing the values that you copied or saved previously.
Note: Different providers have different procedures for updating DNS records. See the DNS/Hosting provider table following these procedures
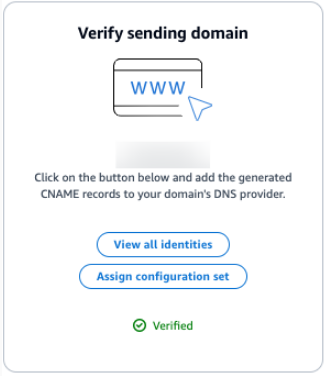
- Navigate back to the Amazon SES console, and refresh the set up page. Confirm that the status of the domain in the Amazon SES console is verified.
Step 3: Send an email
Amazon SES is a cloud-based email service offered by Amazon that facilitates both transactional and bulk emails. This service leverages Amazon’s powerful infrastructure in the cloud to provide a veritable suite of integration options including its SMTP interface, AWS SDKs designed to integrate effortlessly with applications, as well as support for email clients and other software.
Now that you have verified an email address and domain, you can send an email. With Amazon SES, you can send an email in three ways: using the console, using the Simple Mail Transfer Protocol (SMTP) interface, or using the API.
This tutorial shows how to use the simplest method, the console. After you get started with Amazon SES, you will want to send your emails using the SMTP interface or the API, because you can access those programmatically.
With Amazon SES, you can send formatted email or raw email. If you choose formatted email, Amazon SES formats the email for you. If you choose raw email, you must manually format the email, which gives you more control over the email headers and how the message displays. In this tutorial, we use raw format so that we can demonstrate how to send an email formatted in HTML.
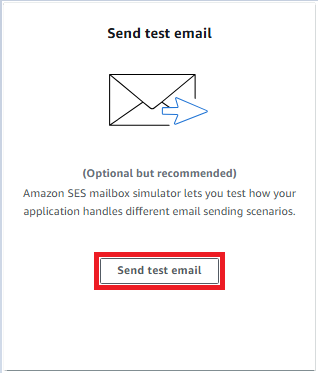
- Navigate back to the Get setup page, in the Send test email section, choose Send test email.
2. On the Send test email page, make the following changes:
- For Email format, choose Raw.
- For From-address, leave default input.
- For Scenario, choose Custom.
- For Custom recipients, enter the email address you previously verified.
- For Message, copy and paste the following message into the provided text box.
Subject: Amazon SES Test
MIME-Version: 1.0
Content-Type: text/html
<!DOCTYPE html>
<html>
<body>
<h1>You have successfully sent an email using Amazon SES!</h1> <p>For more information about Amazon SES, see the <a href="http://docs.aws.amazon.com/ses/latest/DeveloperGuide/Welcome.html">Amazon SES Developer Guide</a>.</p>
</body>
</html>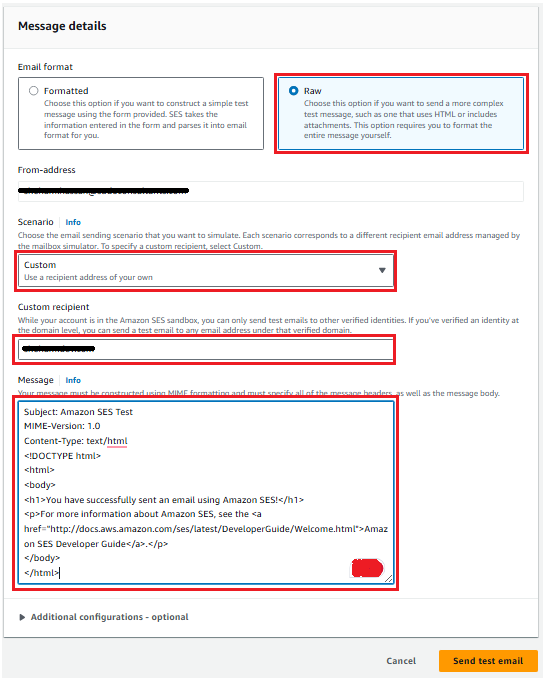
3. Then, choose Send test email.
4. Sign in to the email client of the address you sent the email to. You will find the message that you sent. If you cannot find it, check the spam folder.
Congratulations! You have verified an email address and sent an email using the Amazon SES console.


