
Before we dig deep into integrating AWS with Kubernetes, let’s differentiate both services. Amazon Web Services (AWS) is a widely-used cloud computing platform that provides a suite of on-demand computing services such as storage, compute power, and databases. It enables organizations to build, deploy, and scale applications without having to maintain physical infrastructure.
Kubernetes, on the other hand, is an open-source container orchestration platform that automates deploying, scaling, and operating application containers. Containers are a lightweight, portable, and efficient way to package and distribute applications, allowing developers to focus on writing code and not worry about underlying infrastructure.
Importance of container orchestration
Container orchestration plays a crucial role in modern application development and deployment. As the number of containers grows, managing them becomes increasingly complex. Orchestration platforms like Kubernetes help manage containerized applications by automating tasks such as:
- Scaling applications based on demand and resource usage
- Ensuring high availability and fault tolerance
- Rolling out updates and rollbacks with minimal downtime
- Balancing loads across multiple nodes and containers
- Managing container networking and storage
- Enforcing security and access control policies
These features make container orchestration essential for deploying and managing applications at scale, ensuring smooth operations and optimized resource utilization.
The objective of this article is to provide a comprehensive guide on integrating AWS with Kubernetes for container orchestration. This integration combines the flexibility and power of AWS infrastructure with the robustness and automation capabilities of Kubernetes, enabling organizations to deploy, scale, and manage containerized applications seamlessly. By following the steps outlined in this guide, users will be able to set up a Kubernetes cluster on AWS, configure necessary integrations, deploy applications, and ensure optimal performance and security.
Prerequisites
Before you dive in integration guide , it is essential that you must a basic understanding of both AWS and Kubernetes. Additionally ensure you have the following prerequisites :
- An AWS account with the necessary respective permissions for creating and managing resources.
- Installed and configured AWS CLI, kubectl , and eksctl to interact with AWS and Kubernetes.
- A Kubernetes cluster running on AWS. You can use a service like Amazon Elastic Kubernetes Service (Amazon EKS) or a self-managed Kubernetes on EC2 instances.
Set up AWS CLI:
- First you have to Install AWS CLI on your OS by following the instructions given below for your operating system.
- Check out the official installation guide here.
- Once it’s done, open the terminal or command prompt and run the command “aws configure”.
- Then Enter your AWS Access Key ID and Secret Access Key when prompted. These credentials can be obtained from the AWS Management Console in “My Security Credentials”.
- People go with default output format (e.g., json) and default region (e.g., us-east-1) when prompted.
Set up kubectl:
To Install kubectl on your local machine by follow the installation guide as per your operating system.
- Check the official guidelines here for kubectl installation.
- After completing the installation process , open terminal and run the command “kubectl –version” to verify the installation process and check the client and server versions.
Set up eksctl:
Install eksctl on your local machine by following the installation guide appropriate for your operating system.
- You can find the official guide for installation here .
- After installation, open the terminal and run the command “eksctl –version” to verify the installation and check the version.
Create an Amazon EKS Cluster (if using Amazon EKS):
- Open a terminal or command prompt and run the following eksctl command to create an EKS cluster:
eksctl create cluster --name my-cluster --version 1.21 --region us-east-1 --nodegroup-name standard-workers --node-type t3.medium --nodes 3 --nodes-min 1 --nodes-max 4 --managed
- Verification of Cluster installation can be done as follows :
- After creating the cluster run following command to configure kubectl to use new cluster:
aws eks --region us-east-1 update-kubeconfig --name my-cluster
To verify the cluster, run the command “kubectl get nodes” to ensure that the cluster nodes are in the “Ready” state.
Congratulations! You have completed the prerequisites AWS with Kubernetes. You have an AWS account with configured permissions, a Kubernetes cluster running on AWS (if using Amazon EKS), and AWS CLI, kubectl, and eksctl installed and configured on your local machine.
Self-managed Kubernetes on EC2 instances:
For setting up a self-managed Kubernetes cluster on EC2 instances, you need EC2 instances, install Kubernetes components, and configure them to form a cluster. Here’s a step-by-step procedure given below:
For provision of EC2 follow the given steps :
- Open the AWS Management Console and navigate to EC2.
- Launch EC2 instances with the desired configuration. Make sure that you choose instances that meet the Kubernetes system requirements, such as CPU, memory, and network resources. Choose instances running a Linux-based operating system, such as Amazon Linux, Ubuntu, or CentOS.
To install docker , follow the given steps :
- Connect to each EC2 instance using SSH.
- Install Docker on each instance by running the appropriate commands for your Linux distribution. For example, on Ubuntu, you can use the following command:
sudo apt-get update
sudo apt-get install -y docker.io
Start and enable the Docker service:
sudo systemctl start docker
sudo systemctl enable docker
Install Kubernetes Components:
- Add the Kubernetes repository and install the necessary packages by running the following commands on each EC2 instance:
curl -s https://packages.cloud.google.com/apt/doc/apt-key.gpg | sudo apt-key add -
sudo apt-add-repository "deb http://apt.kubernetes.io/ kubernetes-xenial main"
sudo apt-get update
sudo apt-get install -y kubelet kubeadm kubectl
- Initialize the cluster on one of the EC2 instances by running the following command:
sudo kubeadm init --pod-network-cidr=10.244.0.0/16
- Once the initialization is complete, follow the instructions displayed on the console to copy the
kubeadm joincommand, which will be used to join the other nodes to the cluster. - Configure Networking:
- Install a container network interface (CNI) plugin to enable pod-to-pod networking within the cluster. For example, you can use Calico, Flannel, or Weave.
- Follow the documentation of the chosen CNI plugin to install and configure it on the EC2 instances.
- Join Worker Nodes:
- On each worker node EC2 instance, run the
kubeadm joincommand that you copied during the cluster initialization step.
- On each worker node EC2 instance, run the
- Verify the Cluster:
- Return to the EC2 instance where you ran
kubeadm initand run the following command to set upkubectlconfiguration:
- Return to the EC2 instance where you ran
mkdir -p $HOME/.kube
sudo cp -i /etc/kubernetes/admin.conf $HOME/.kube/config
sudo chown $(id -u):$(id -g) $HOME/.kube/config
- Run the command
kubectl get nodesto verify that all nodes in the cluster are in the “Ready” state.
Congratulations! You have set up a self-managed Kubernetes cluster on EC2 instances. You can now use kubectl commands to deploy and manage applications on the cluster. Remember to secure your cluster, configure storage, and consider other advanced configurations based on your requirements.
Setting up AWS infrastructure
Setting up the AWS infrastructure for integrating AWS with Kubernetes involves creating a VPC, configuring subnets and security groups, and establishing IAM roles and policies. Here’s a step-by-step procedure:
Create a Virtual Private Cloud (VPC):
- Go to the AWS Management Console and navigate to the VPC service.
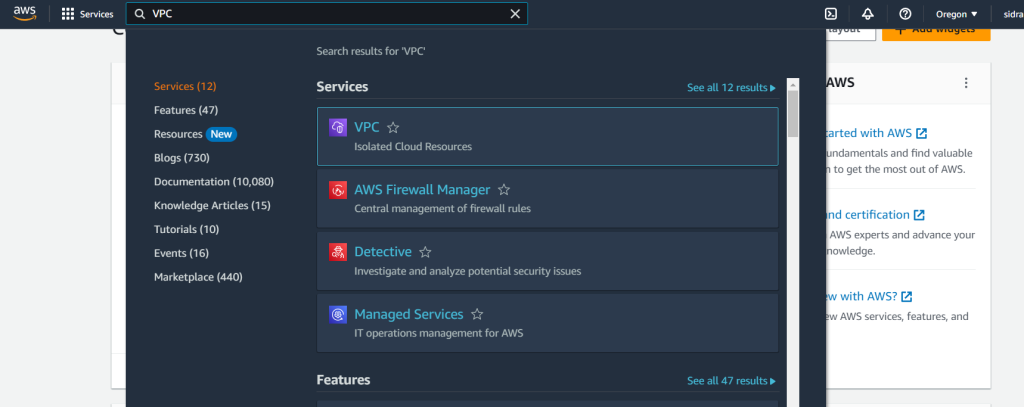
- Click on “Create VPC” and provide a name and CIDR block for your VPC.

- Configure any additional settings based on your requirements, such as DNS resolution, DNS hostnames, and IPv6 support.
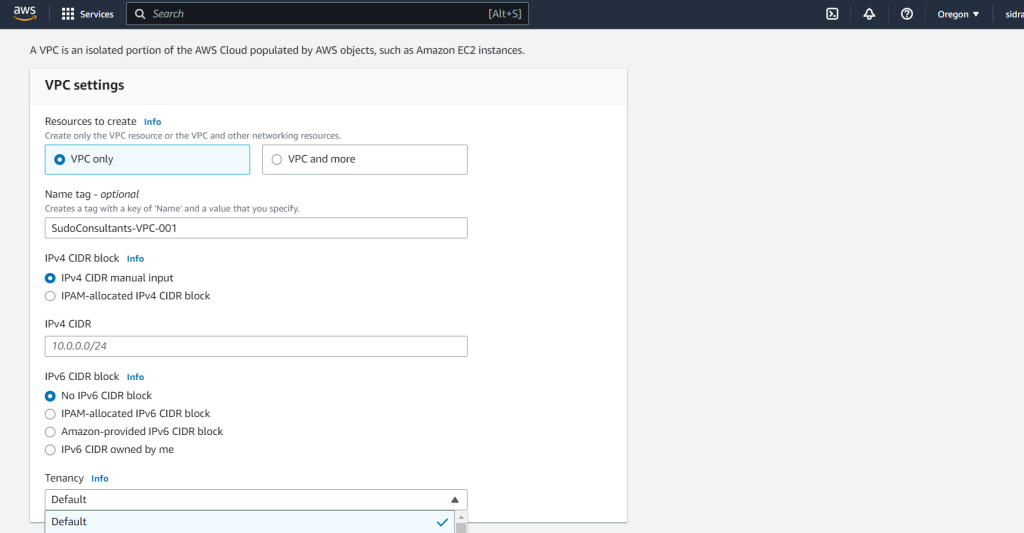
- Click on “Create” to create the VPC.
Configure Subnets:
- Inside the created VPC, navigate to the “Subnets” section.

- Click on “Create subnet” to create the necessary subnets for your Kubernetes cluster.
- Provide a name, choose the VPC you created in the previous step, and specify a CIDR block for the subnet.
- Repeat the subnet creation process to create additional subnets if required, ensuring that they are spread across different availability zones for high availability.
Configure Security Groups:
- In the VPC section, navigate to the “Security Groups” section.

- Click on “Create security group” to create a security group tailored for your Kubernetes cluster.
- Provide a name, select the VPC you created earlier, and define inbound and outbound rules based on the network requirements of your cluster. Ensure that necessary ports for Kubernetes components and communication are open.
Establish IAM Roles and Policies:
- Go to the IAM service in the AWS Management Console.
- Create an IAM role specifically for Kubernetes by clicking on “Roles” and then “Create role”.
- Choose the service that will use this role (in this case, select EC2) and attach the necessary policies related to Kubernetes resource management and communication. For example, you can attach the AmazonEKSClusterPolicy and AmazonEKSServicePolicy.
- Complete the role creation process by providing a name and reviewing the settings.
- Additionally, if you plan to integrate other AWS services with Kubernetes, create the required IAM roles and policies specific to those services, granting the necessary permissions for integration.
Once you have completed these steps, you will have the AWS infrastructure set up for integrating AWS with Kubernetes. Your VPC, subnets, and security groups will provide network isolation and controlled access for your Kubernetes cluster. The IAM roles and policies will grant the necessary permissions for resource management and communication within the cluster.
Deploying Kubernetes cluster on AWS
Next step is to deploy a Kubernetes cluster on AWS using eksctl so, here is the simplified process of provisioning and managing the cluster:
- Utilize the previously installed eksctl to create a Kubernetes cluster, specifying desired configurations such as instance types, availability zones, and scaling options.
- Verify the successful creation of the cluster by checking its status and confirming the availability of worker nodes.
Configuring kubectl for cluster access
Now to interact with the newly created Kubernetes cluster firstly configure kubectl as follows:
- Set up a kubectl context for the newly created cluster, allowing you to switch between multiple clusters effortlessly.
- Verify kubectl access to the cluster by retrieving cluster information and checking the communication status.
Integrating AWS services with Kubernetes:
AWS offers a lot of services that can be integrated with Kubernetes. This section explores two key integrations: configuring the AWS Load Balancer Controller and integrating Amazon RDS (Relational Database Service) with Kubernetes.
Configuring AWS Load Balancer Controller
AWS Load Balancer Controller simplifies the management of load balancers in Kubernetes. Follow these steps to configure it:
- Install the AWS Load Balancer Controller using the provided Helm chart or Kubernetes manifests.
- Set up the necessary IAM roles and policies to allow the controller to interact with AWS services securely.
- Configure and then test the controller ,which you have done by creating and managing load balancers within your Kubernetes cluster, leveraging AWS features like Elastic Load Balancing and Application Load Balancer.
Integrate Amazon RDS with Kubernetes
Amazon RDS offers managed database services that can be seamlessly integrated with Kubernetes. To integrate Amazon RDS, follow these steps:
- Create an RDS instance with the desired database engine, storage, and configuration settings. Here’s the official guide .
- Configure Kubernetes to access the RDS instance by creating Kubernetes secrets or leveraging tools like Kubernetes External Secrets.
- Deploy and test an application that utilizes the RDS instance for data storage, ensuring the connectivity and functionality of the integrated setup.
Conclusion
In conclusion this article has provided you a comprehensive overview of integrating AWS with Kubernetes for container orchestration. By following the outlined procedures, readers, even those new to the subject, can successfully set up the necessary prerequisites, including the AWS infrastructure and Kubernetes cluster. Furthermore, the guide covers the configuration of AWS Load Balancer Controller, integrating Amazon RDS, and securing the Kubernetes cluster. With these steps, users can deploy applications, configure logging and monitoring, and maintain their Kubernetes cluster effectively. By integrating the power of AWS and Kubernetes together the organizations can benefit from scalable and efficient container orchestration in the cloud.
A Software Engineer by profession and a Writer by passion