
In this article you will learn how to setup Amazon Web Services (AWS) Web Application Firewall (WAF) to protect your business data from web scrapers and other malicious traffic. Our step-by-step guide covers the creation of AWS WAF instance, adding security rules and rule groups, and configuring metrics to monitor performance and identify potential threats.
So what actually is web scrapping ?
Web scraping, also known as web harvesting or web data extraction, is the process of extracting data from websites. While this practice can be useful for collecting public information, it can also pose a significant threat to businesses by exposing sensitive information and potentially impacting website performance. To protect your business data from web scrapers, you can use Amazon Web Services (AWS) Web Application Firewall (WAF) and Shield. AWS WAF provides security rules that can be configured to block malicious traffic, such as web scrapers, and protect your data. This step-by-step guide will show you how to set up and configure AWS WAF to protect your business data from web scrapers.
Need Our Help ?
Say goodbye to security headaches and experience peace of mind with our professional AWS WAF setup services , guaranteeing the security of your data and reputation .
For a comprehensive understanding of the process following are the steps you need to follow in order to successfully setup AWS WAF :
Step 1 : Create an AWS WAF instance
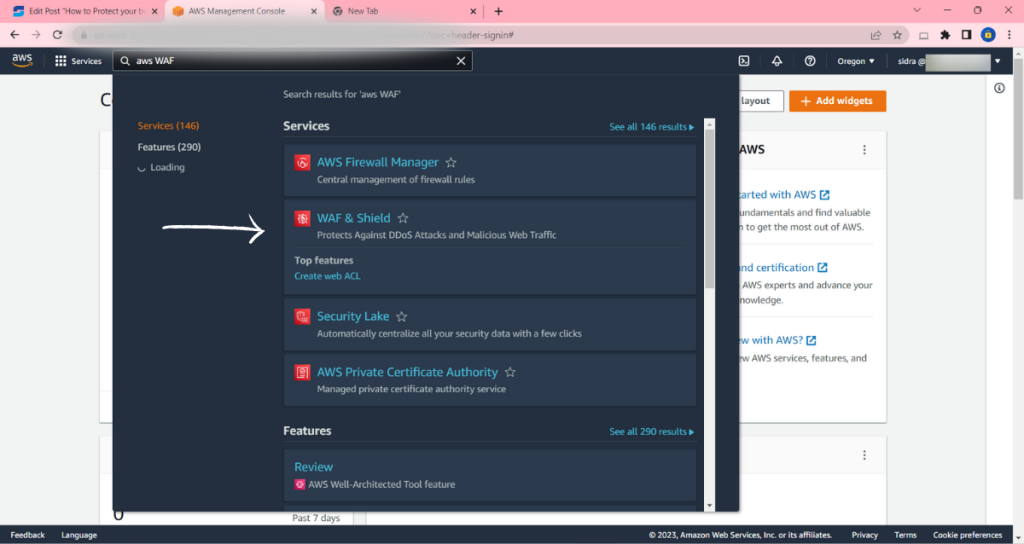
Go to the AWS Management Console, choose AWS WAF & Shield, and create a new AWS WAF instance.
Here are the steps to create an AWS WAF instance:
- Open the AWS Management Console.
- Go to the AWS WAF & Shield service.
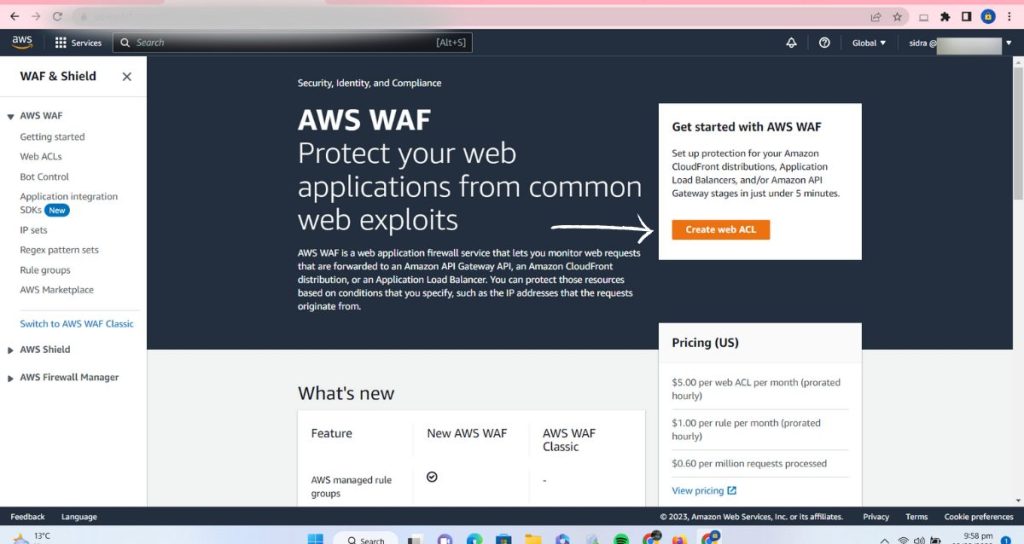
Step 2: Define a web ACL
In the AWS WAF console, create a web access control list (web ACL) to specify the security rules you want to enforce. Click on “Create web ACL” button.
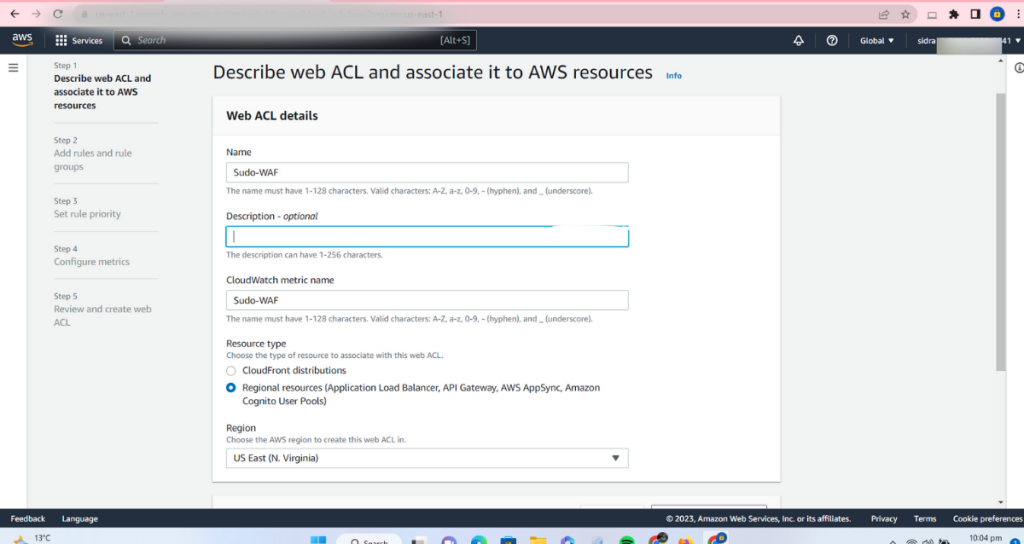
Enter a name for your WAF instance and select the region you want to use.
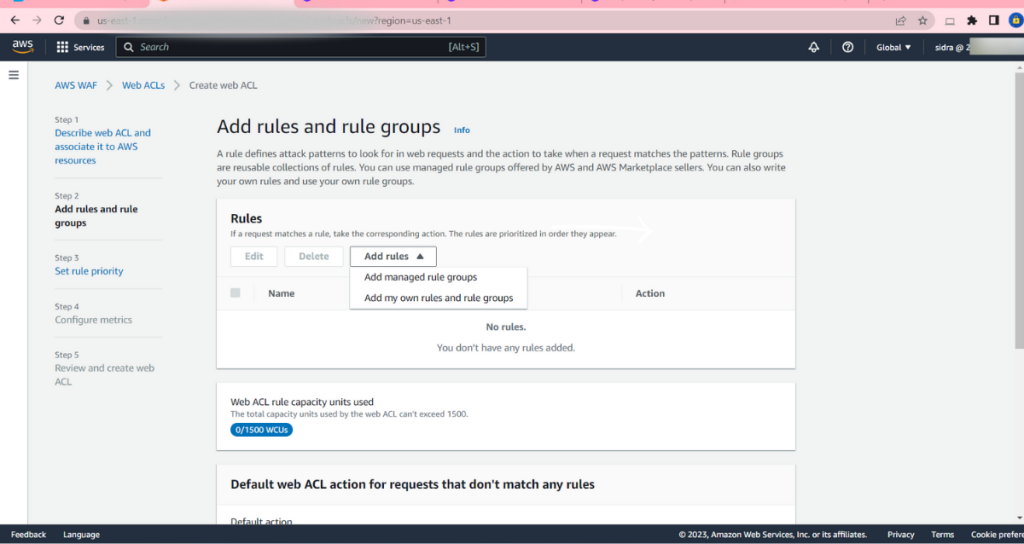
Step 3 : Create rules
Create individual rules that correspond to specific security scenarios. For example, you can create a rule to block requests from known scrapers or to allow only specific IP addresses.
On the “Rules” tab, click on the “Add rule” button.
In AWS WAF, there are two types of rules that can be created in a web ACL:
- Predefined Rules: These rules are pre-built and based on common web attack patterns, such as SQL injection attacks, cross-site scripting (XSS) attacks, and other types of malicious traffic. Predefined rules are designed to block these attacks and protect your data.
- Custom Rules: These rules allow you to create your own security rules based on specific conditions, such as IP address, request headers, or specific URLs. Custom rules are useful for addressing specific security concerns that are unique to your organization, such as blocking requests from specific countries or IP addresses.
You can study more about rules from AWS official site’s link.
In AWS WAF, you can also create rule groups, which are collections of rules that are executed together. Rule groups are useful for organizing your security rules and making it easier to manage and maintain your security rules over time.
- Choose the type of rule you want to create: either a “Predefined rule” or a “Custom rule”. If you selected a “Predefined rule”, choose the appropriate rule from the list of available rules. If you selected a “Custom rule”, enter the conditions and action for the rule. Repeat steps 5-8 to add additional rules as needed.
- To create a rule group, click on the “Add rule group” button.
- Enter a name for your rule group and select the appropriate rules to include in the group.
- Repeat steps 10-11 to add additional rule groups as needed.
- When you have finished adding rules and rule groups, click on the “Next ” button.
Next you can set the priority of the rules as per your own customization requirements.
Step 4 : Associate the web ACL with a CloudFront distribution
If you use Amazon CloudFront as a content delivery network (CDN) for your website, you can associate the web ACL with a CloudFront distribution to enforce security rules at the edge. Similarly , configure the metrics (CloudWatch) if there’s any. Configuring metrics in AWS WAF is important because it helps you monitor the performance of your security rules and identify any potential threats to your data. Metrics provide a way to track important information, such as the number of blocked requests, the number of requests that have triggered a rule, and the number of requests that have been allowed. This information can be used to adjust your security rules and ensure that they are working as intended. Regularly monitor the performance of your security rules and update them as necessary to keep up with new threats. Enable logging for your AWS WAF instance and configure alerts to notify you of security incidents. This helps you quickly identify and respond to potential threats.
By configuring metrics in AWS WAF, you can:
- Monitor the performance of your security rules in real-time.
- Quickly identify any potential security incidents or threats.
- Determine the effectiveness of your security rules and make changes as needed.
- Detect and respond to changes in traffic patterns, such as increased traffic from a specific source.
Finally, Click on the “Create” button to create the AWS WAF instance.

Conclusion
In conclusion investing in a secure and reliable AWS WAF setup is essential for businesses that want to protect their online assets and maintain a strong reputation. By taking the necessary precautions, businesses can safeguard their data and secure their online presence for years to come.
By following the steps outlined in this guide, businesses can create an AWS WAF instance, add security rules and rule groups, and configure metrics to monitor the performance of their security rules. With the help of a professional setup service provider, businesses can streamline the setup process and ensure that their AWS WAF instance is configured correctly.
A Software Engineer by profession and a Writer by passion